DIY Family Portraits
I'm a little late posting this because our moms were getting our new family pics for Mother's Day so I didn't wanna spill the beans!!!
I really like to have a family picture taken every few years, whether my kids like it or not! Especially in this day and age where everything is digital and 99% of our pics are on our phones. I also like to do them inexpensive, yet still have them look somewhat professional.
Over the years we have had a few done at the good old Sears Portrait Studio! In fact most of the kids professional baby pics were taken there once a year until they started school. Funny when you think back on it now but I bet lots of you remember doing the exact same thing, am I right?
In case you too are looking to get an inexpensive family picture taken I thought I would share ours and tell you how we went about doing it, right down to having it framed. I guess we are ahead of the game in a sense because my youngest son does have a decent camera and photography is his hobby, but he's 17 so portrait and people are not the chosen objects he likes to shoot but he humoured me.
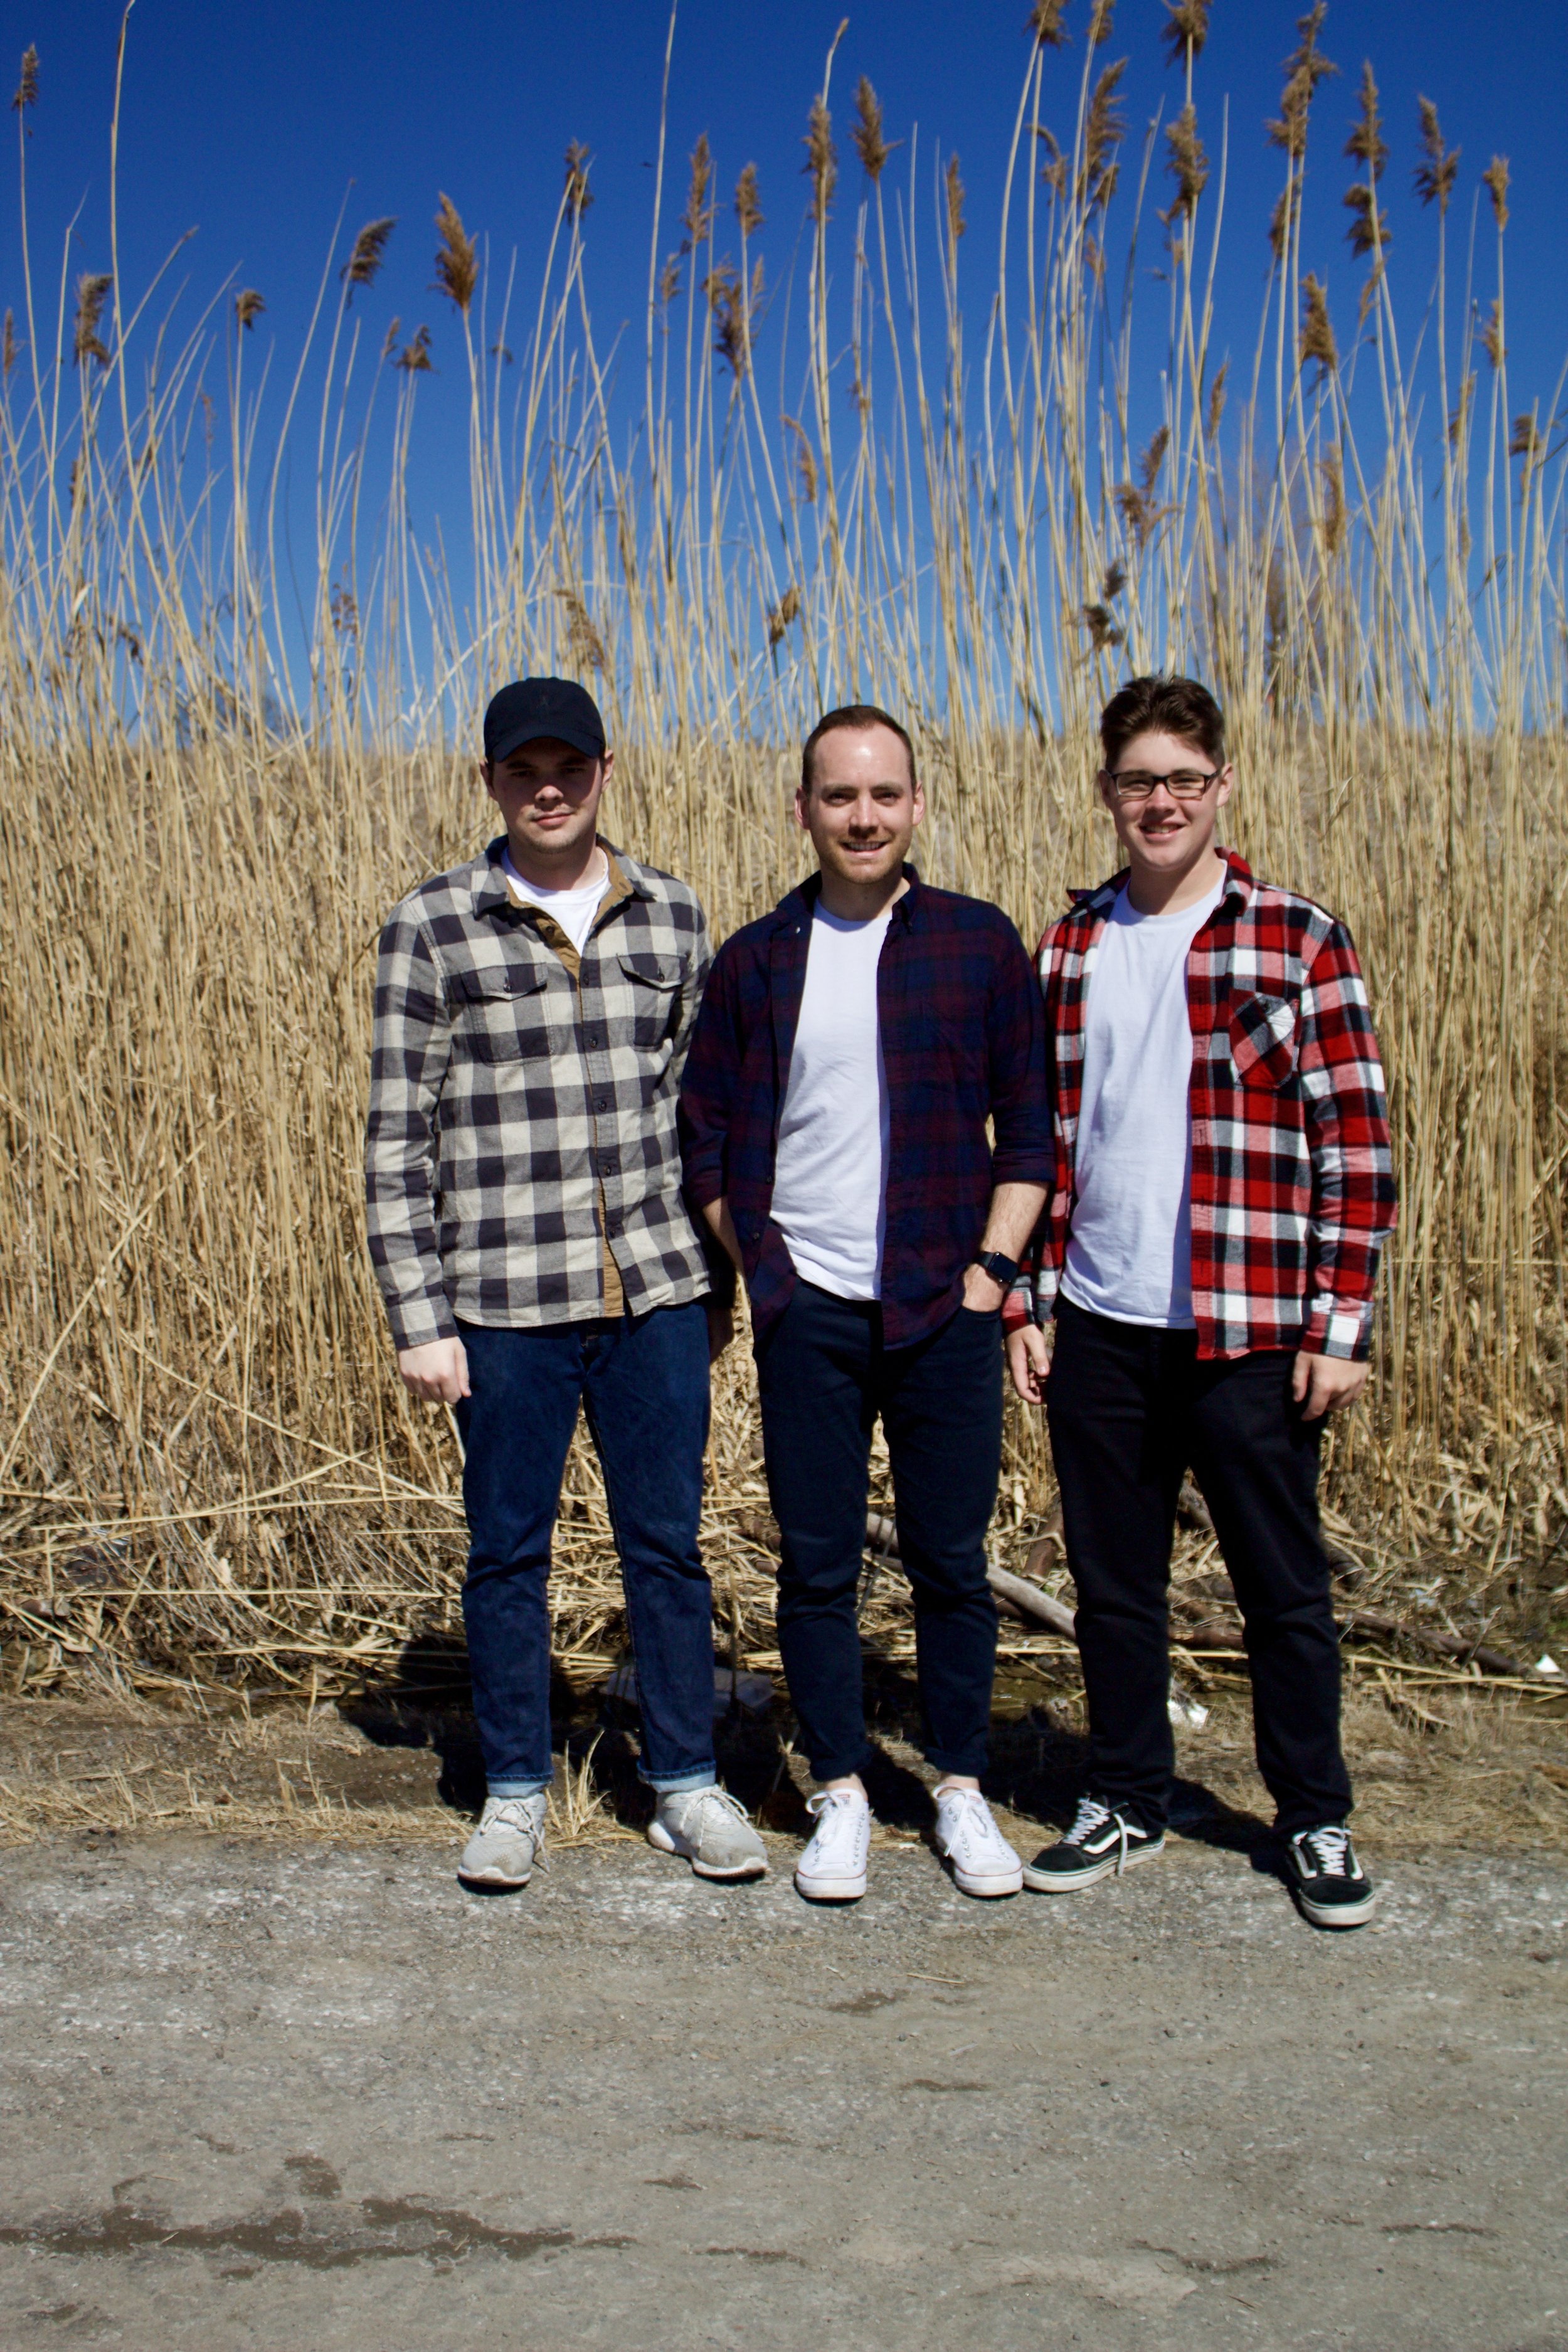
The day we decided to do the picture was (thankfully) a beautiful sunny day back in April and there literally was not a cloud in the sky. I told all the guys to show in some kind of jeans and plaid shirt, any colour, just keep it casual. We headed down a dead end street around the corner from our house that ends at a pond/farmers field area to look for a spot. (It's funny how everyone showed up in their plaid shirts from Roots Canada, wonder if they're looking for models?)
Thomas, our youngest, got his camera set up on his tripod and did all the other fiddly things required and we took some test shots. Connor, our oldest, of course had to wear a baseball hat but whatever i've learned to pick my battles. Connor is the drama queen of the family and swore he was going to go blind from keeping his eyes open while smiling into the sun for the 10 seconds it took for the timer to count down and snap the pics. My husband learned he could become a ventriloquist while telling them all to shut-up and smile while still smiling himself! I may or may not have used a couple of curse words. (we should have been videotaping the entire process) There were lots of laughs and lots of outtakes until enough was enough. Thomas felt we had enough shots from which to pick some good ones.
Back home we went, once Thomas uploaded the shots on this computer we picked the three we loved the most and I went about ordering enlargements online. My go to for having photos printed is Costco Photo Lab, not only are their prices unbeatable, the quality is amazing. They do large poster size enlargements which is what I was looking to get for our copy of our family picture. The biggest one I ordered was 24x36 and it cost $16.13 and your 8x10's are less than $2, you get the idea.
Here are the three we chose:


After I picked up our enlargements I headed out to buy frames at Michael's (with my 40% off coupon of course) and found frames for our moms to go with their Mother's Day gifts and for our own enlargement, I went with a poster frame. They are lighter weight and Michael's carry some good quality ones. We hang ours in a stairwell so I never want to worry about it somehow falling down, glass breaking and cutting someones head off because how would I ever get blood out of my stair runner? LOL I also like to have an enlargement in black and white for this wall. It's not easy to capture how perfect it looks here either, this is the best shot I could get. You'll have to come over to my house to see how perfect it is in this space.

I also printed some 4x6, 5x7 and an 8x10 in colour and will do a collage in the family room and have a couple to take up north.
So there you have it, to have our family portrait done and enlarged to a 24x36 and framed, it cost me a total of $45. Now that's what I call a thrifty project! And remember, you don't need a top of the line camera, just make sure you have great lighting, if you don't have a timer on your camera, ask a neighbour to push the button for you. Take a TON of shots so you are sure to at least end up with one you will love. And we all know and love the weekly Michael's coupons for frames right? And if you don't want quite that big of an enlargement there are various sizes and you can also find expensive frames at Ikea which is what I will be using for our smaller prints.
With our kids getting older, my stepson lives and works in the city, he has a busy job and is always travelling, Connor, my oldest, is living and working away from home and his schedule is always all over the place and our youngest graduating from high school in a few weeks, it's getting harder and harder to get everyone together to capture a photo like this. My boys laugh, but will always go along with it because they know it's important to me. The generally call me the paparazzi, it's a love/hate relationship depending on the photo I snap.
These family pictures tell our story. Every single one I look back on, I can remember the day it was taken, who took it, the time of year and I can always say "remember when we had this picture taken and......" And we do all remember, and we laugh and reminisce. One day these pictures will be so precious so it's a tradition that I plan on continuing and I bet my boys do as well even though they wouldn't admit it now.
Do you do family pictures? If not, I hope this inspires you to plan your own DIY family portrait project. Leave me a comment below and let me know how it goes!
Michele xo