How to Make an Entrance
Two weeks before Christmas 2019 we moved into our current home which was a new build inventory home. We got lucky in the sense that there were some upgrades (kitchen and flooring) but otherwise the house was essentially a very boring blank slate filled with boob lights!
Whether you’ve been here for awhile or are new, a quick scroll through my website or Instagram will show you we haven’t wasted a moment adding some colour and design to our home, making it our own, one room at a time. We’ve conquered two bathrooms, two bedrooms, a laundry room, a kitchen and now most recently, our entryway, all in 11 months. Oh, and we are currently finishing the basement, over achievers? Maybe, either that or we just like to DIY!

Today i’m sharing all the dirt on the entryway makeover from start to finish, from paint to wallpaper to bead board, lighting and decor. I’m laying it all out for you and sharing links for everything.
Let’s start with the boring before, the only thing not captured here is the boob light, but trust me, it’s there!
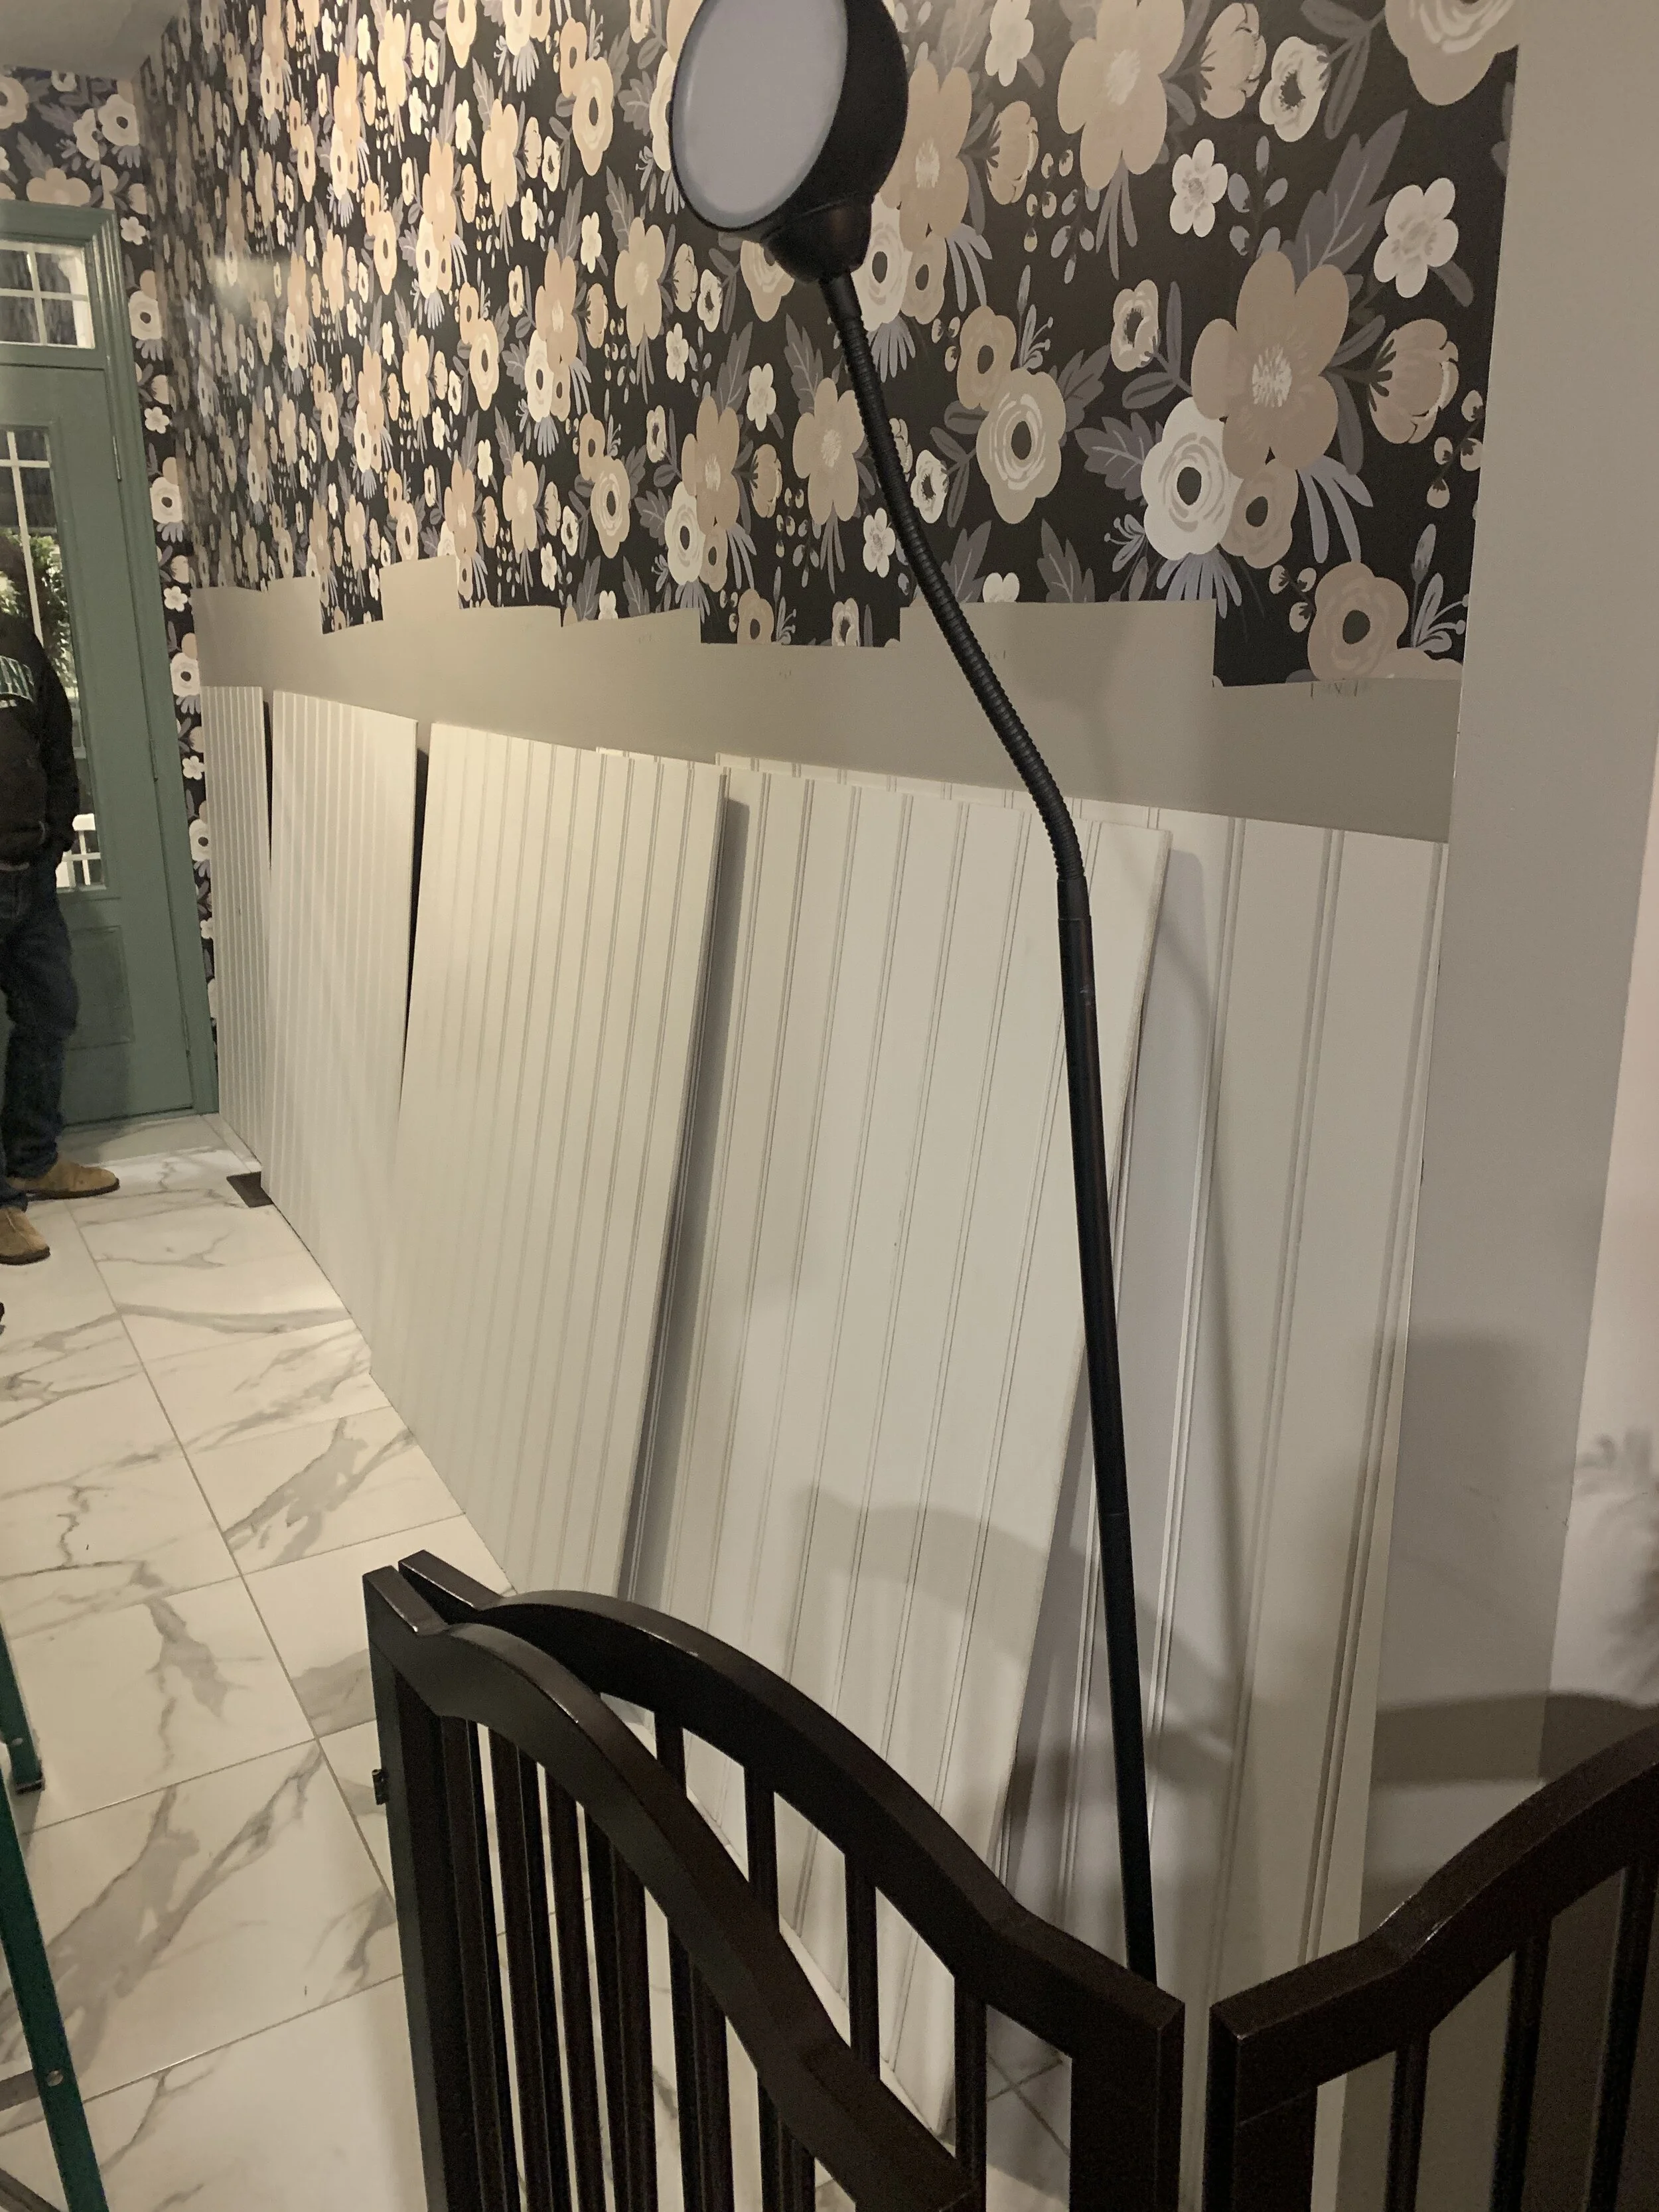
My plan for this entryway was to install bead board on the bottom half of the wall so before the project got started we headed to our local Home Depot to purchase four sheets of bead board. They come in eight foot lengths and are four feet wide. We had Home Depot cut each of them in half which made life much easier for us when it came time to install it. And the best part - totally affordable at $38 a sheet!
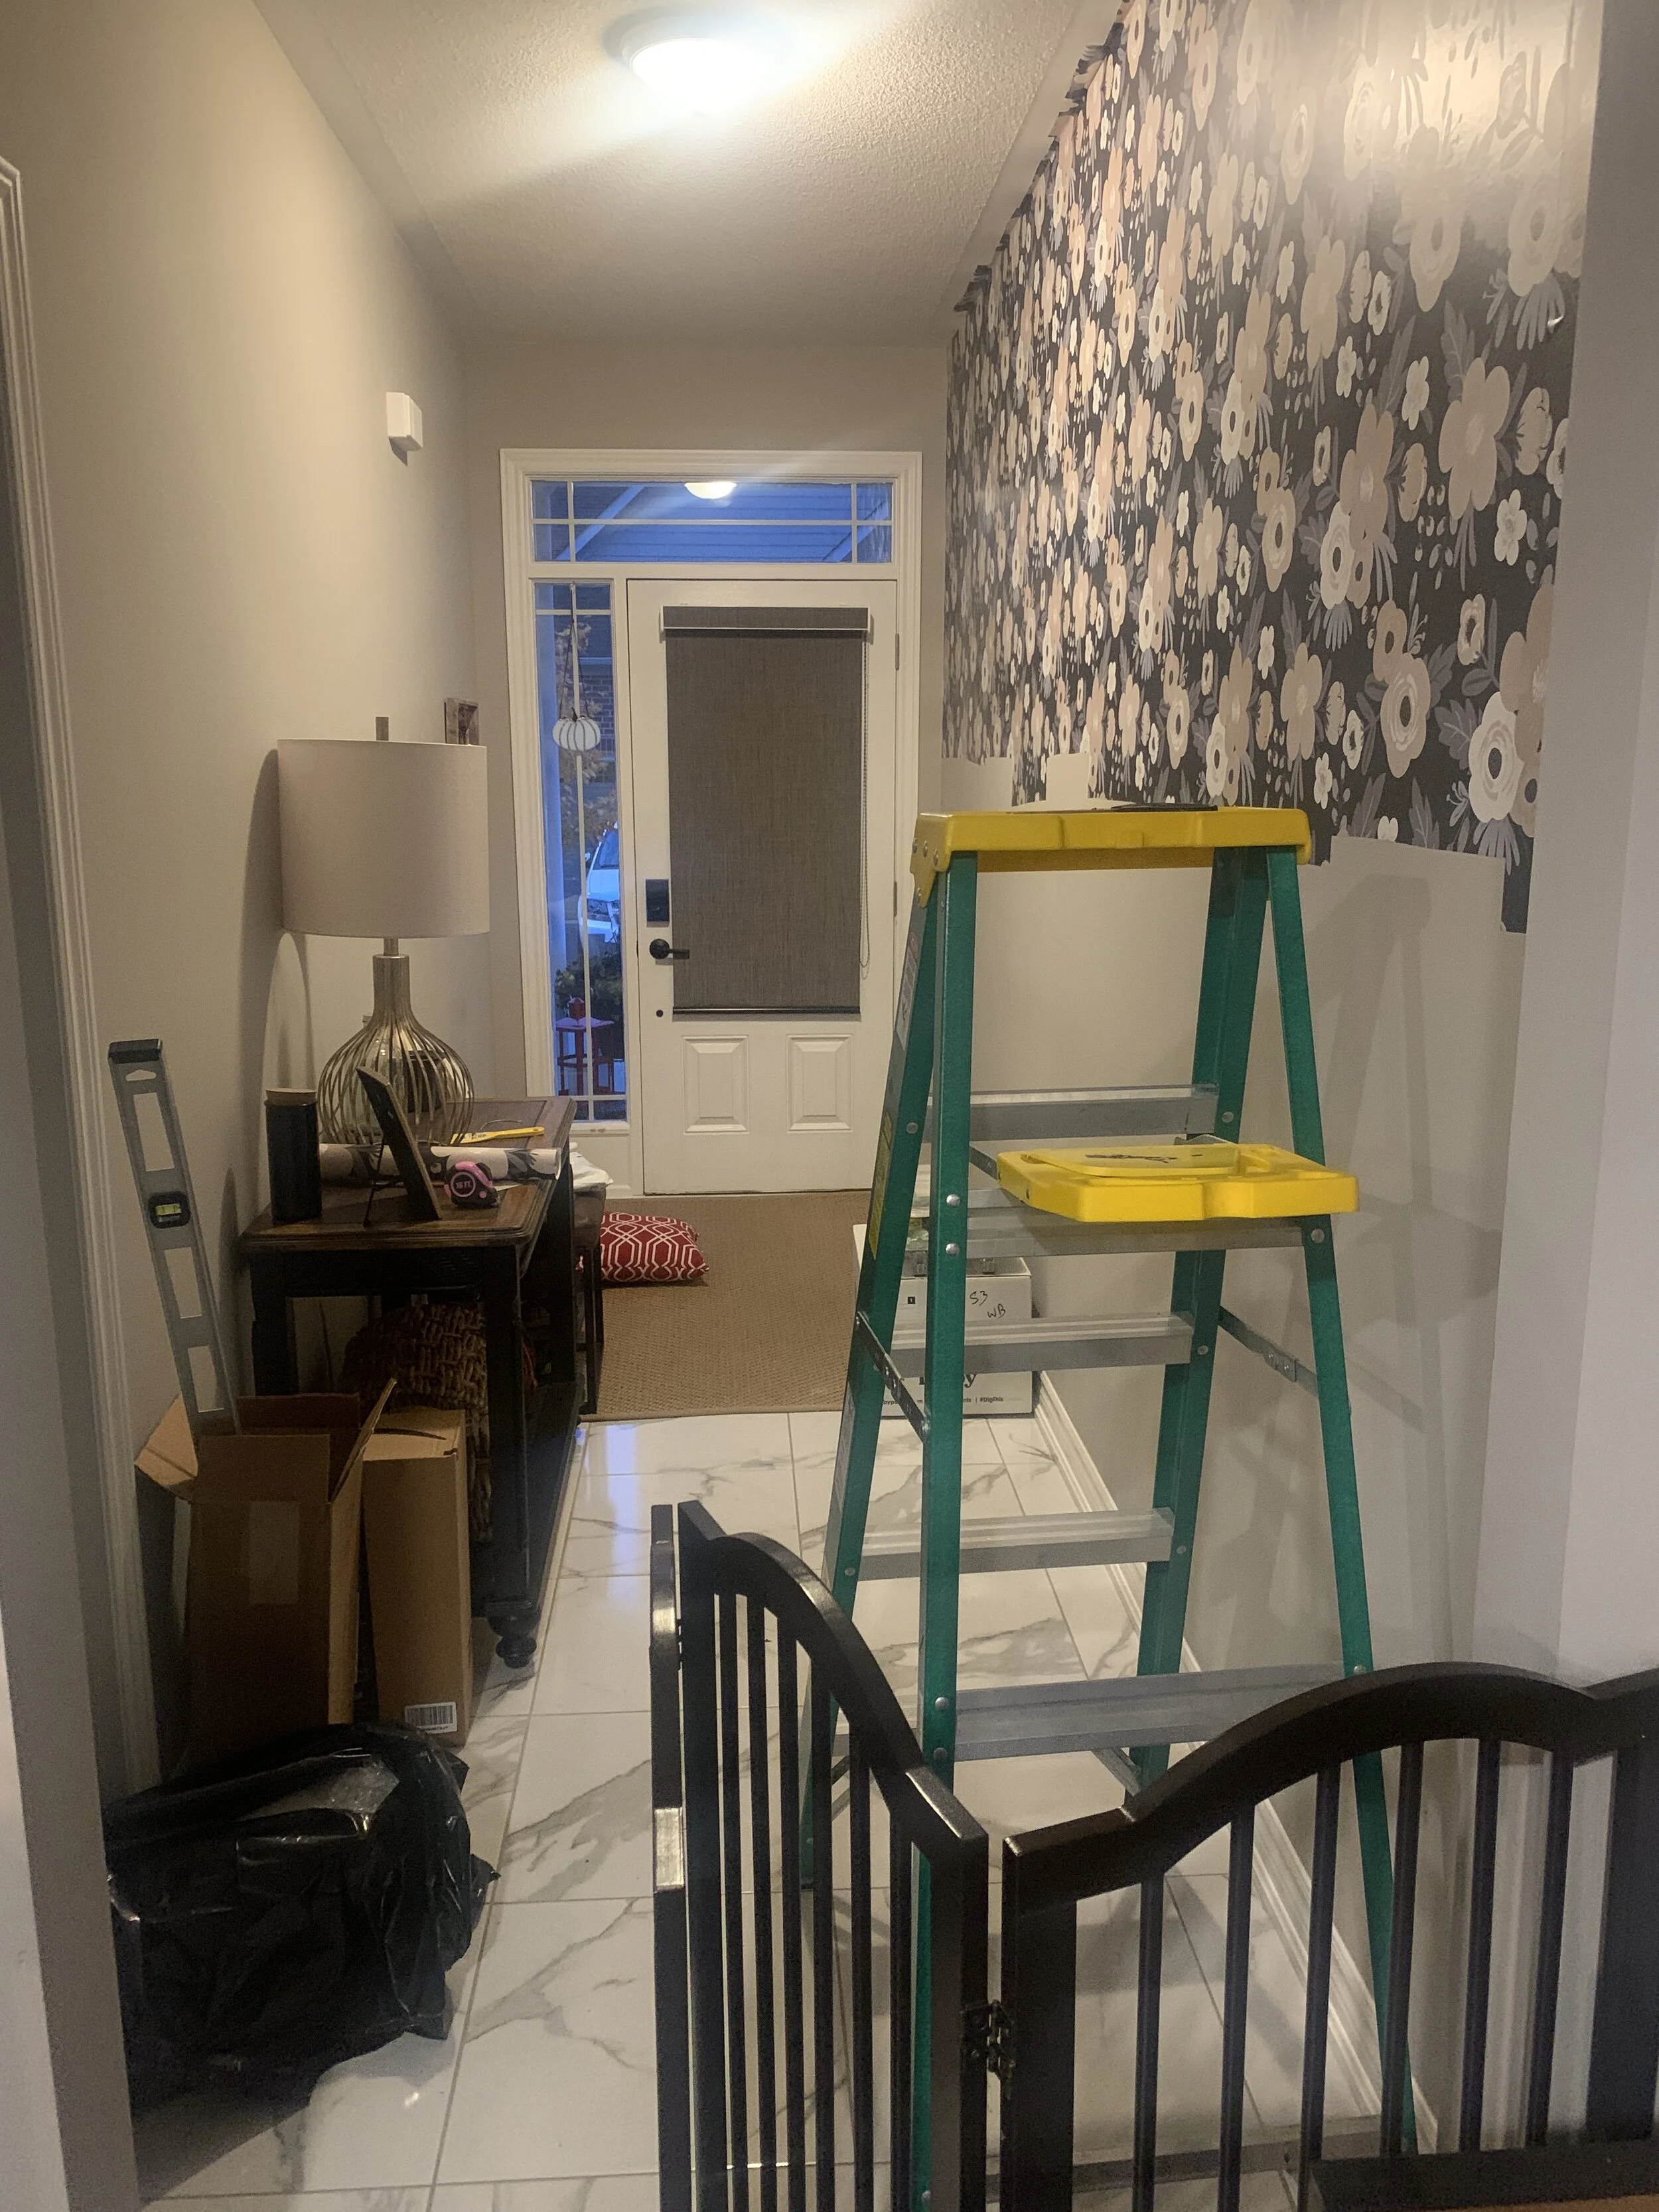
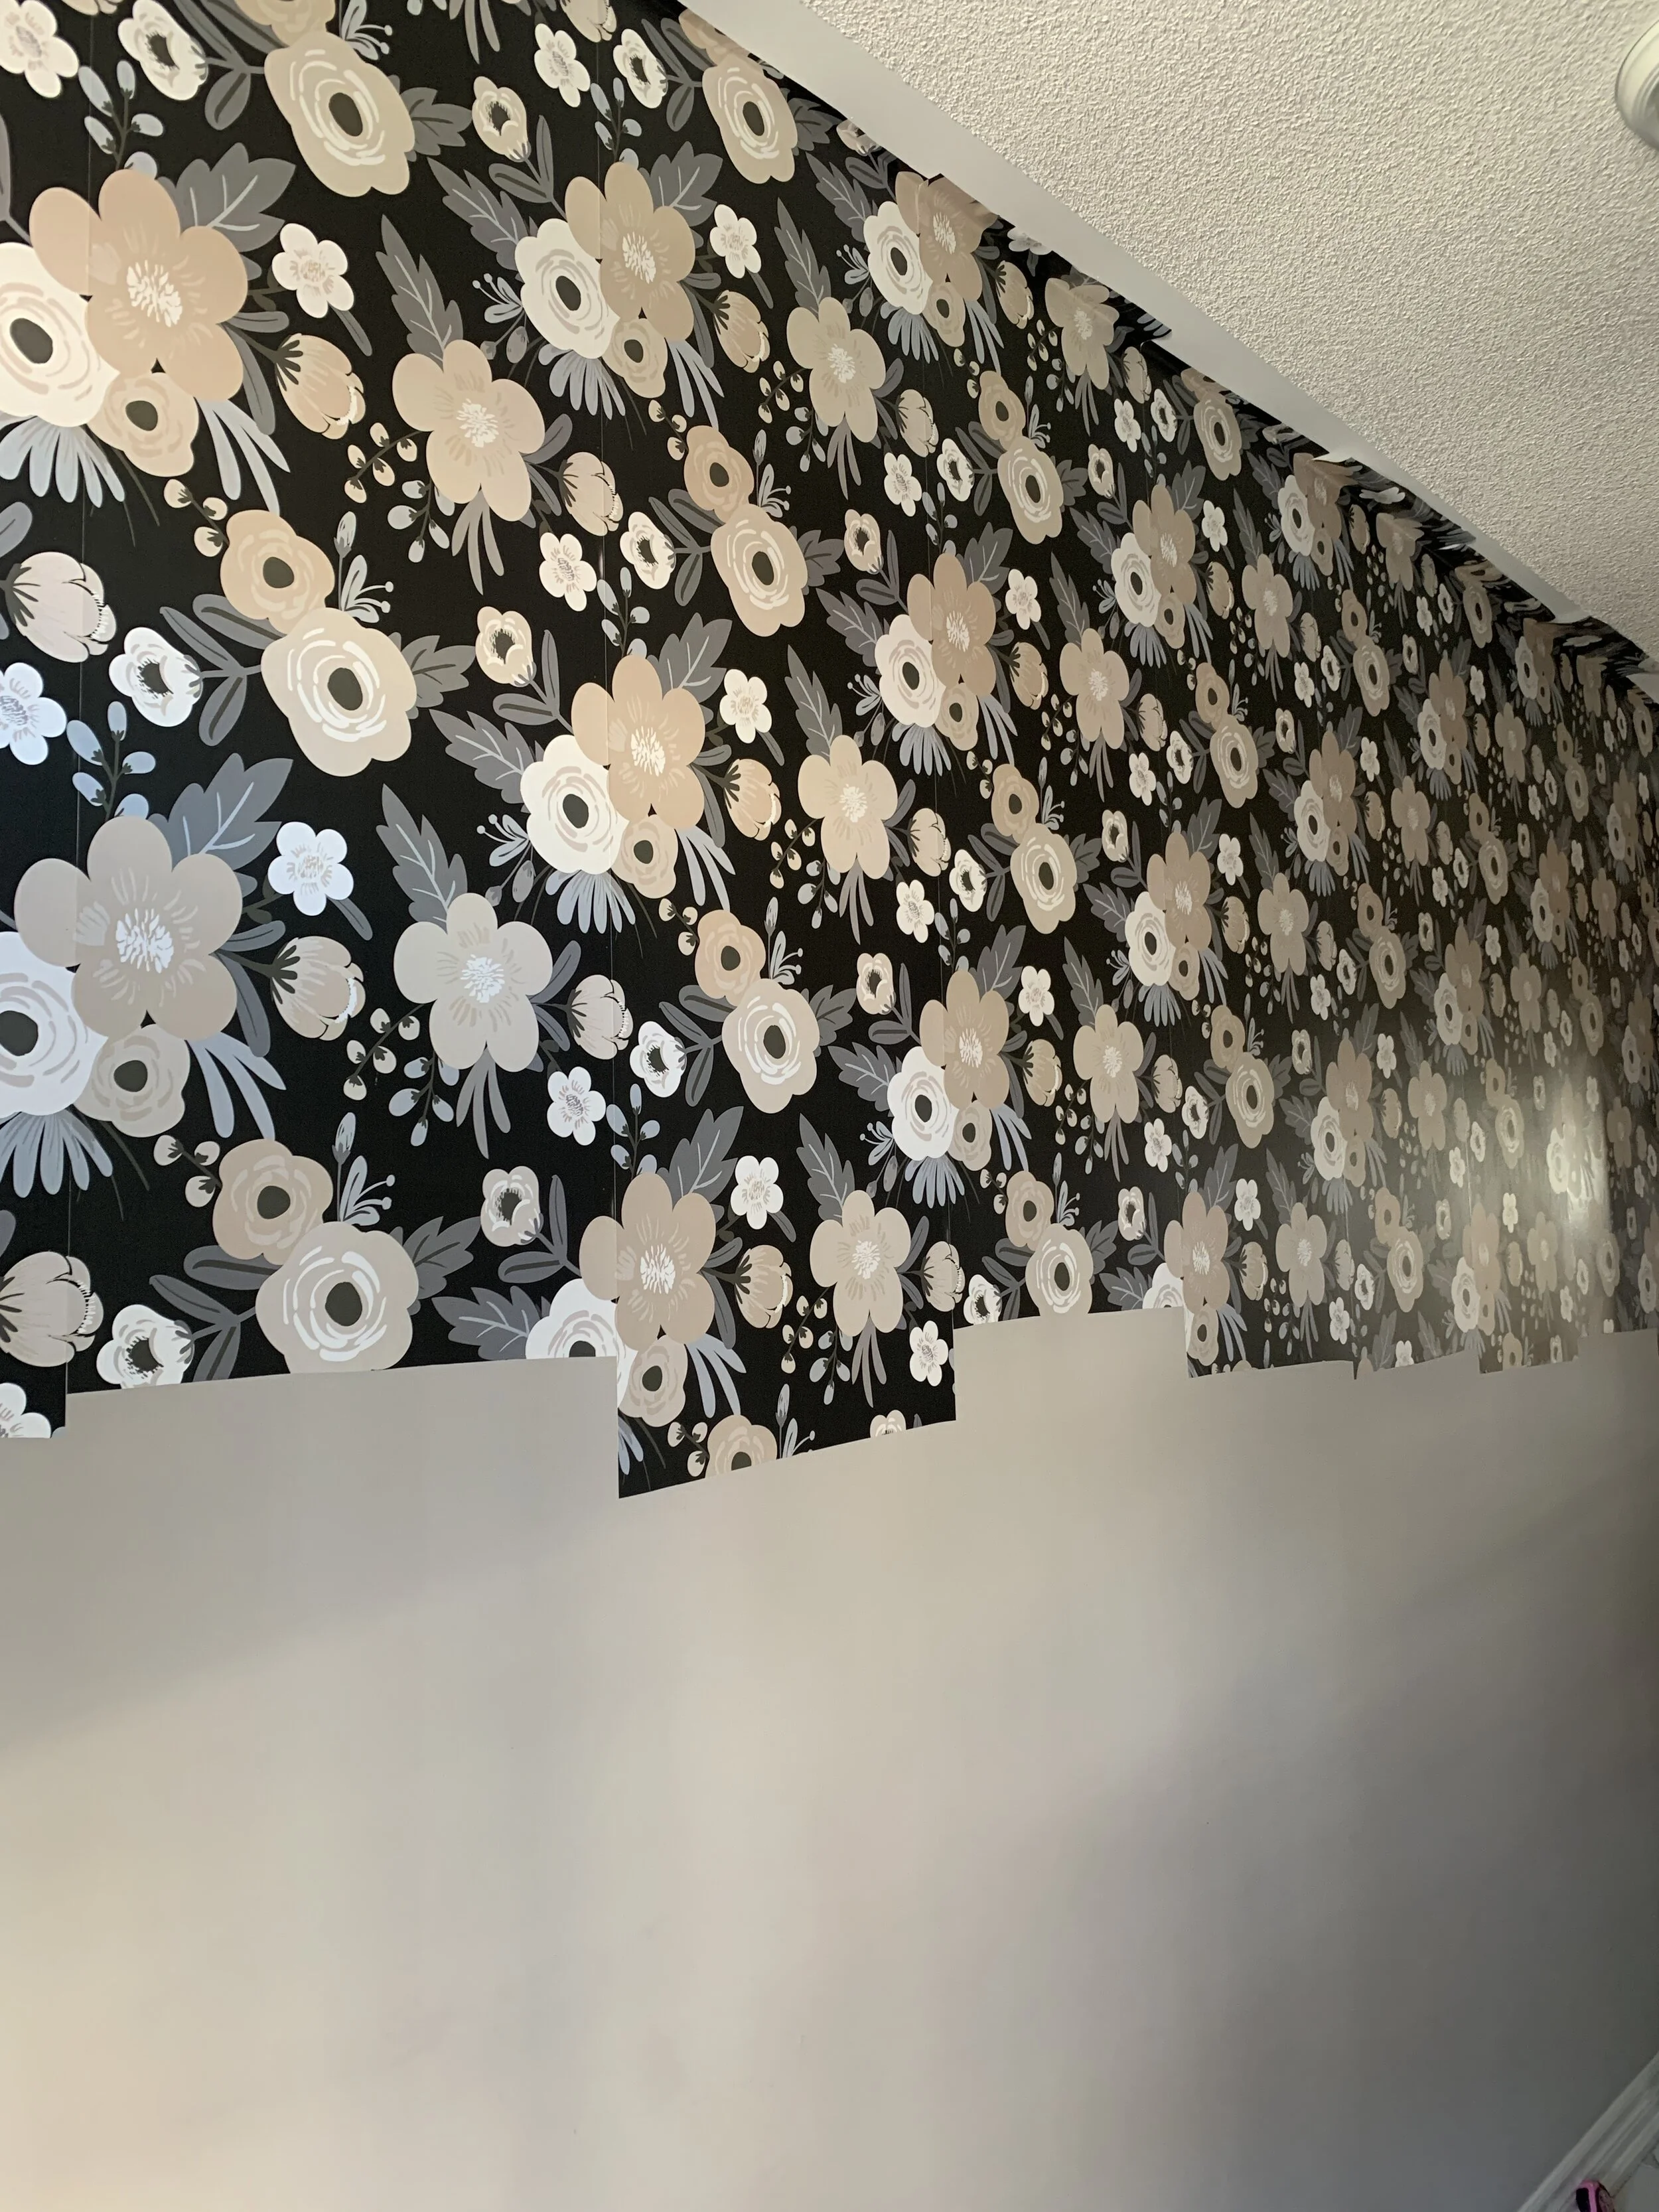
Our entryway is a long narrow space and the single coat closet is closer to the laundry room than the front entrance. While we often come in through the garage and can utilize the closet, it’s not functional when we have guests so finding a solution for that was at the top of my list, well maybe second, first was adding pizazz with my favourite peel and stick wallpaper by Roommates Decor.
For the entryway I used their “Poppy Floral” pattern in black and it is STUNNING! I have used Roommates Decor products several times so installation is pretty easy for me. I have a previous blog post with lots of tips for any one needing any advice. I’ve basically shared what i’ve learned along the way…you can click here to find it!
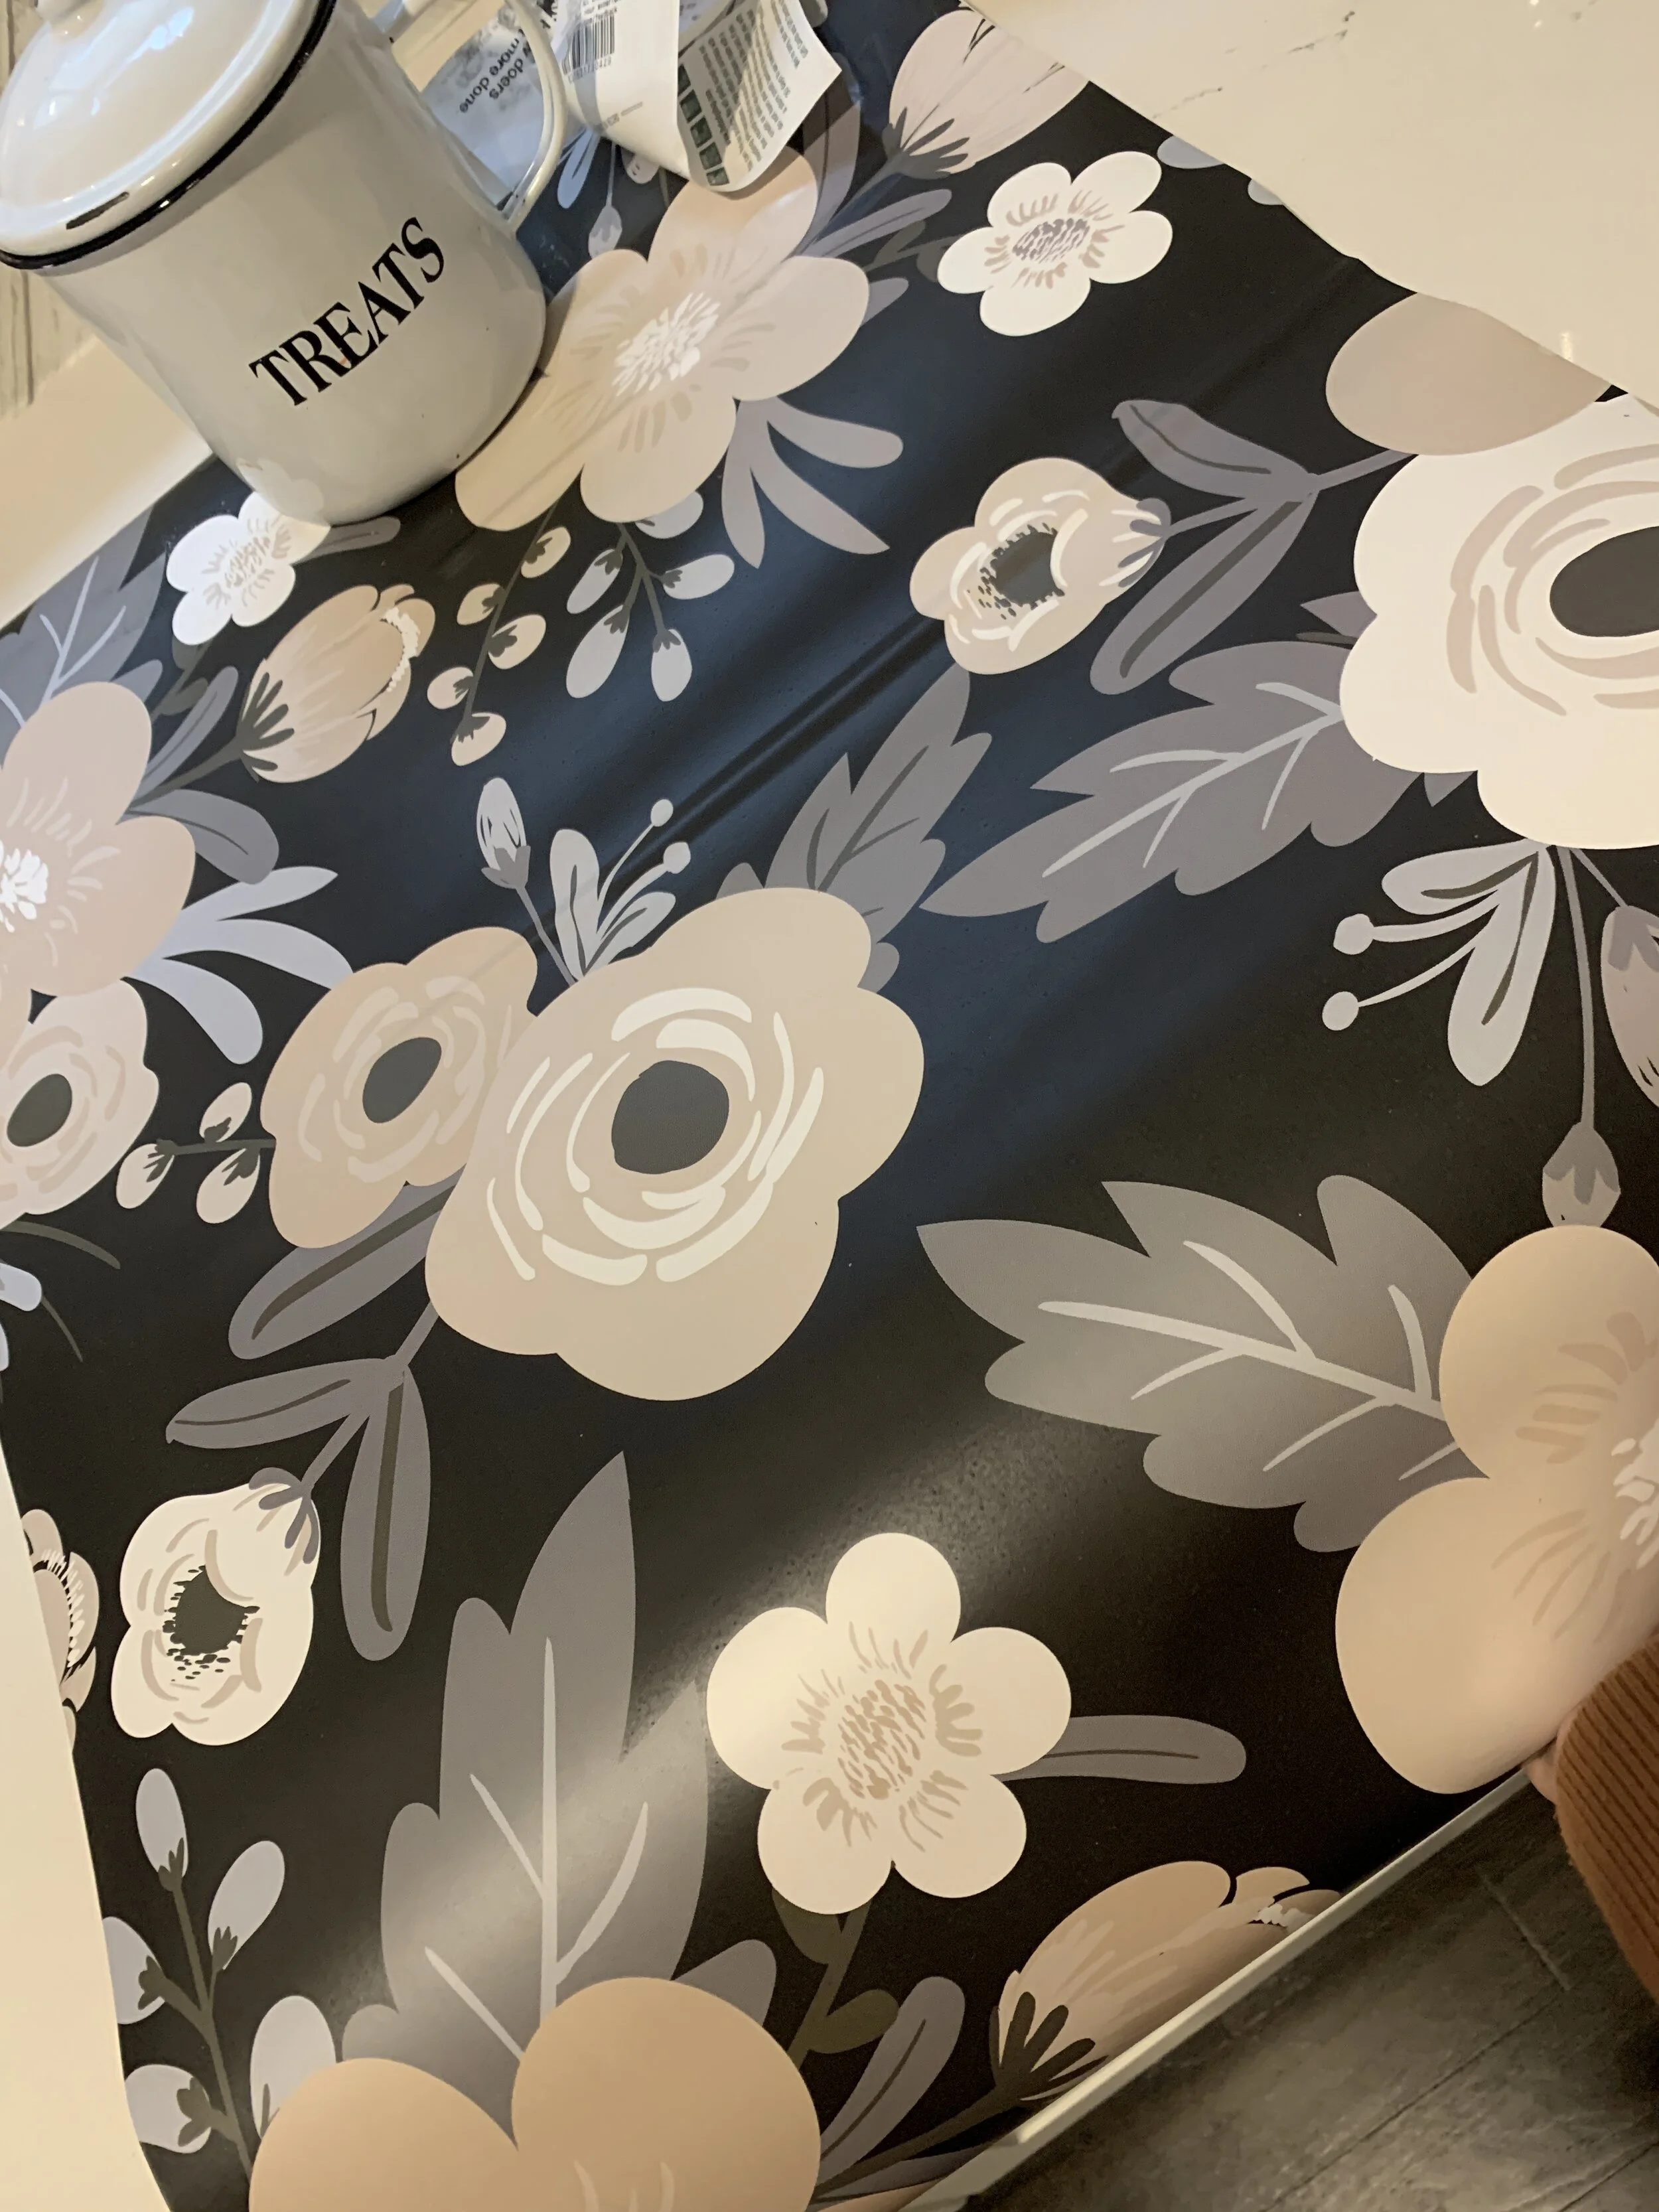

Our ceilings in this house are 9 feet high so I decided I would wallpaper four feet down from the ceiling around the entire long rectangular space. This wallpaper is easy to work with, it is great quality, it trims beautifully and like it or not, wallpaper has made a comeback and in our home, is here to stay!

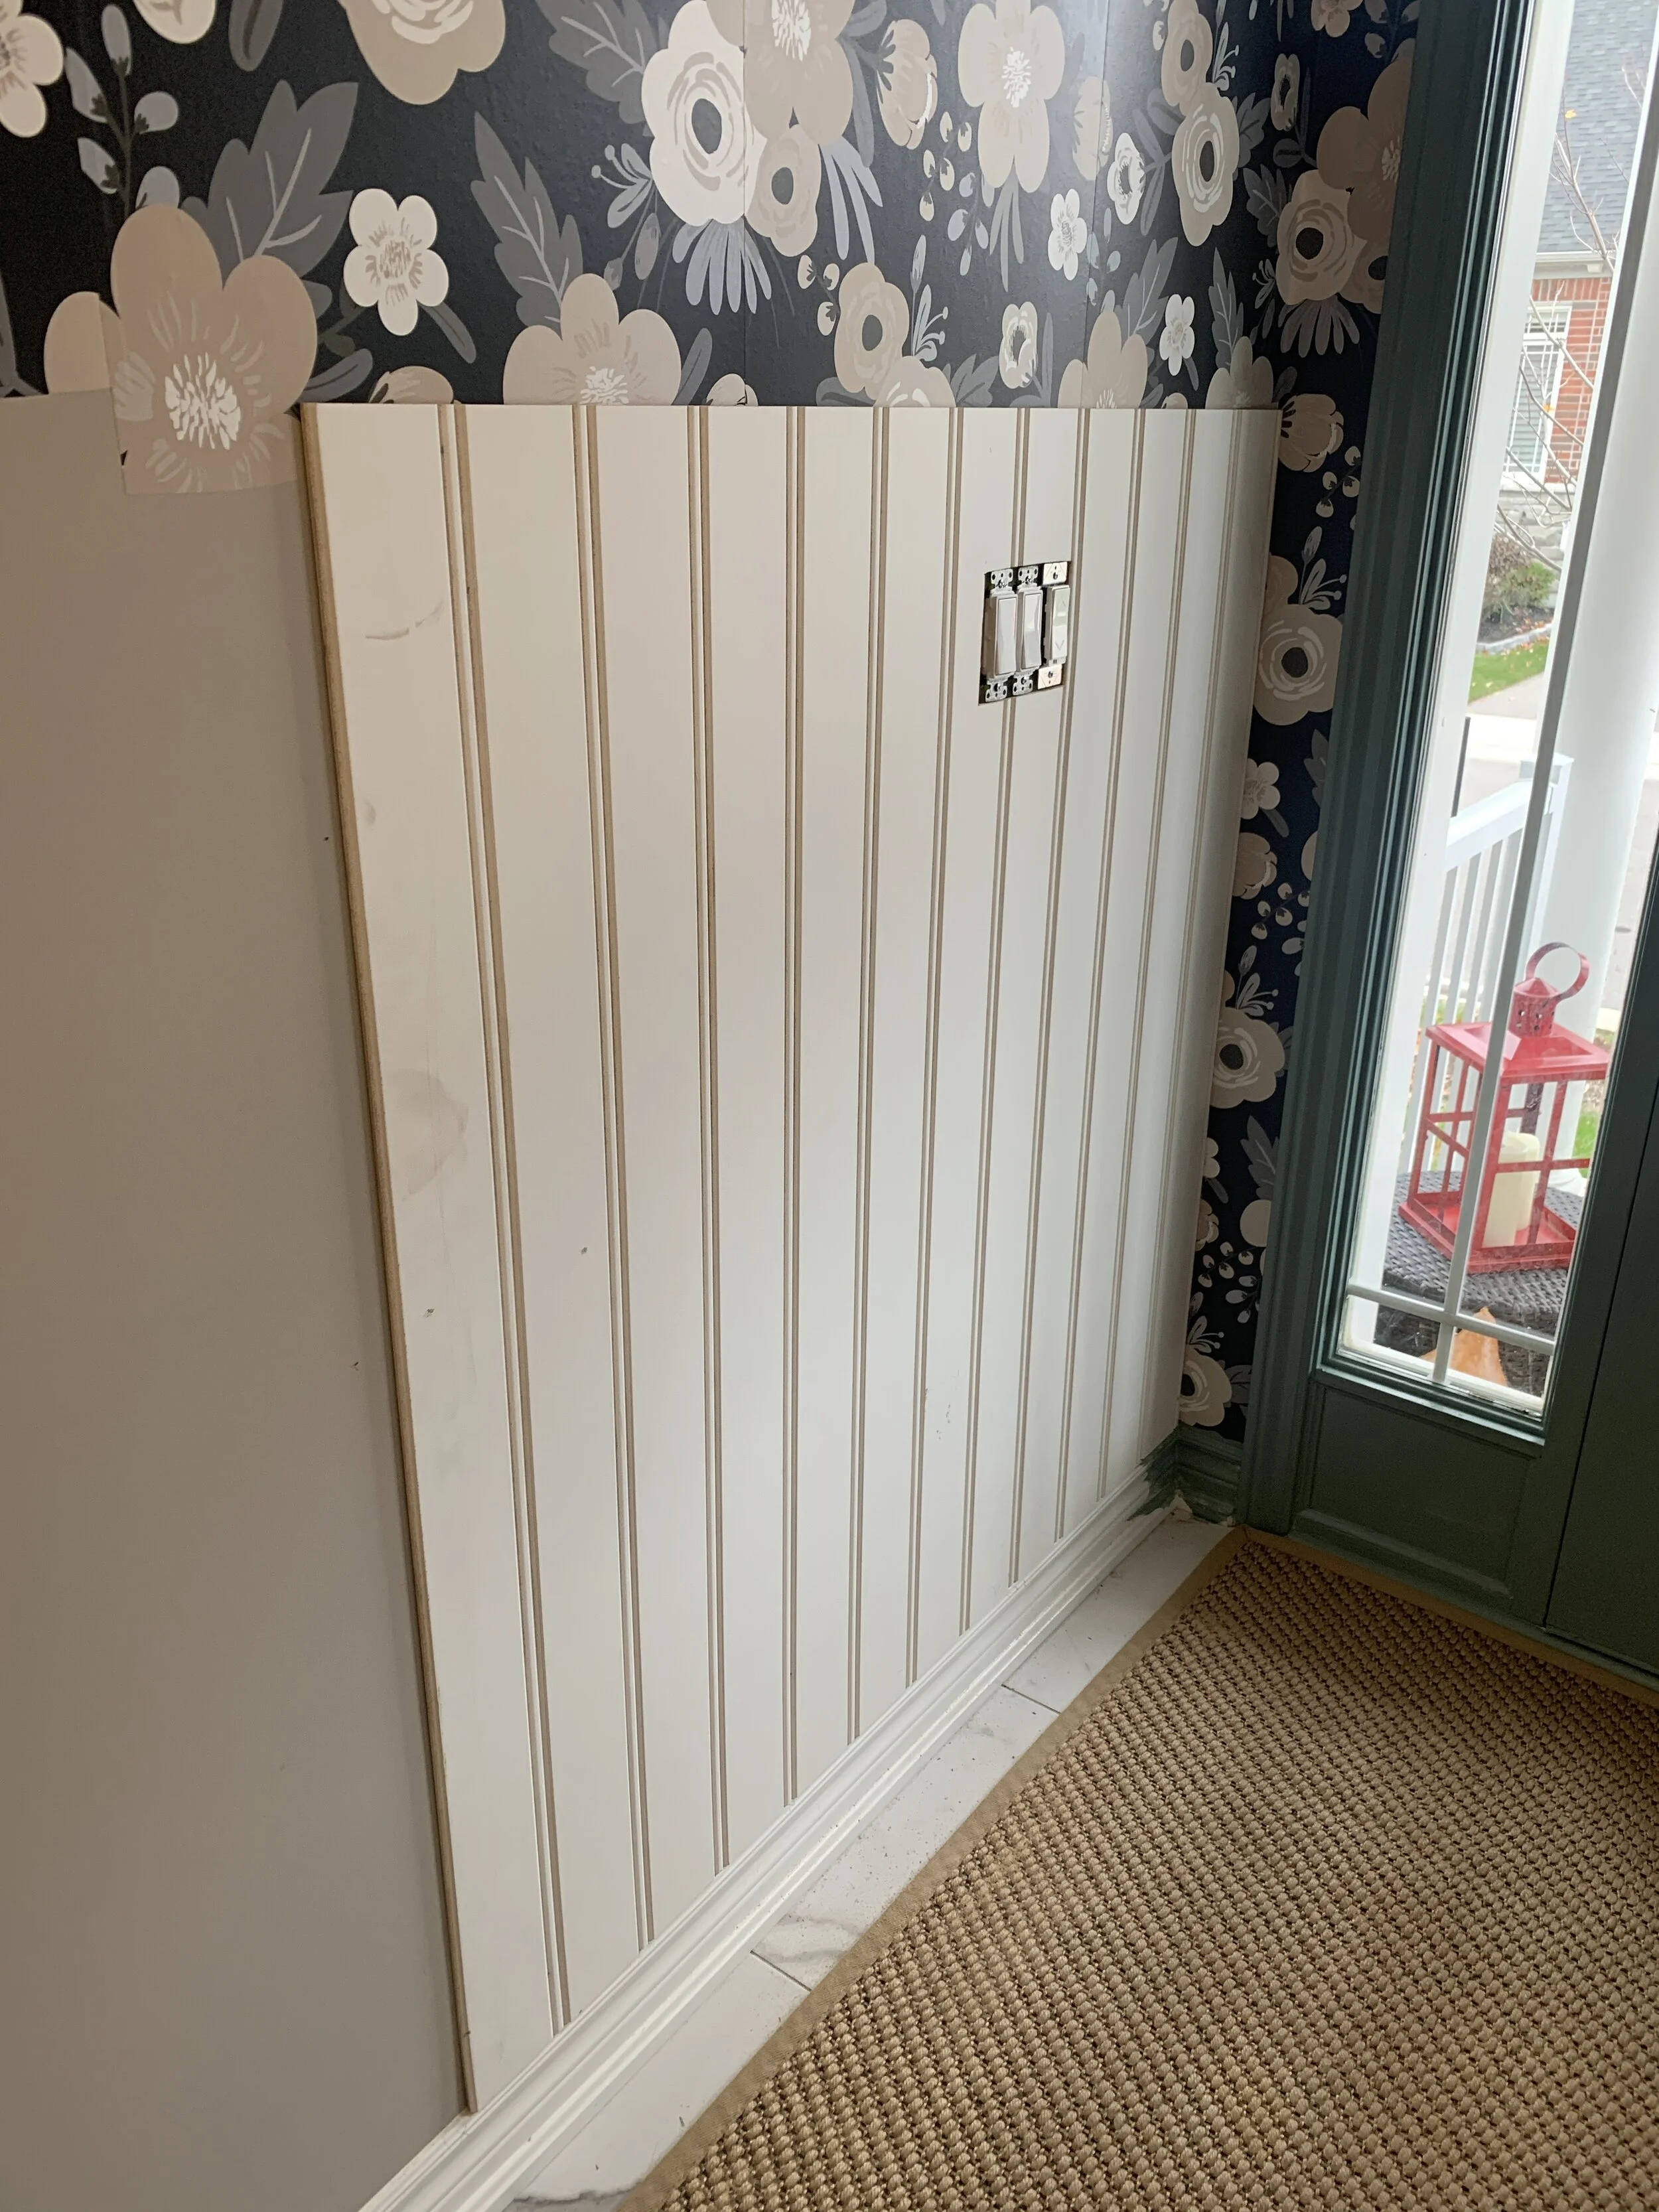
After the wallpaper was hung, we got ready to install the bead board. My husband bought “US” a new nail gun for my birthday back in October. It replaced the corded brad nailer that hooked up to the compressor and quite honestly, intimidated me. It only used staples which left bigger than necessary marks in anything we used it on. This new Porter Cable cordless nail gun is the perfect addition to our tool line up!
To hang the bead board we used PL Adhesive from Home Depot and the nail gun. This was the first time we had installed bead board and it was an easy DIY that anyone can do. Getting the sheets pre-cut at Home Depot eliminates a lot of work. We had to cut down one sheet ourself which was stressful and probably the most time consuming since we don’t have our table saw properly set up. But we (hubby) got it done and were super proud of ourselves!
Once the wallpaper and bead board were hung, we moved onto paint…my new favourite brand of paint I should add, Digby Paints! If you haven’t heard of Digby Paints they are an online, one stop paint shop. With 60 premixed colours available to chose from, they make paint shopping easy and fun! Prior to starting this makeover Digby sent me the entire line-up of colour cards, complete with recommended trim colours AND some handy double sided tape to hang the cards on your walls. I had colours hanging on our entryway walls for two weeks! It’s nice to check at different times time day, in different lighting, to be sure you are making the right choice. I decided to go with the most beautiful shade of green called “Gone Fishing” for this project, in semi-gloss.


Once I ordered my paint from Digby, it was at my front door in an easy to carry box in less than a week, complete with the most amazing paint kit that included every single thing I would need - from a paint tray to a drop cloth and masking tape, rollers, brushes and a brochure with handy painting tips. A total one stop shop and I didn’t have to leave my house! Mind blowing!
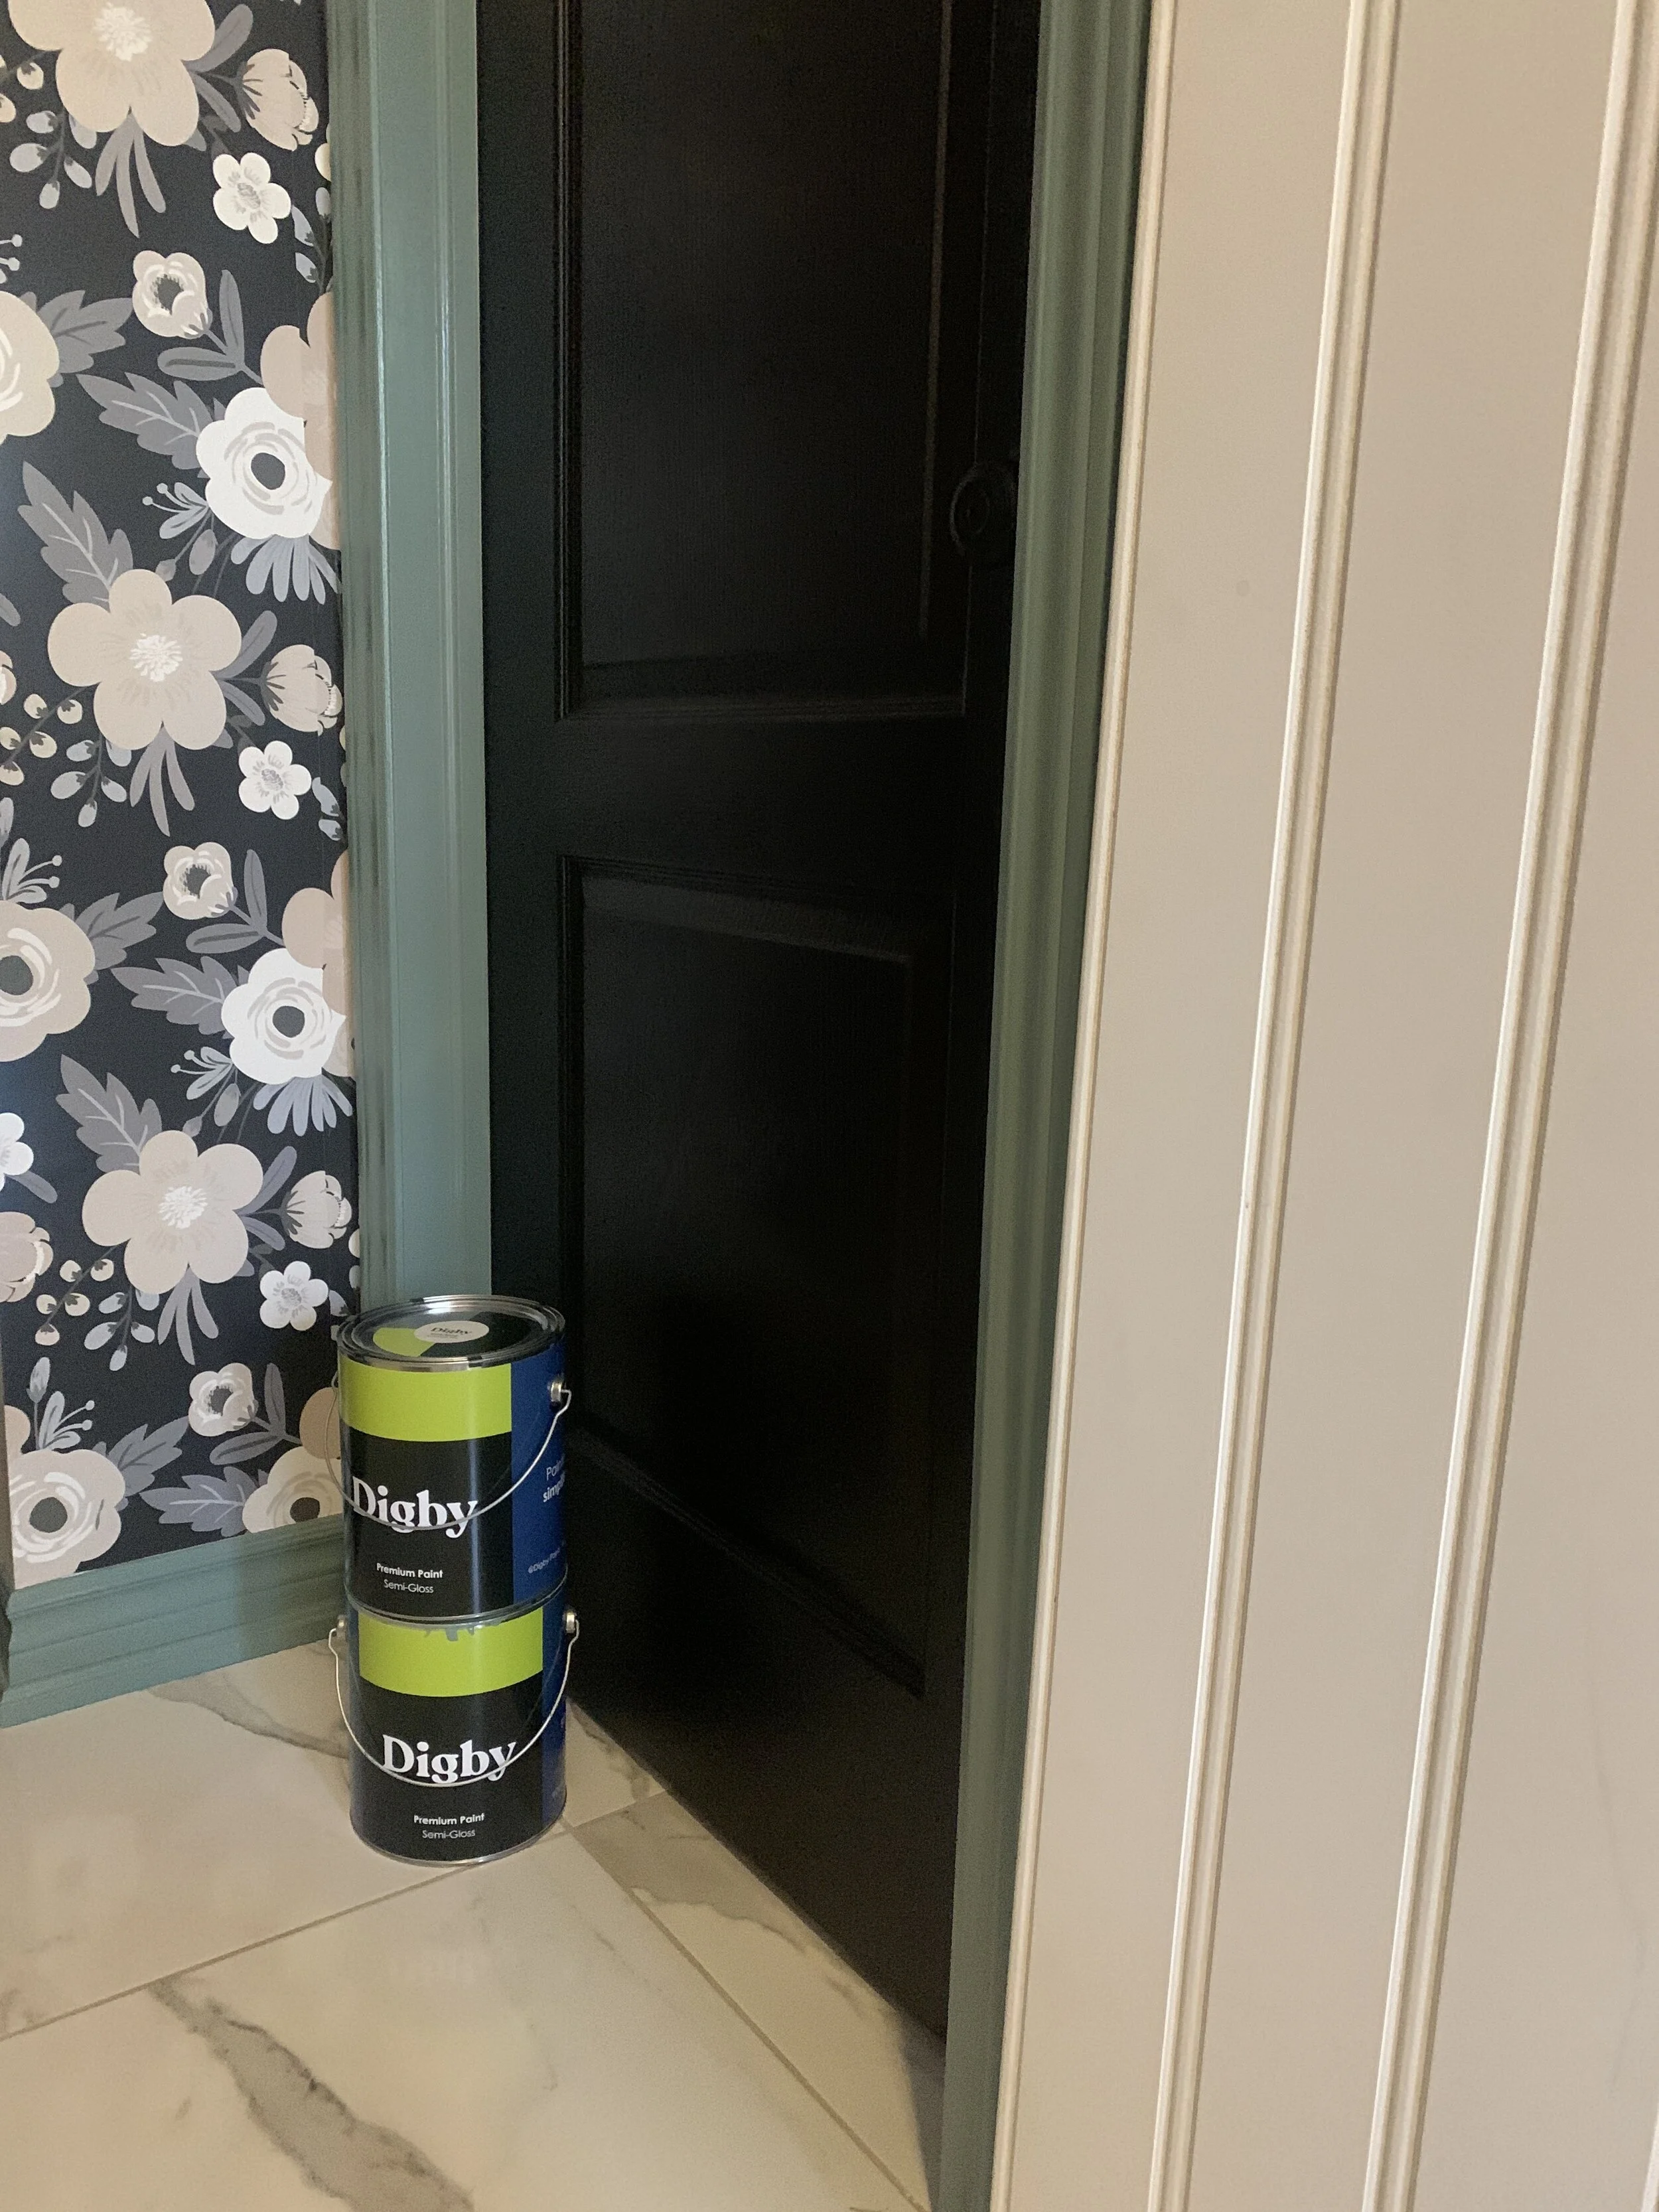
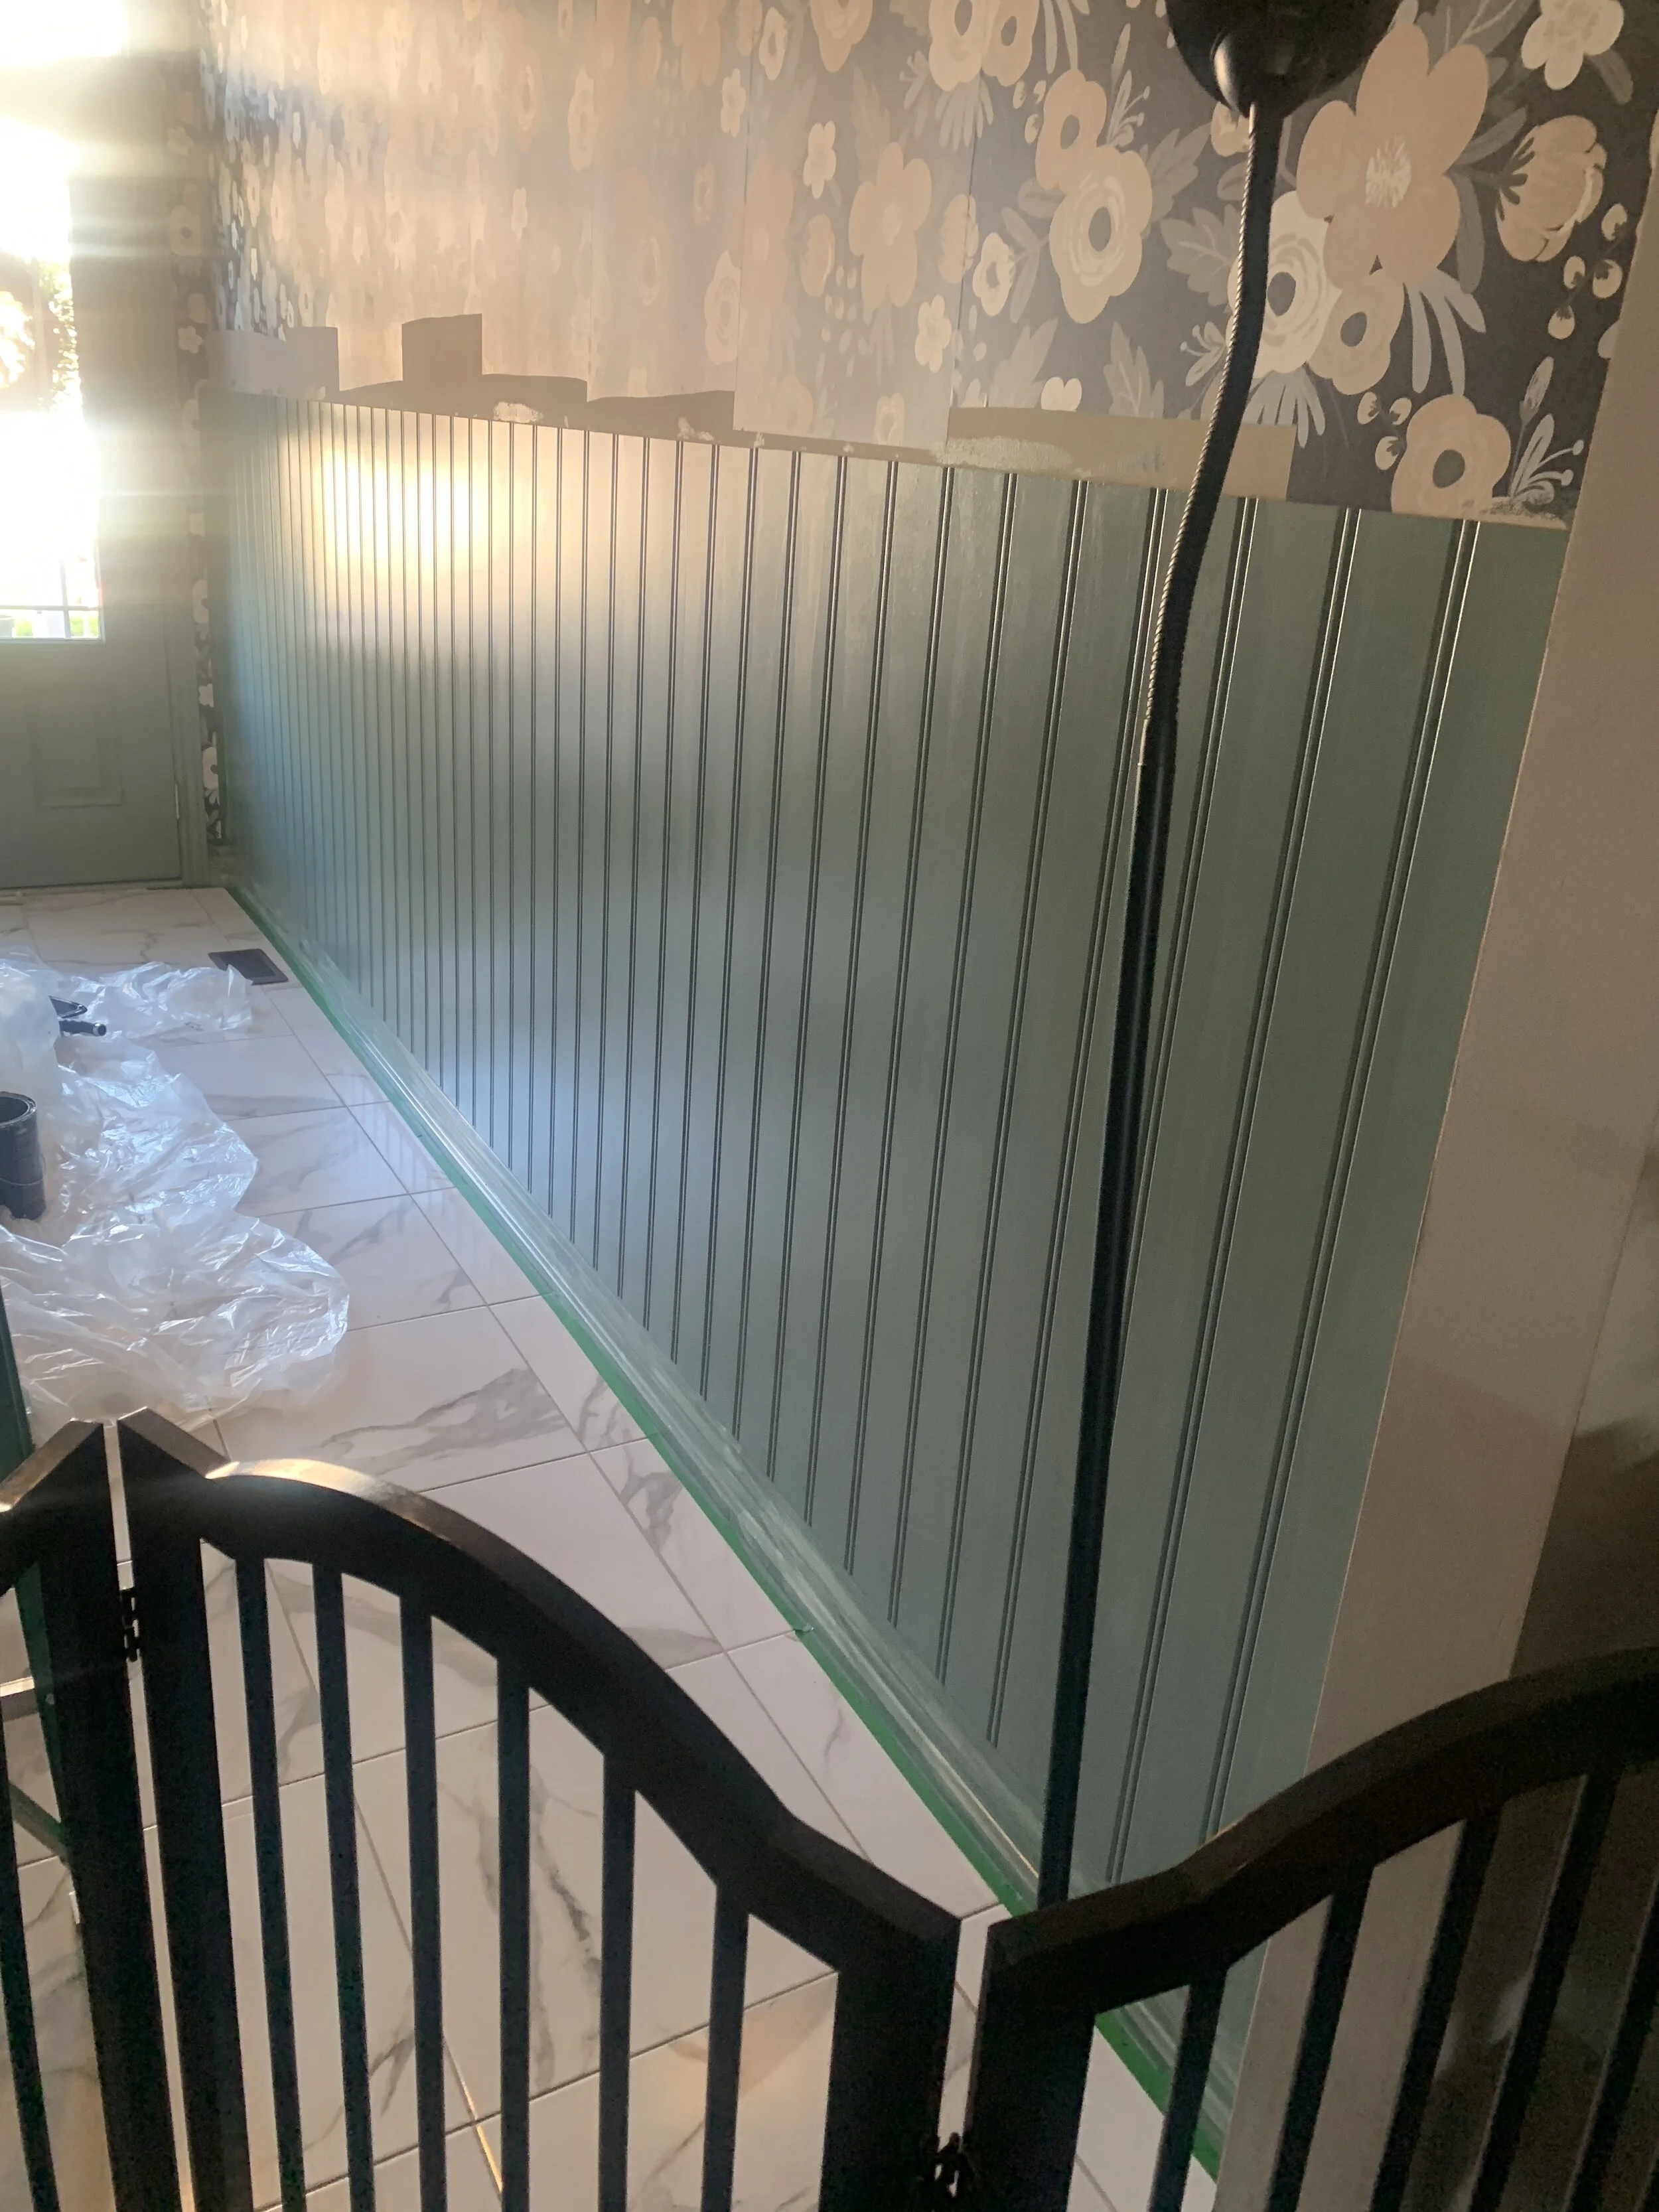
Digby Paints is available in two sheens - Egg Shell and Semi-Gloss and since I was painting the front door, trim and bead board board all the same colour I opted to go with Semi-Gloss and let’s just say it was one of the best design decisions I made for this space. This paint goes on like a DREAM! The quality of the paint combined with the quality of the rollers DIgby includes in their paint kit, has the bead board looking like it was professionally sprayed! The finish is PHENOMENAL! I did give everything three coats, mostly because this house was still painted with builder grade everything so it literally sucked the paint off the roller but it was worth every roll!
I can, without any hesitation, recommend DIgby Paints, especially during these current times when many of us don’t want to go out or can’t go out, but maybe want to do a little refresh in our homes. If you are in Ontario, let Digby Paints come to your rescue! Quality and affordability, the perfect combo!
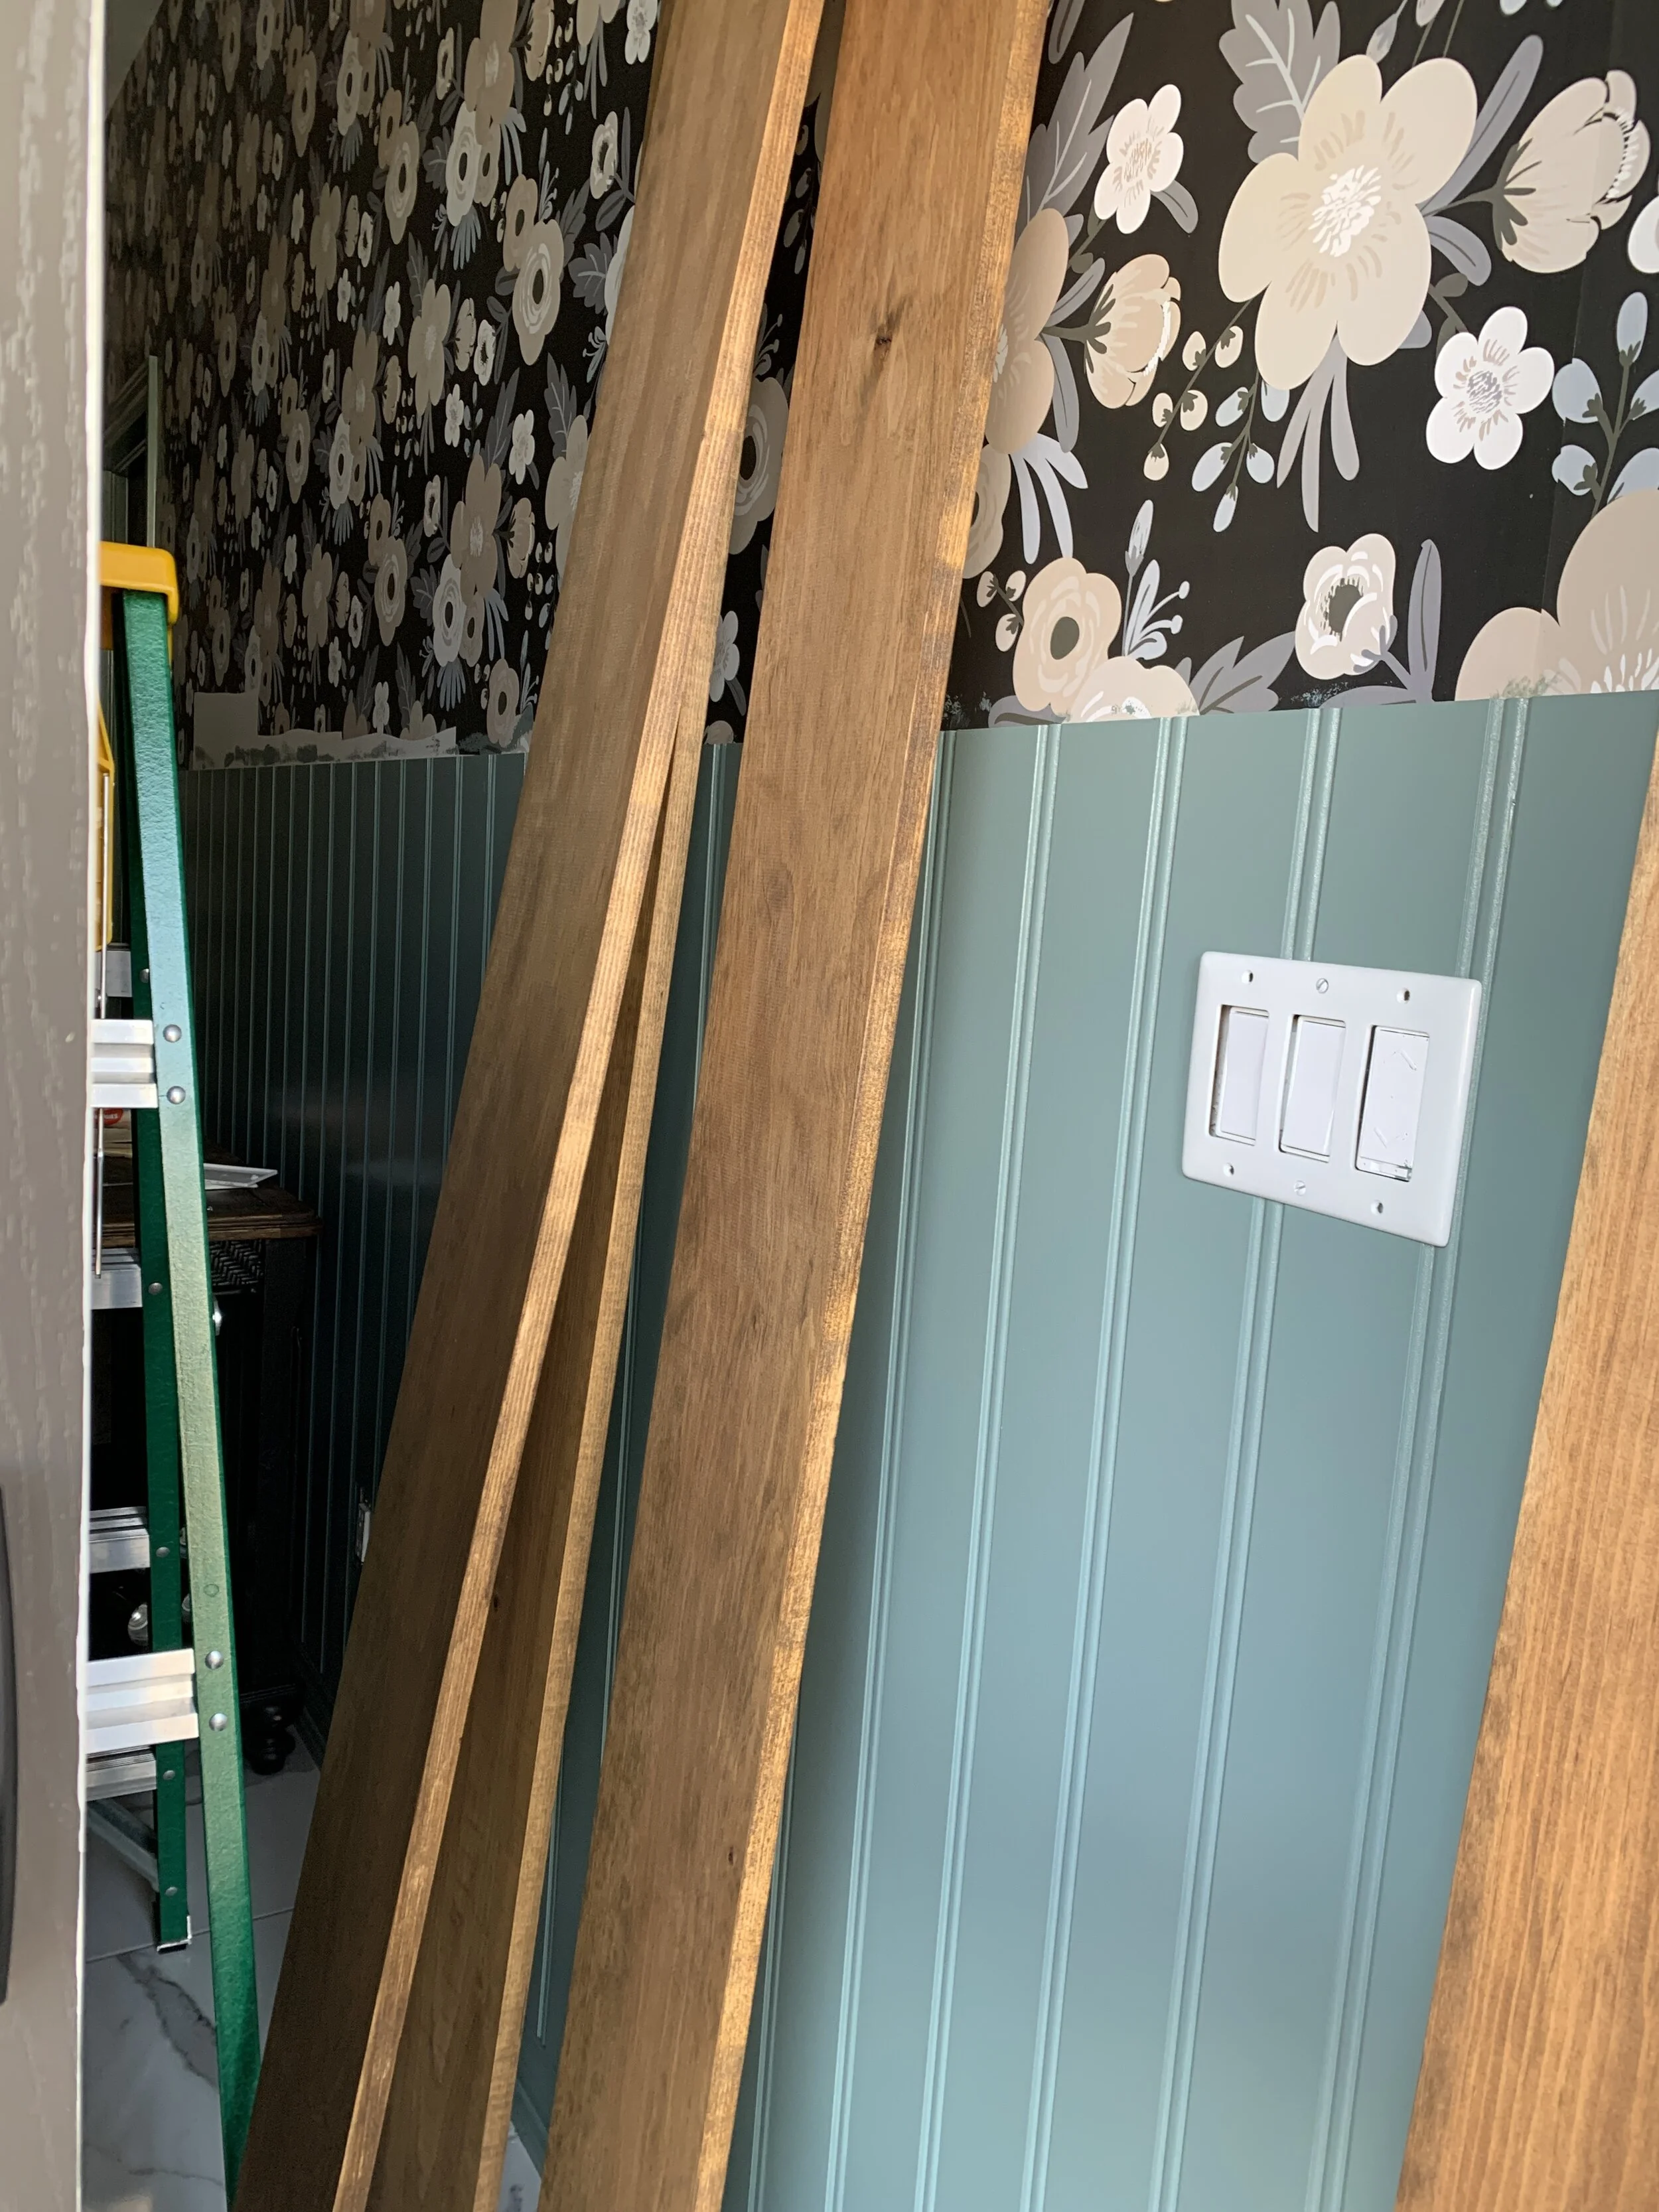
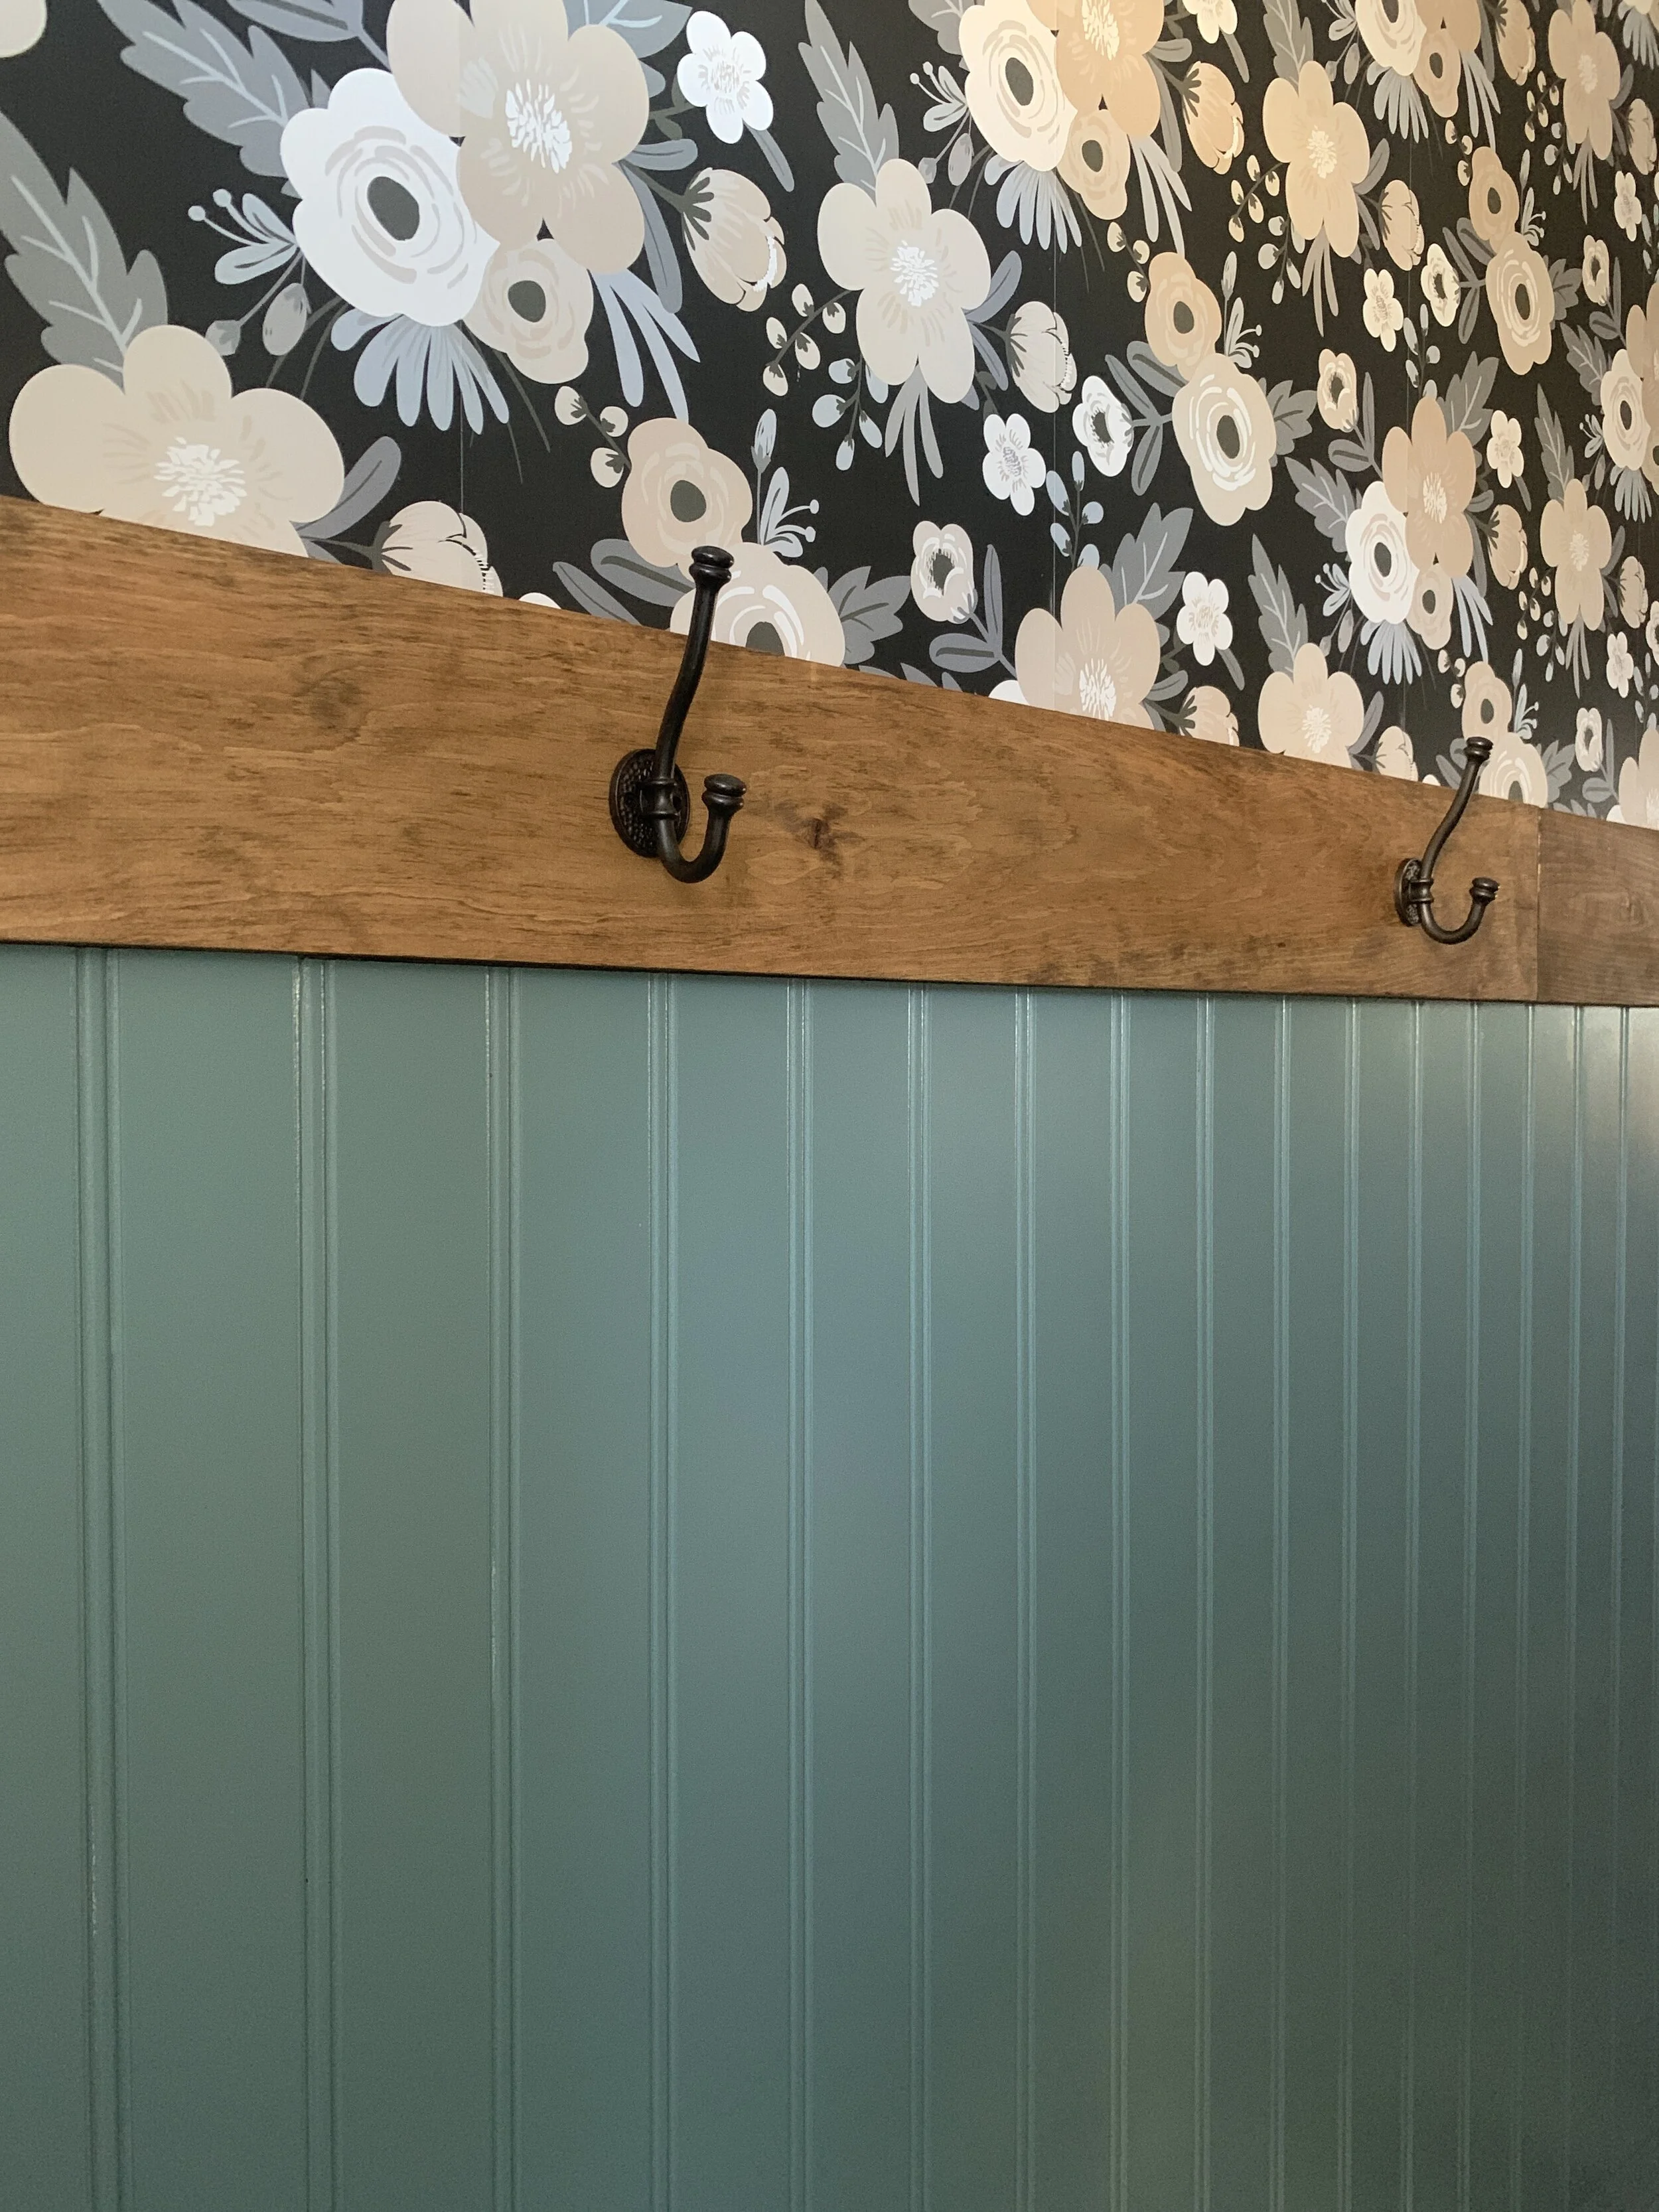
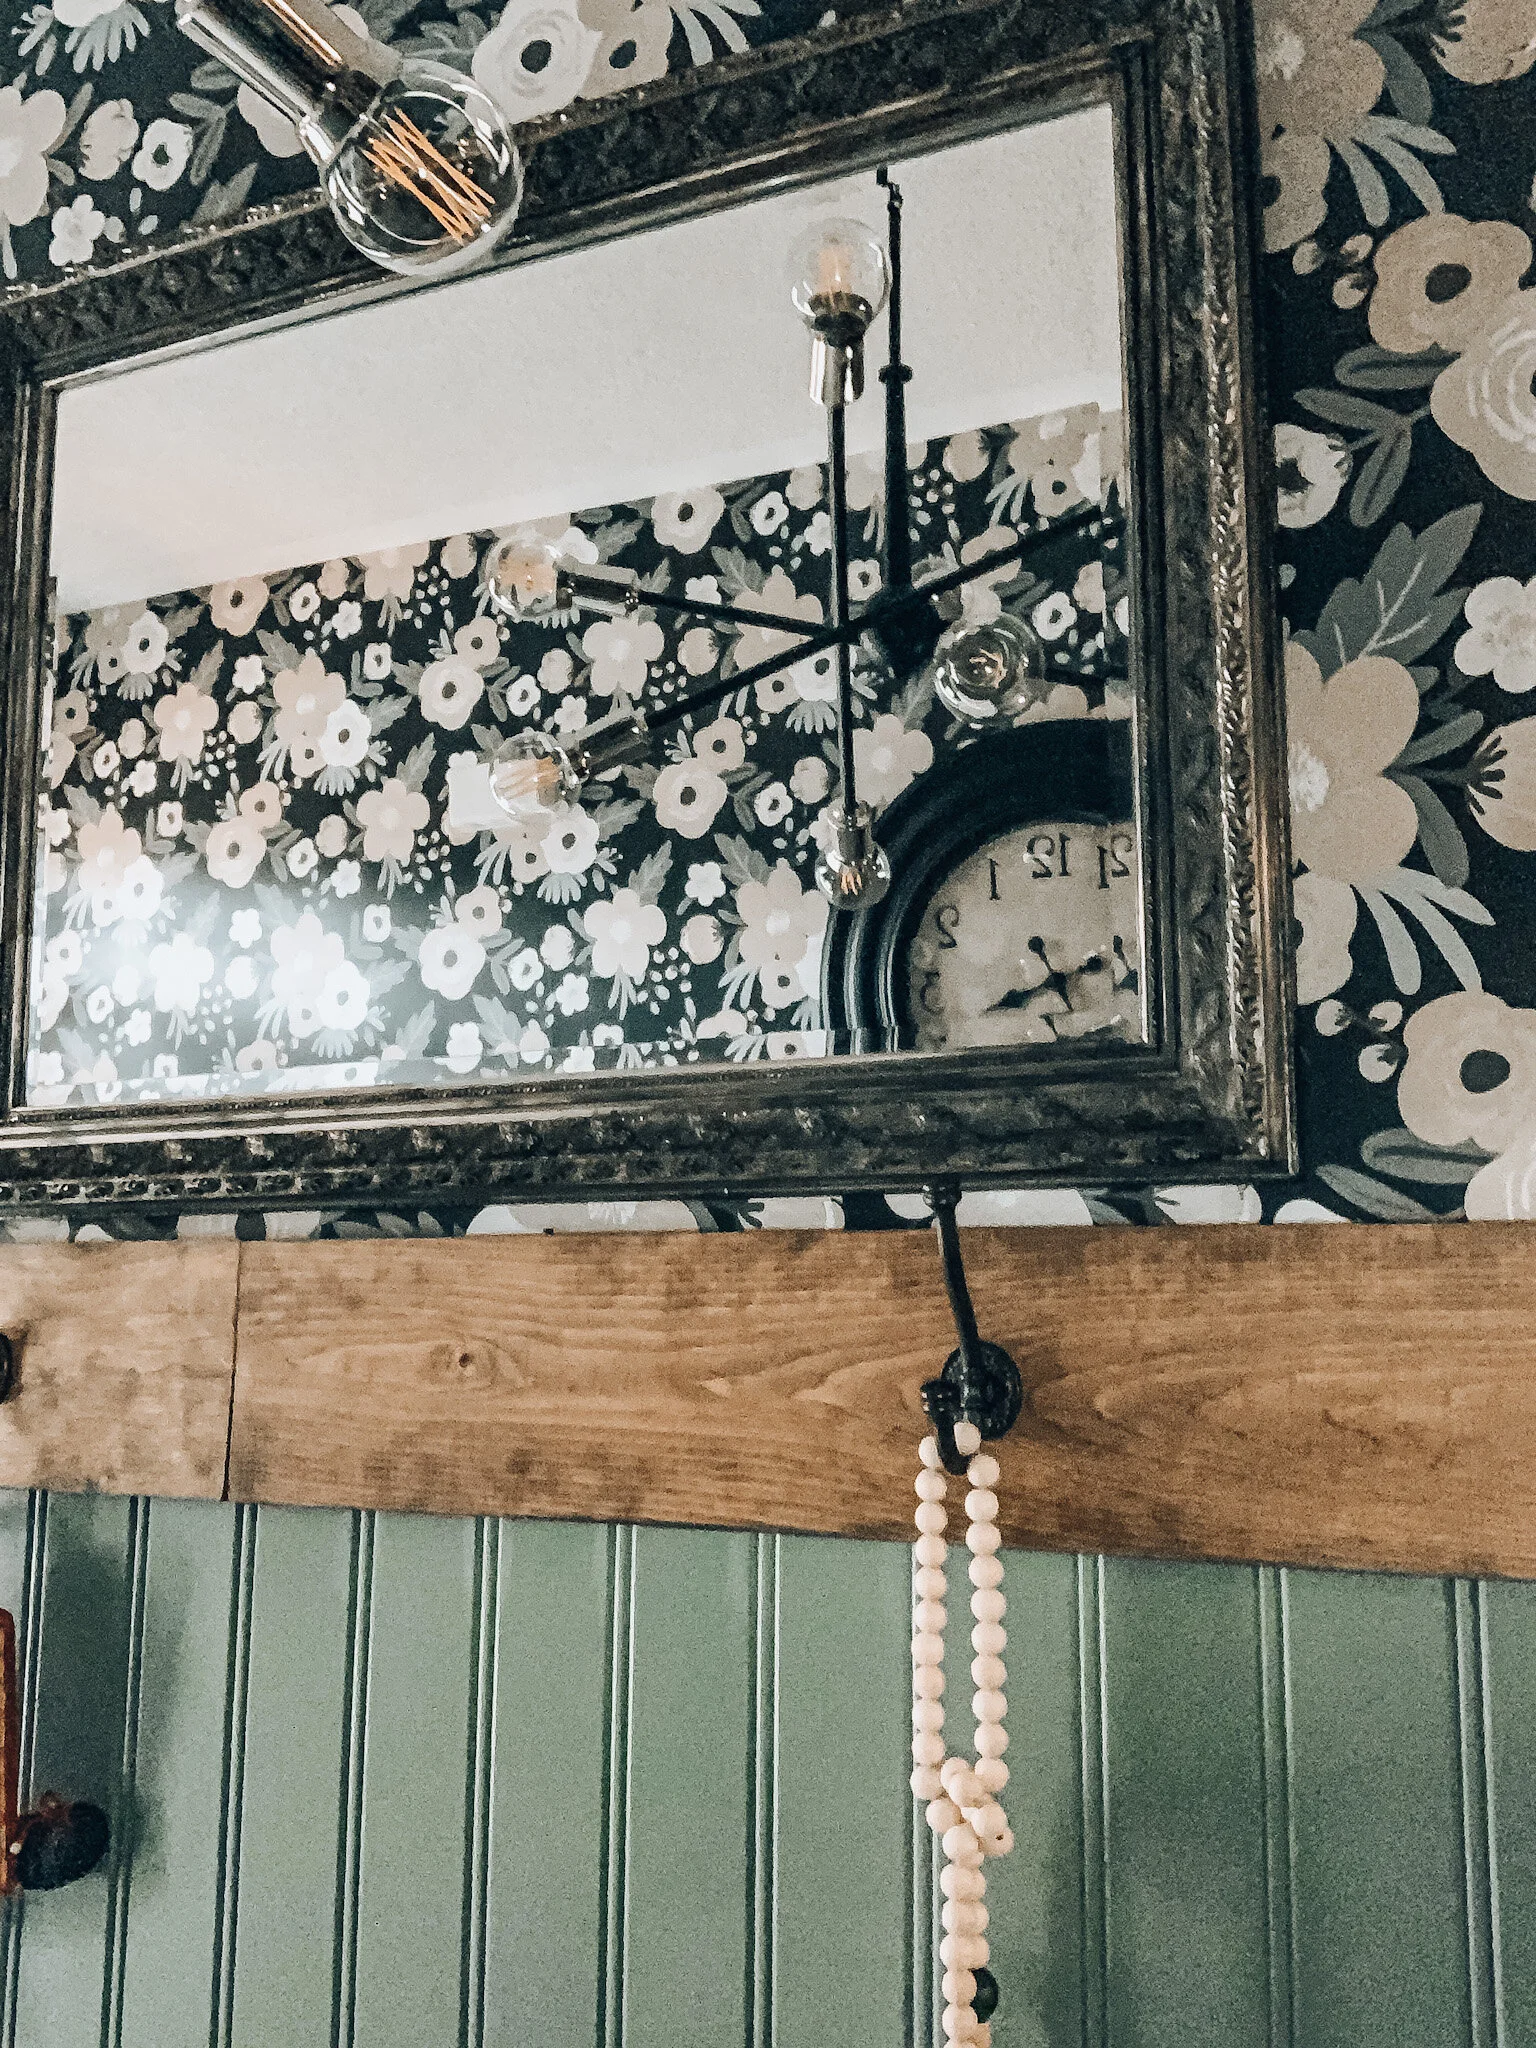
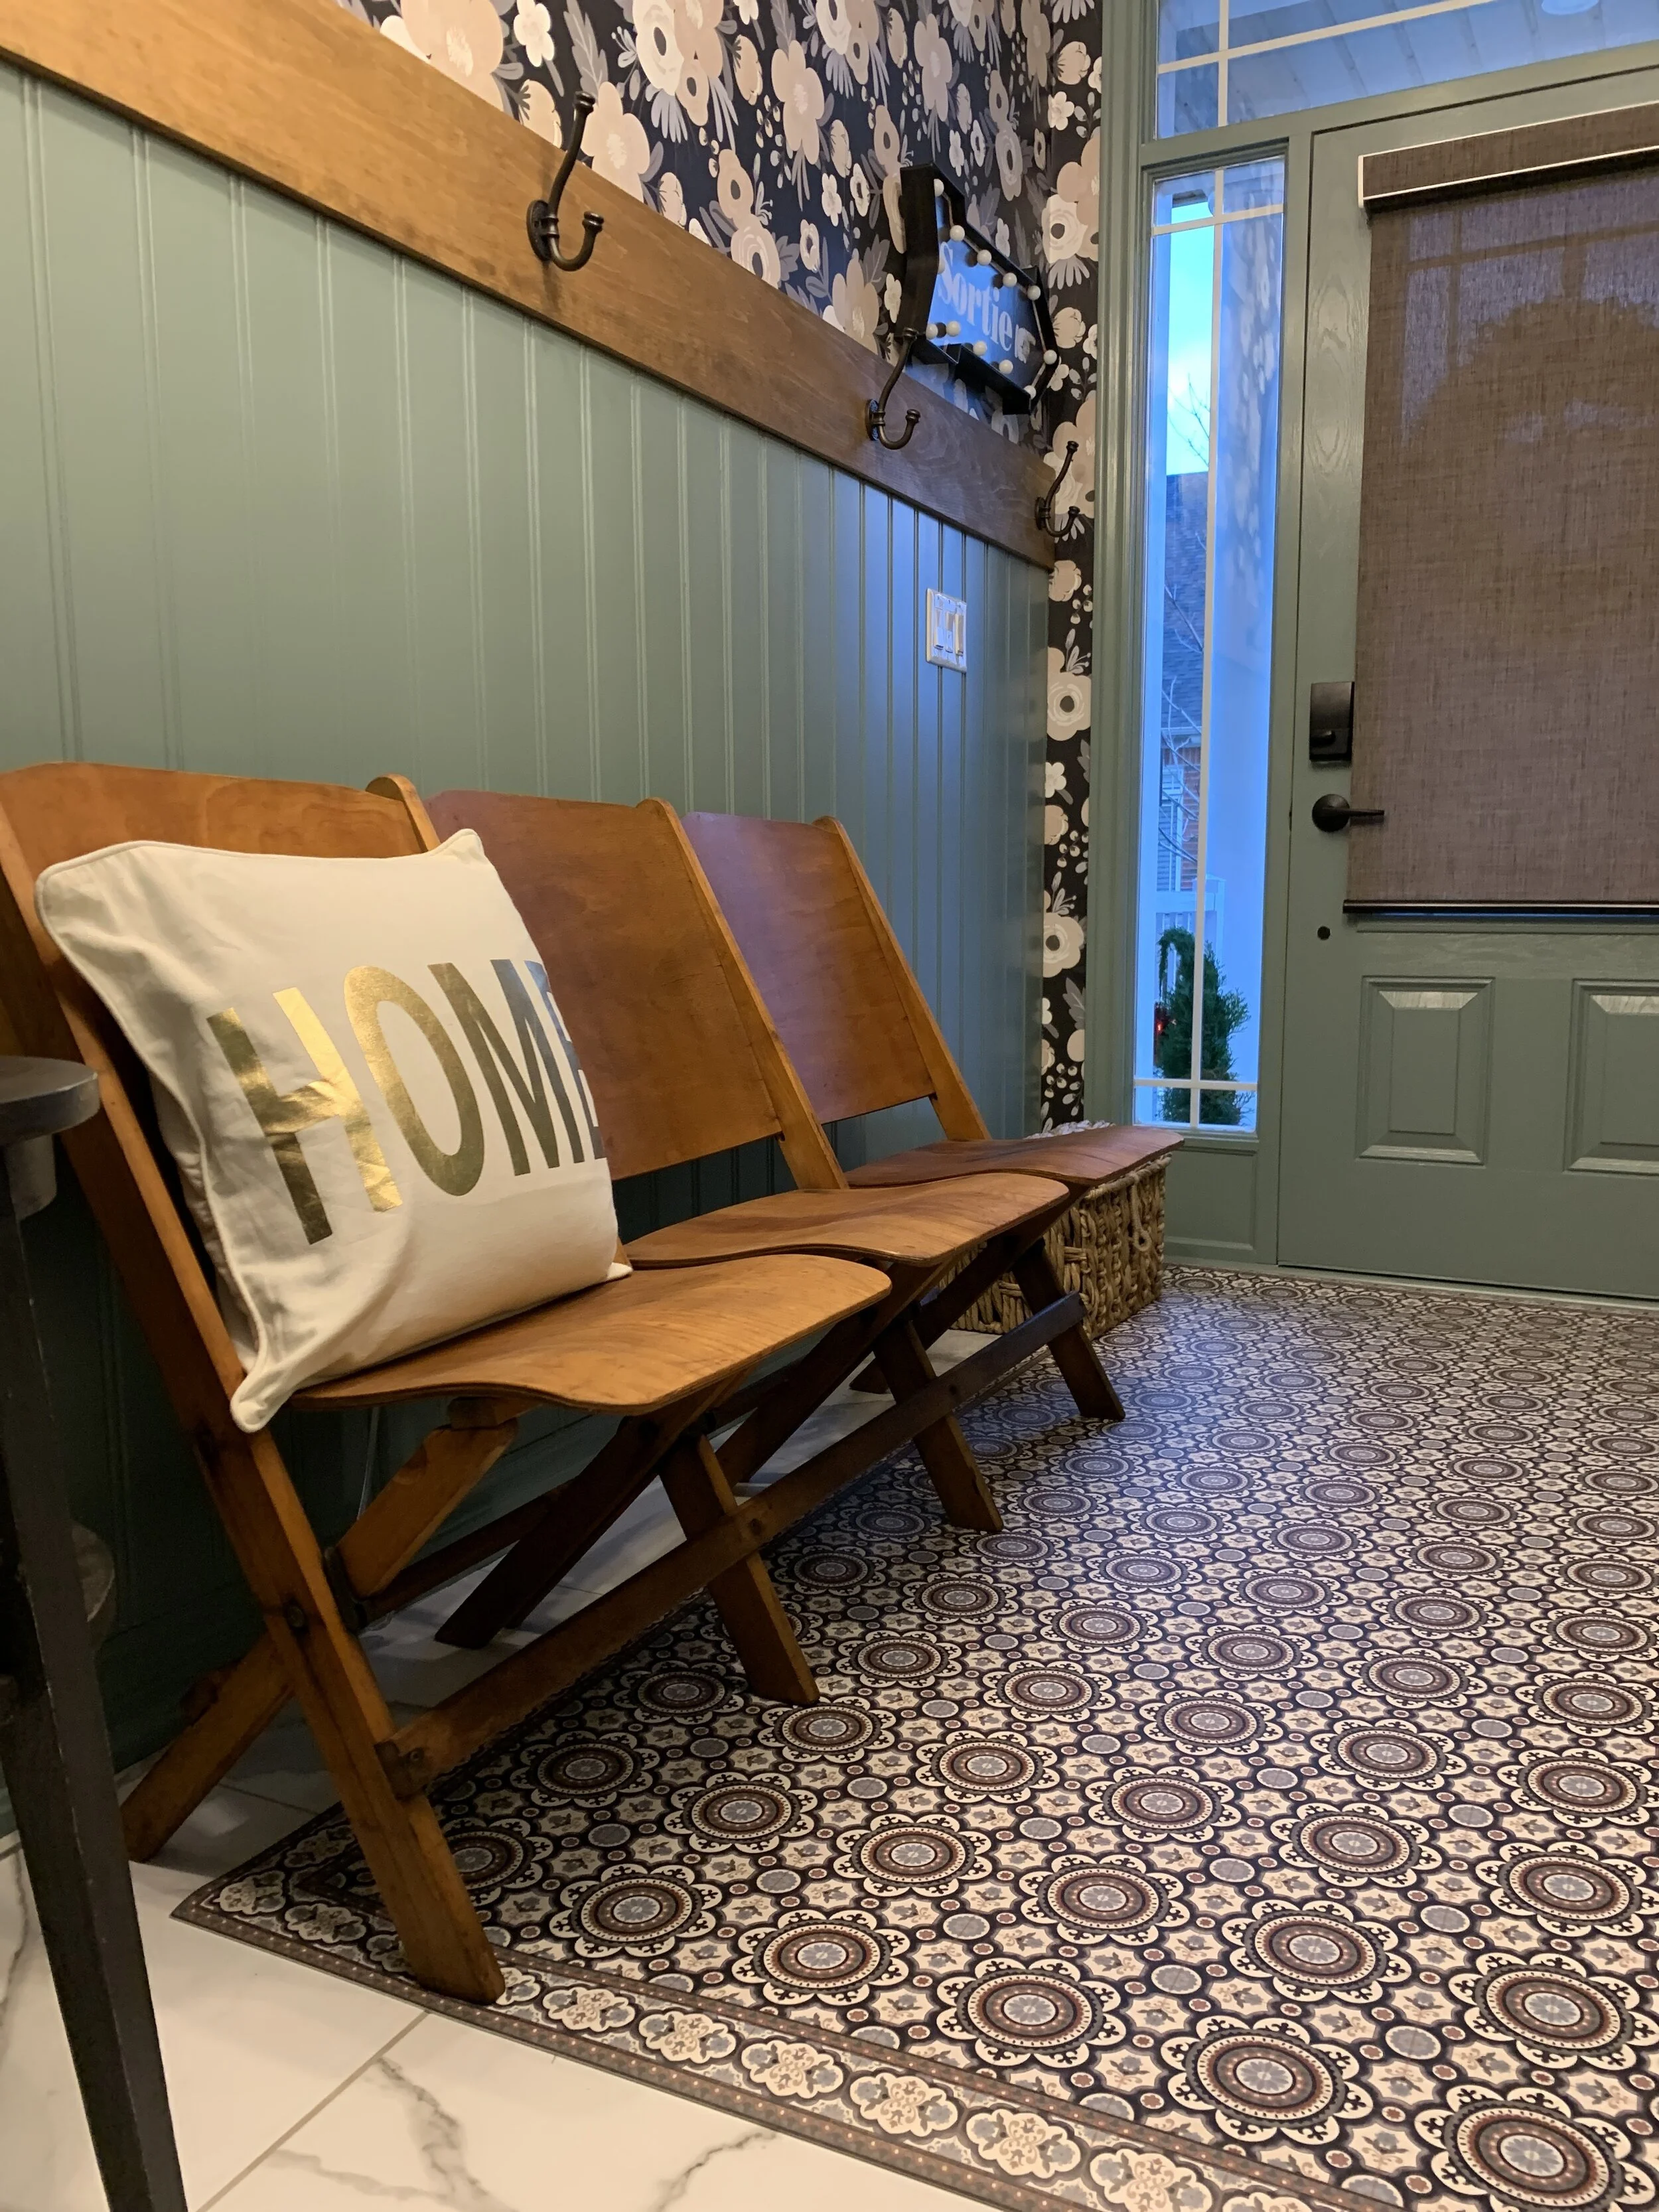
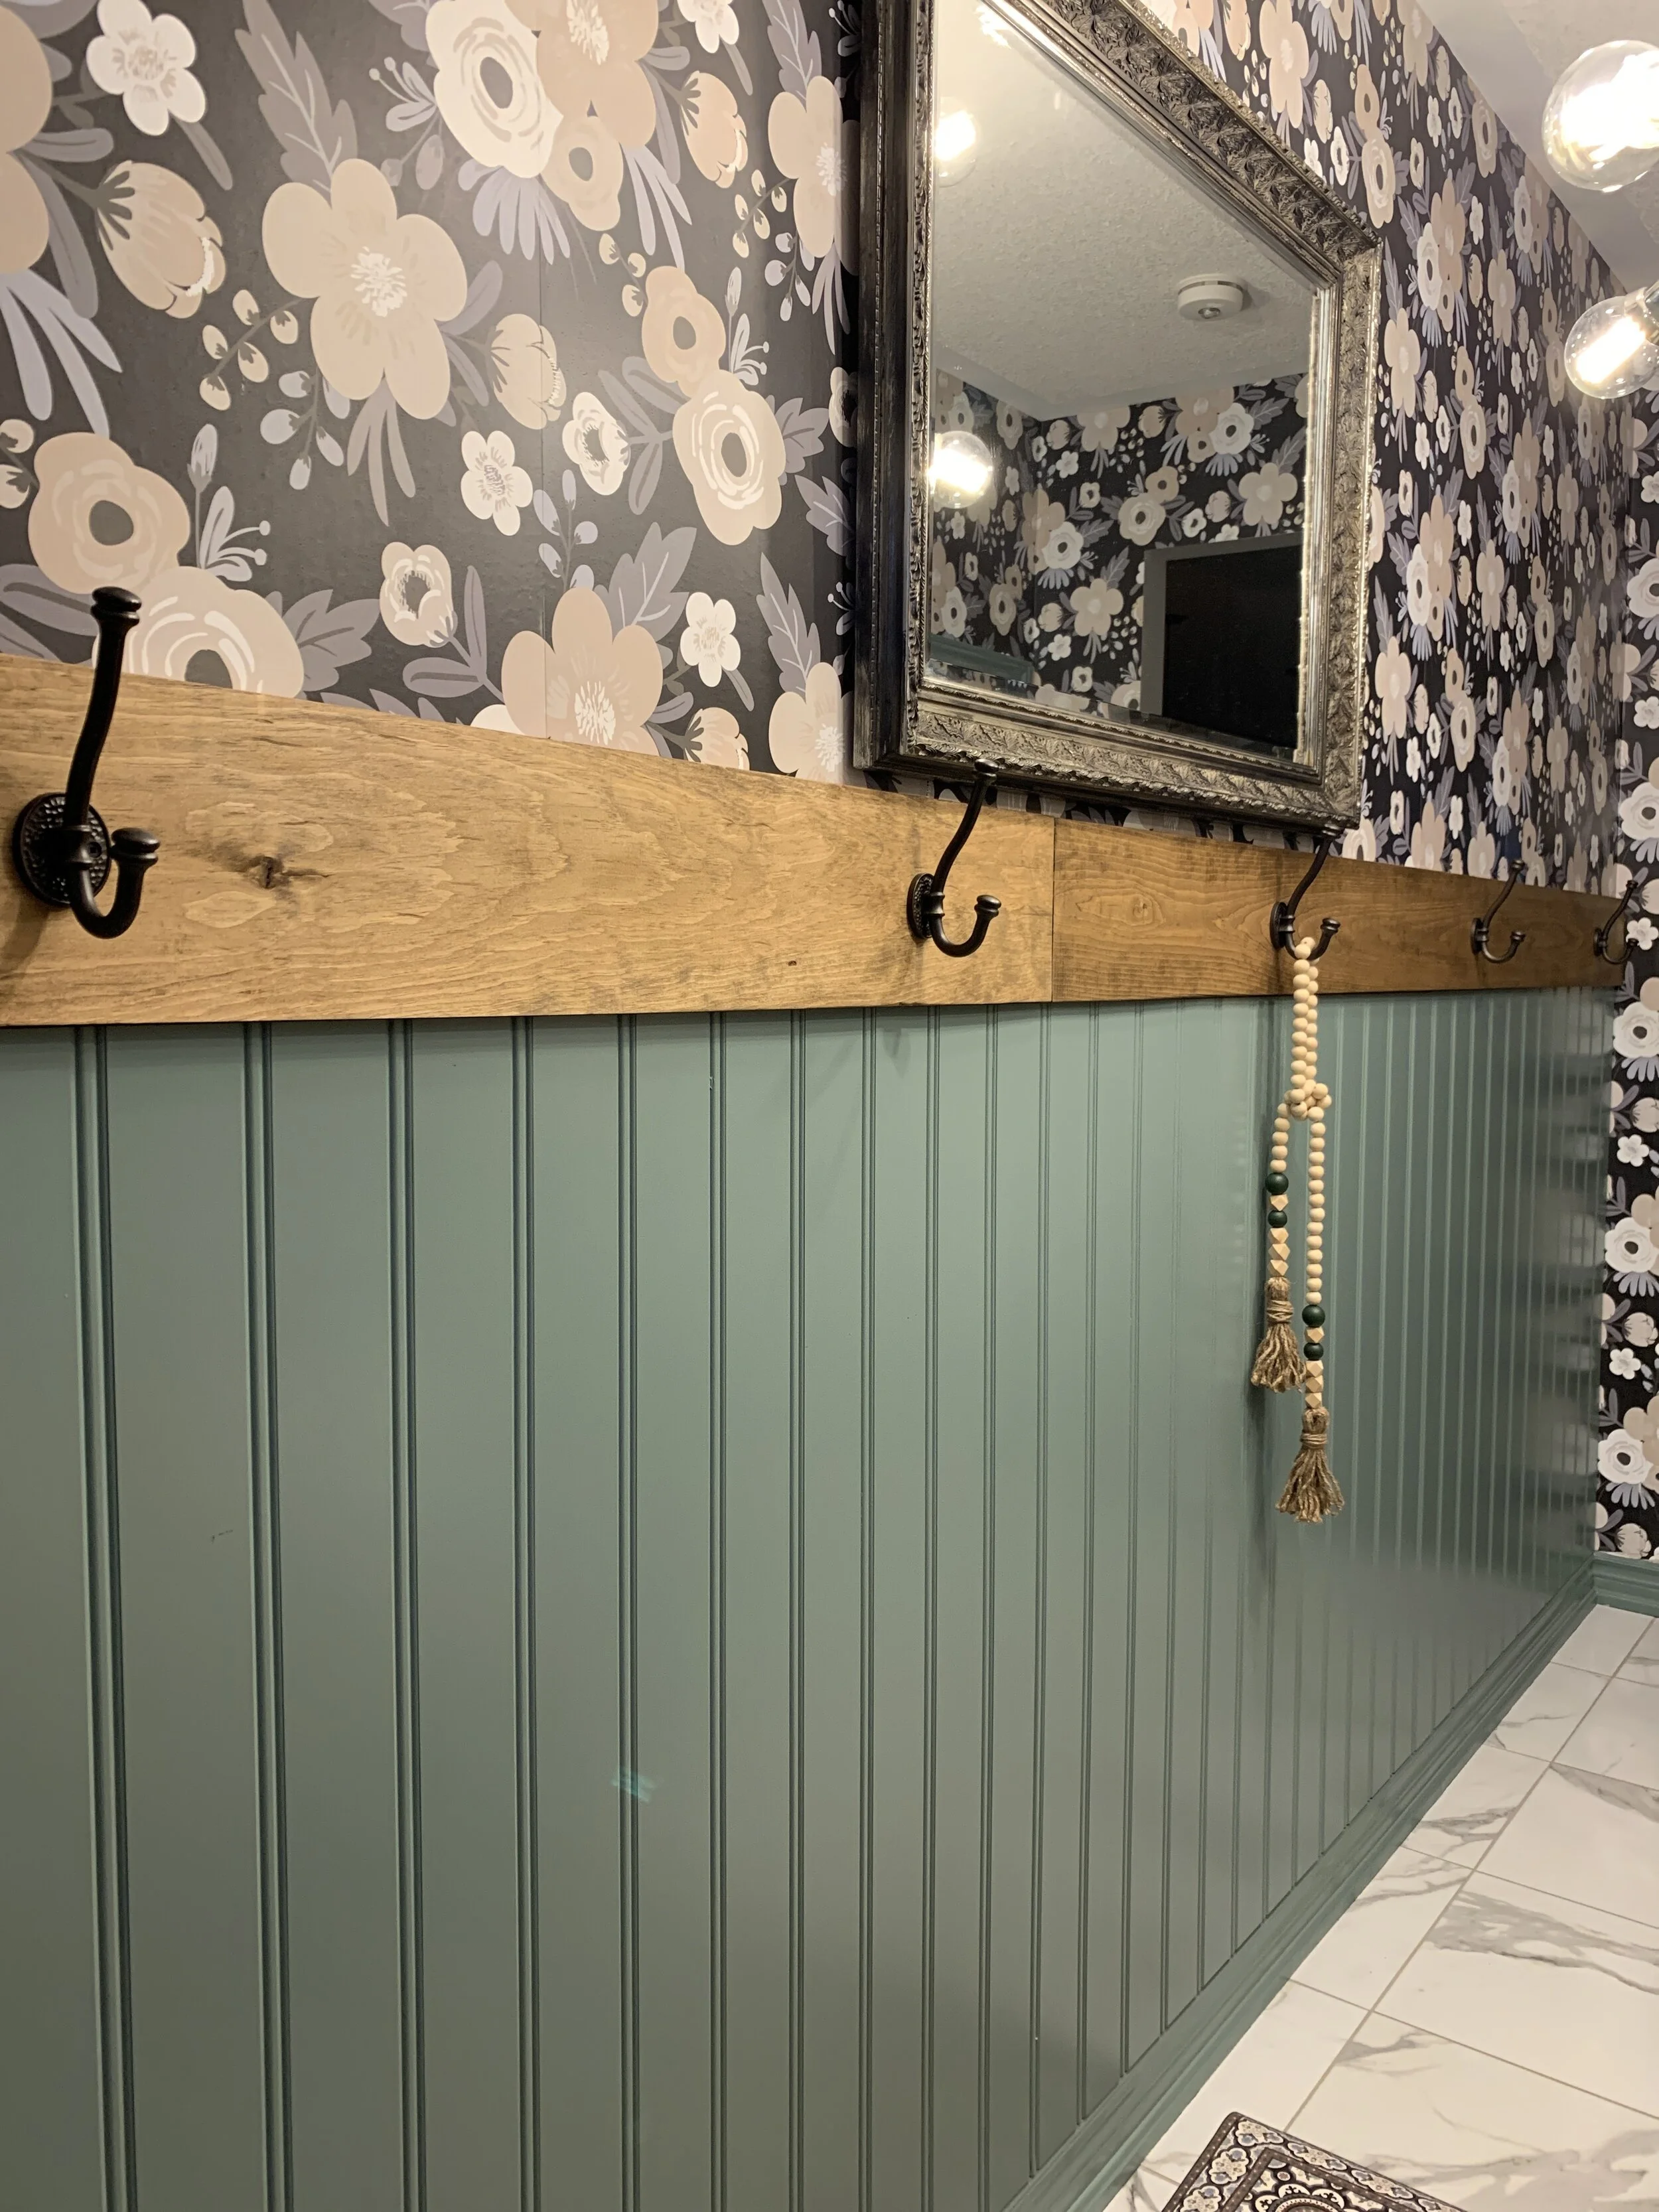
Now we were left with a six inch gap (in some areas depending on the wallpaper match) between the bead board and wallpaper. While some suggested I trim it out with MDF painted the same colour as the bead board, I knew that was too traditional for my liking. Instead we picked up three lengths of 1x8x8 pine planks at Home Depot. I sanded and stained them and we installed them in somewhat of a unique way. We marked all the studs along each wall, tacked the pine up with a couple of pin nails from our nail gun, and then added these beautiful hooks that were gifted to me from Libery Hardware, screwing each of them into a stud, using two inch black floor screws instead of the screws that came with the hooks. Not only did this mean the pine was secure, it also meant the hooks are good to hold a heavy coat or purse. We didn’t install a hook on every stud, we instead installed on one every other stud. I love the modern rustic mix this pine and these chunky hooks add to the space.
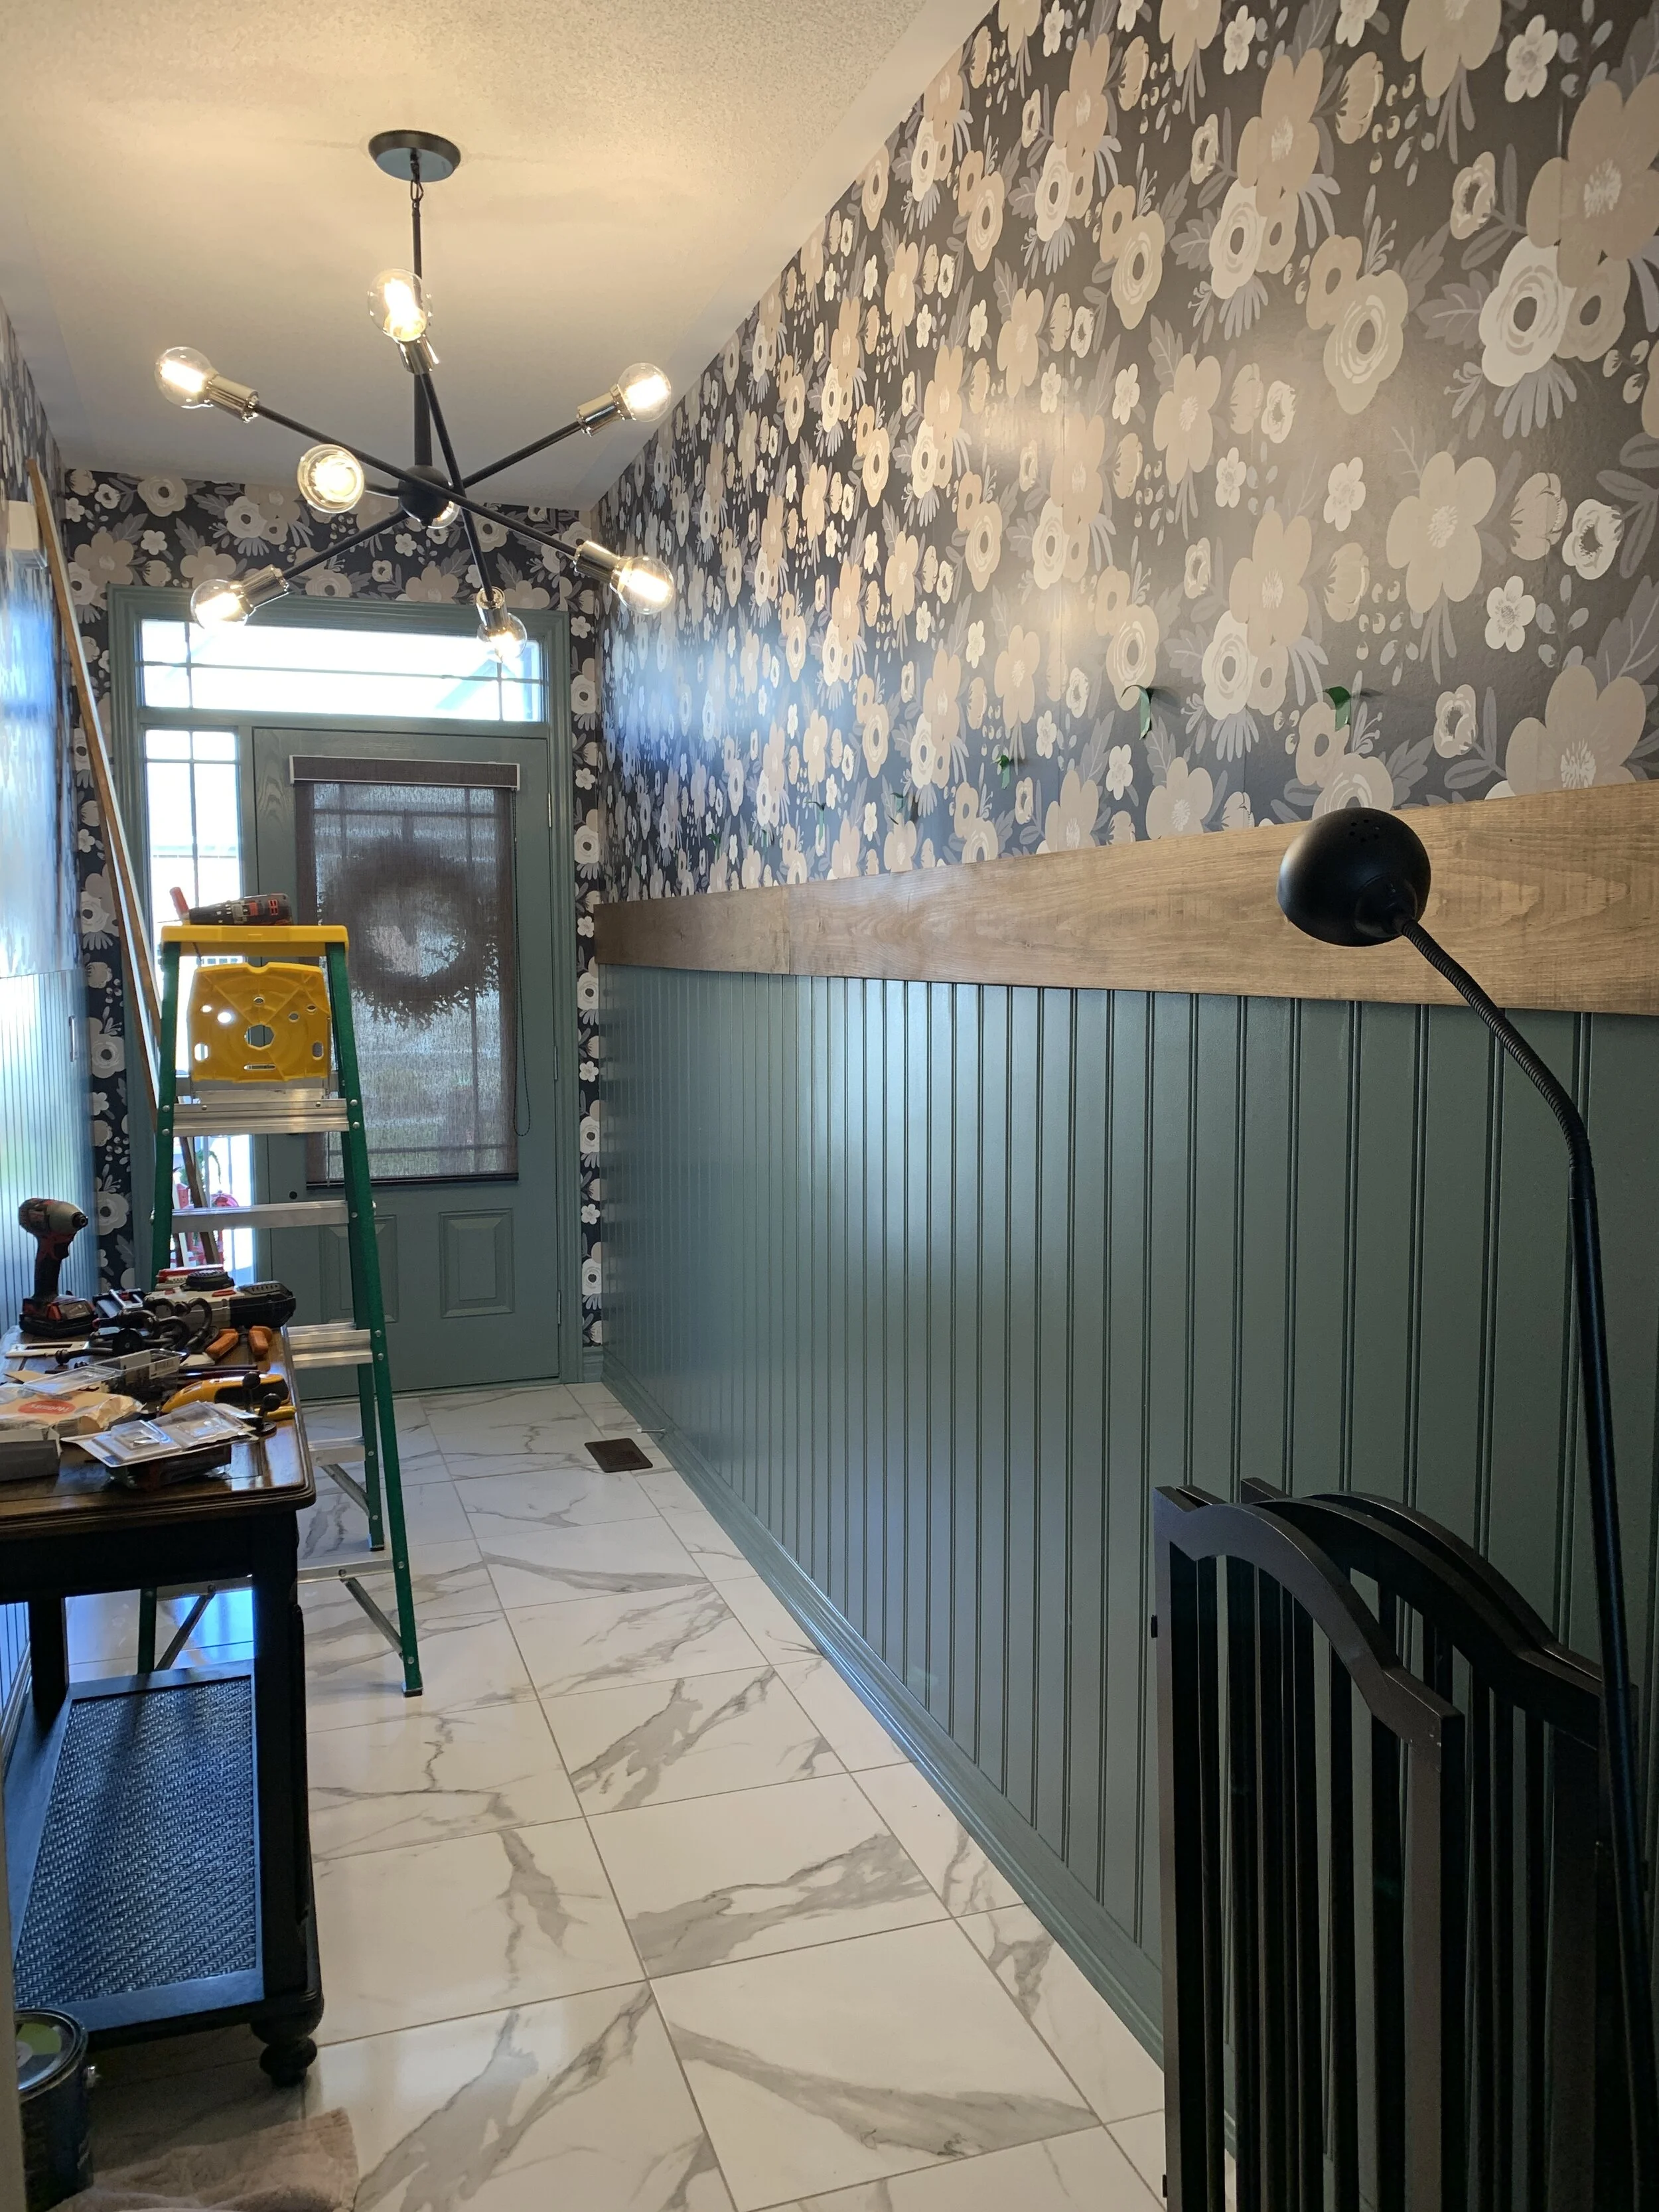

Now let’s talk lighting and we can’t thank Living Lighting Canada enough for assisting us in our quest to rid this house of boob lights! You can probably imagine how dimly lit this space was with a one bulb boob light prior to this makeover. I knew I wanted a light fixture that was big, bright and beautiful. Something that made a statement and this new Armstrong Chandelier by Kichler did not disappoint! We chose the eight bulb style and LOVE LOVE LOVE how it looks in our newly made over space. I always believe your lighting should make a statement and shopping at Living Lighting can help you make that happen. Whether it’s big and in your face or soft and subtle, they have something to suit everyones needs, design style and price range. Click here to find a store nearest you….me, I love the staff at the Richmond Hill, Ontario location, they are always friendly and helpful. If you go there, ask for Darlene and tell her Uncluttered House says hi!


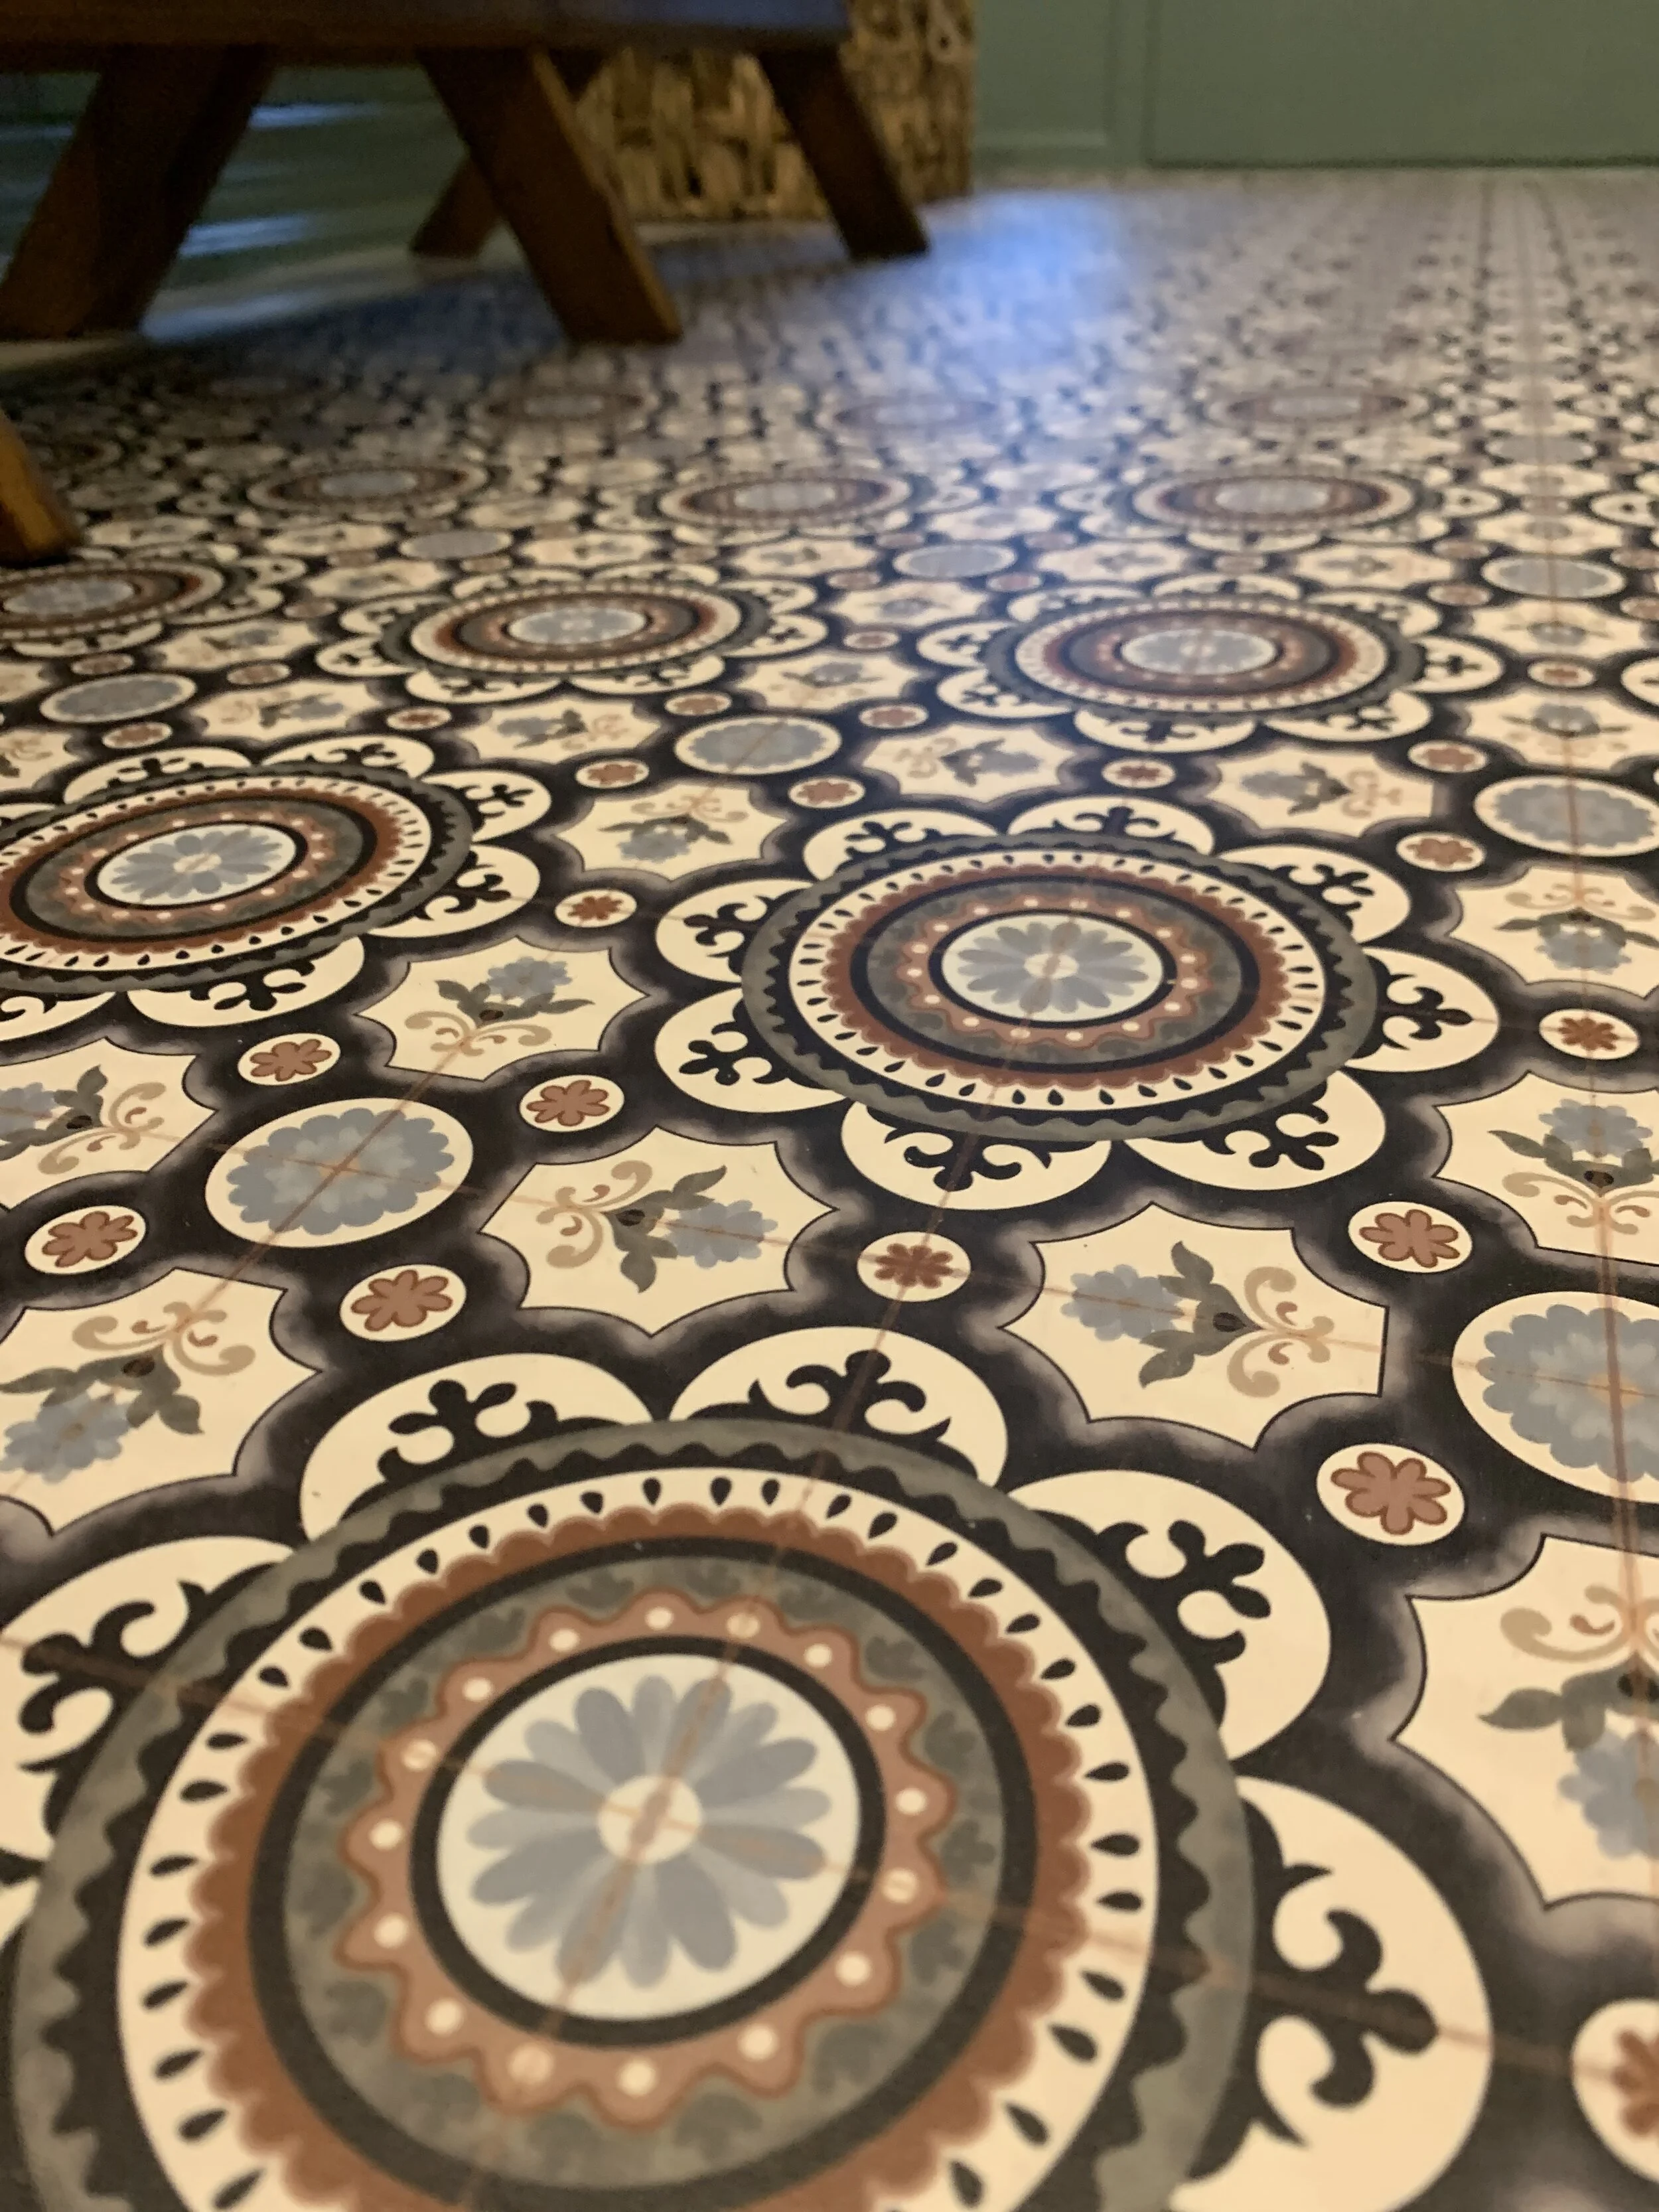
Next up in this makeover extravaganza is this BEAUTIFUL vinyl tile mat from Case Alma. This mat has made my dreams come true. The flooring in this space is considered an “upgrade” by the builder but we didn’t get to pick it and I don’t love it. It is really hard to keep clean and let’s face it, white tile and grout in any entryway is not a great combo, especially when you love to entertain and have dogs, am I right? Case Alma came to my rescue with this low profile vinyl mat. It has the character and look of tile without the expense and mess of removing and replacing the existing tile. It will be a godsend this winter with wet boots and wet paws. There are several patterns and sizes available on the Case Alma website but if you love this one, it’s called Jasmine and she’s beautiful! These mats are an investment but a good one, beautiful and versatile, the perfect combo!

And now let’s talk about these gorgeous church pews! And yes, they are church pews, they have the hymnal racks on the back! I had been searching for a set of these for years and finally during lock down this spring, I got lucky on Kijiji, The seller let me e-transfer her and she held them for me until we could pick up…..for $30!!!!! I was told they came from a church in Peterborough, Ontario and I would LOVE to confirm this if anyone has any leads!

I knew they needed a bit of work but they were sturdy and that was the only thing I cared about. They sat in the garage until it was time to start this makeover. I’ll admit I wasn’t really sure where to begin repairing the one seat that was quite swollen from water damage so I called my friend and furniture salvager, Marla from Simple Love Furniture for tips. Her and her husband dropped by my garage and quickly told me they would take them and repair them for me because it was outside of my realm of expertise! And although I am a hardcore DIYer, in this case I knew they were right. And during the course of the makeover I also knew I needed to find a small accent table to hold a lamp. I checked out the usual suspects - Home Sense, Winners, Structube, Wayfair and found nothing that appealed to me. When Marla contacted me to tell me the pews were done, I asked her if she had any small tables kicking around at Simple Love, she asked for my measurements and checked her stash….luckily for me, she had one the perfect size and agreed to paint it black for me, leaving it chippy and beautiful. When Marla and Chris delivered my repaired pews and table, it was literally like winning the lottery! They repaired the badly damaged seat and oiled them and left them looking perfectly imperfect. I couldn’t love them more and they add so much character to this space. If you too are a lover of vintage and well loved furniture, check out Simple Love Furniture!
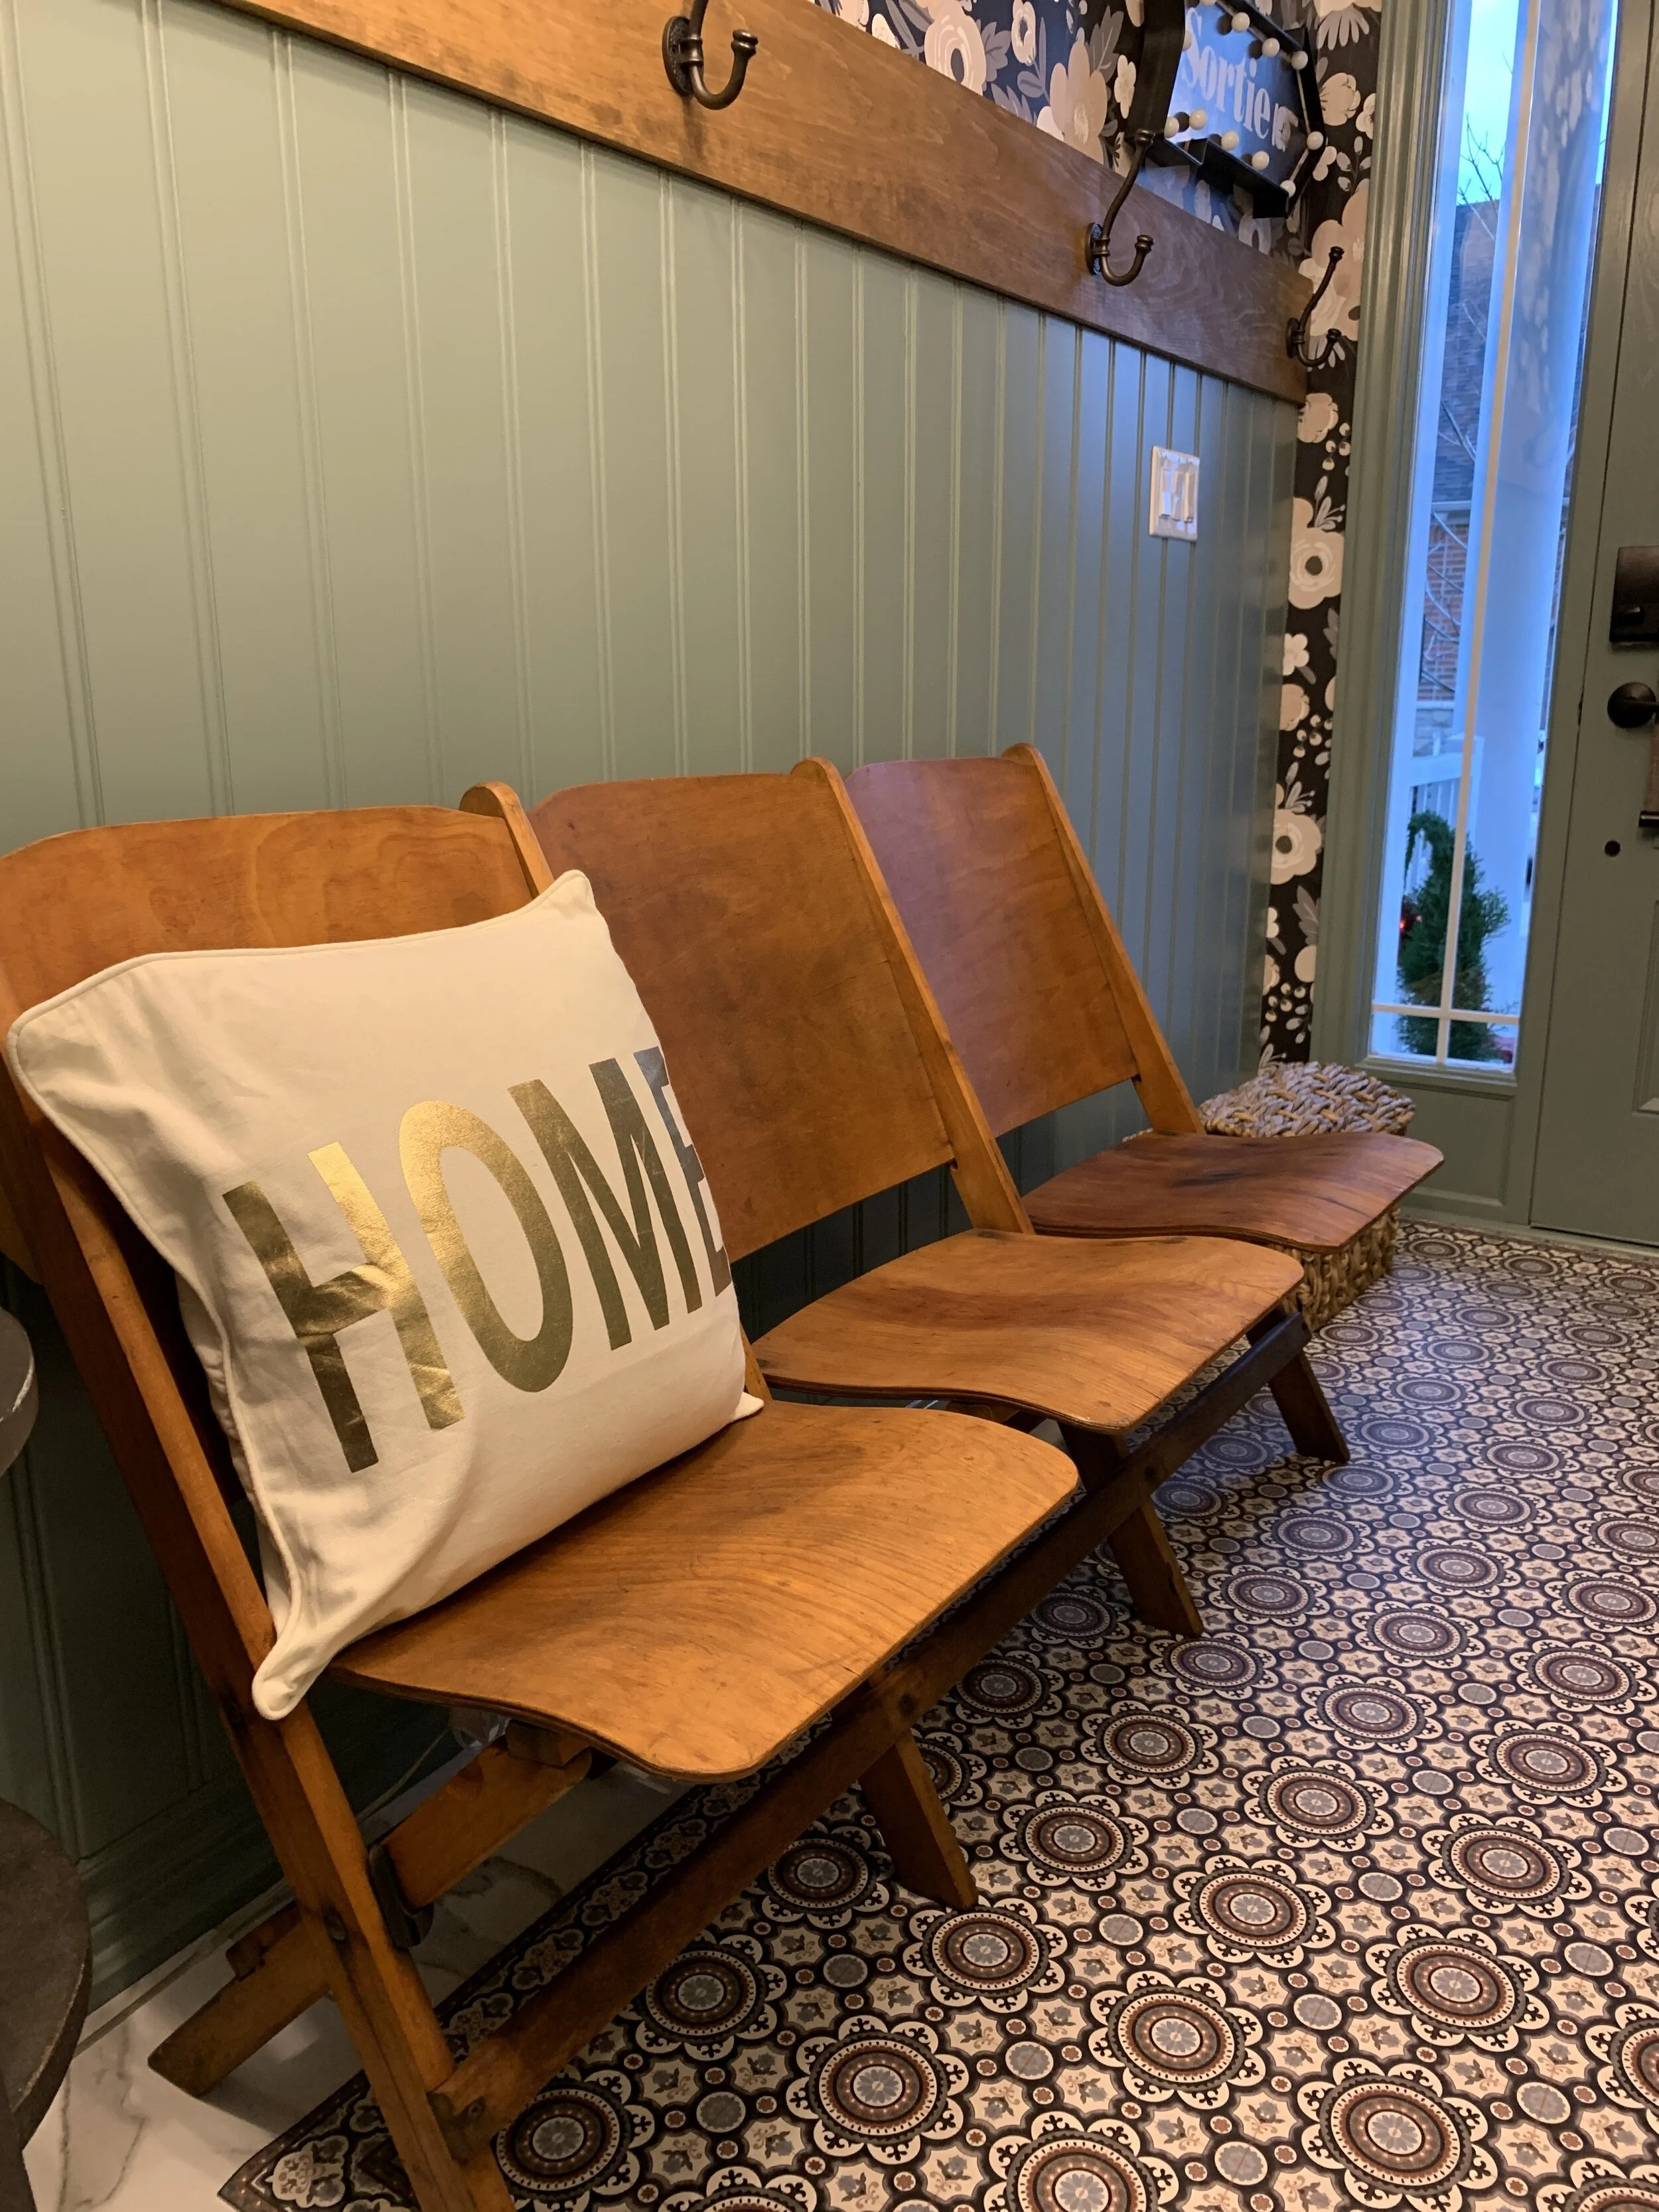
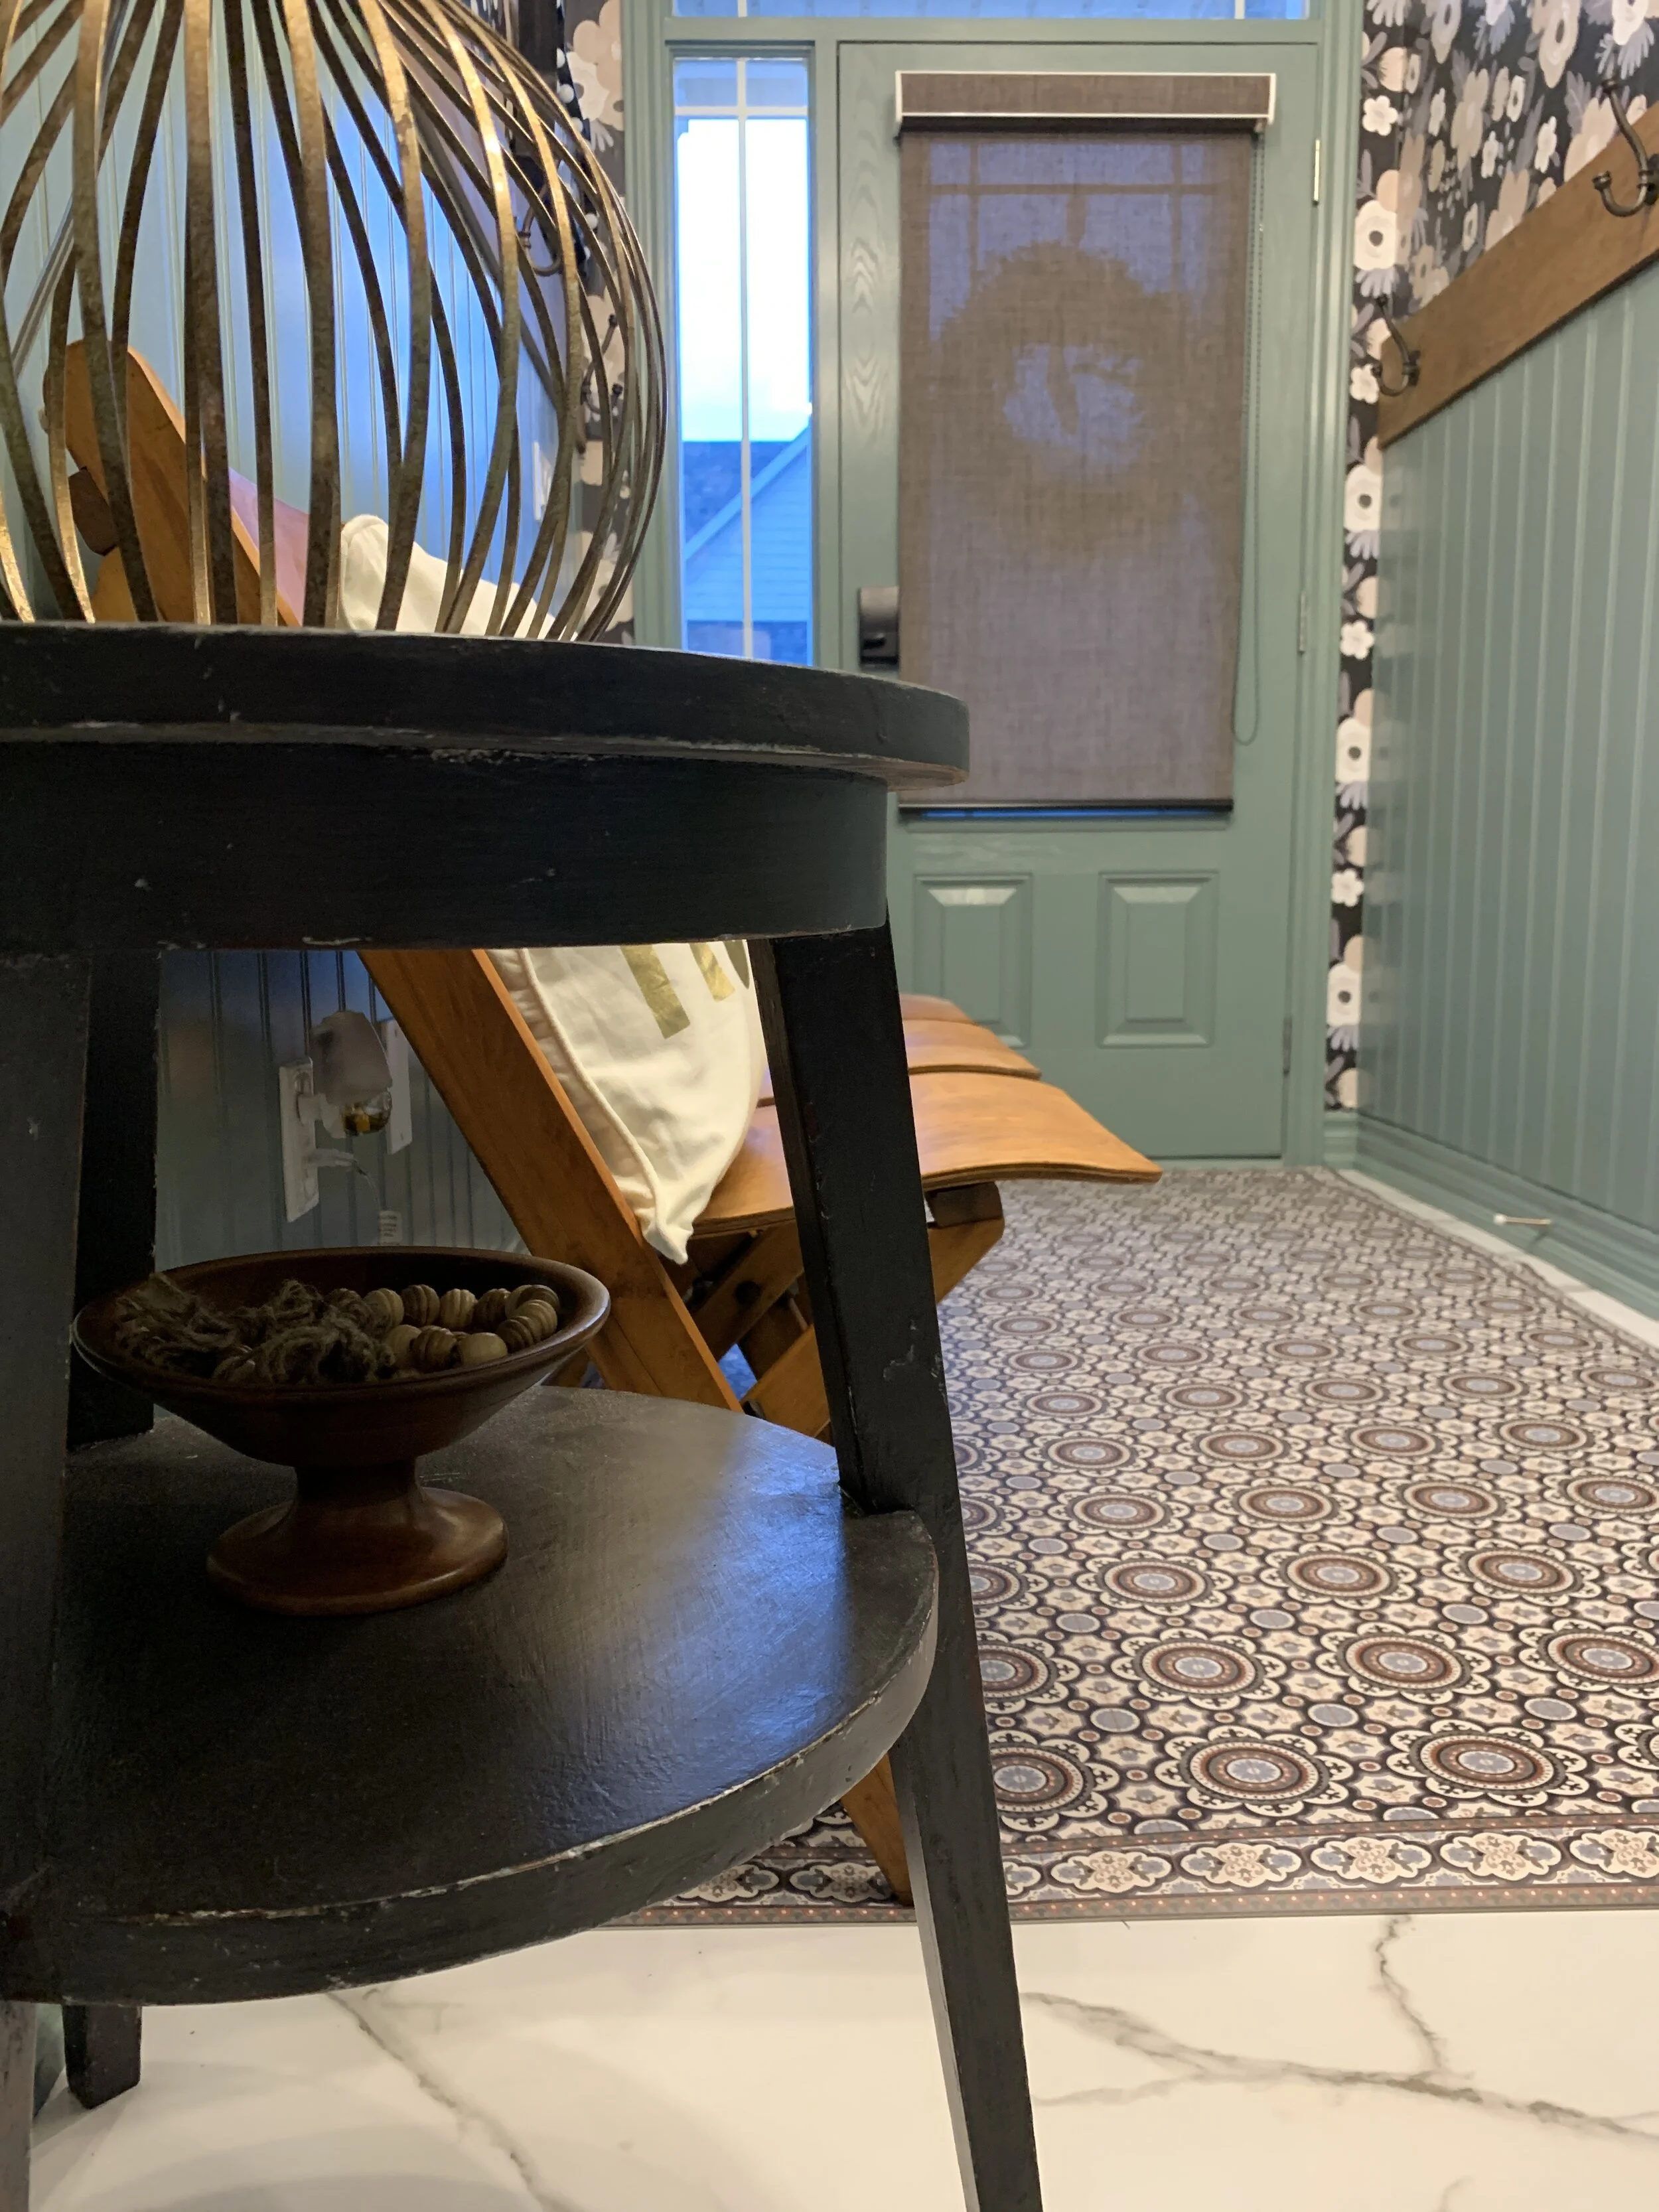
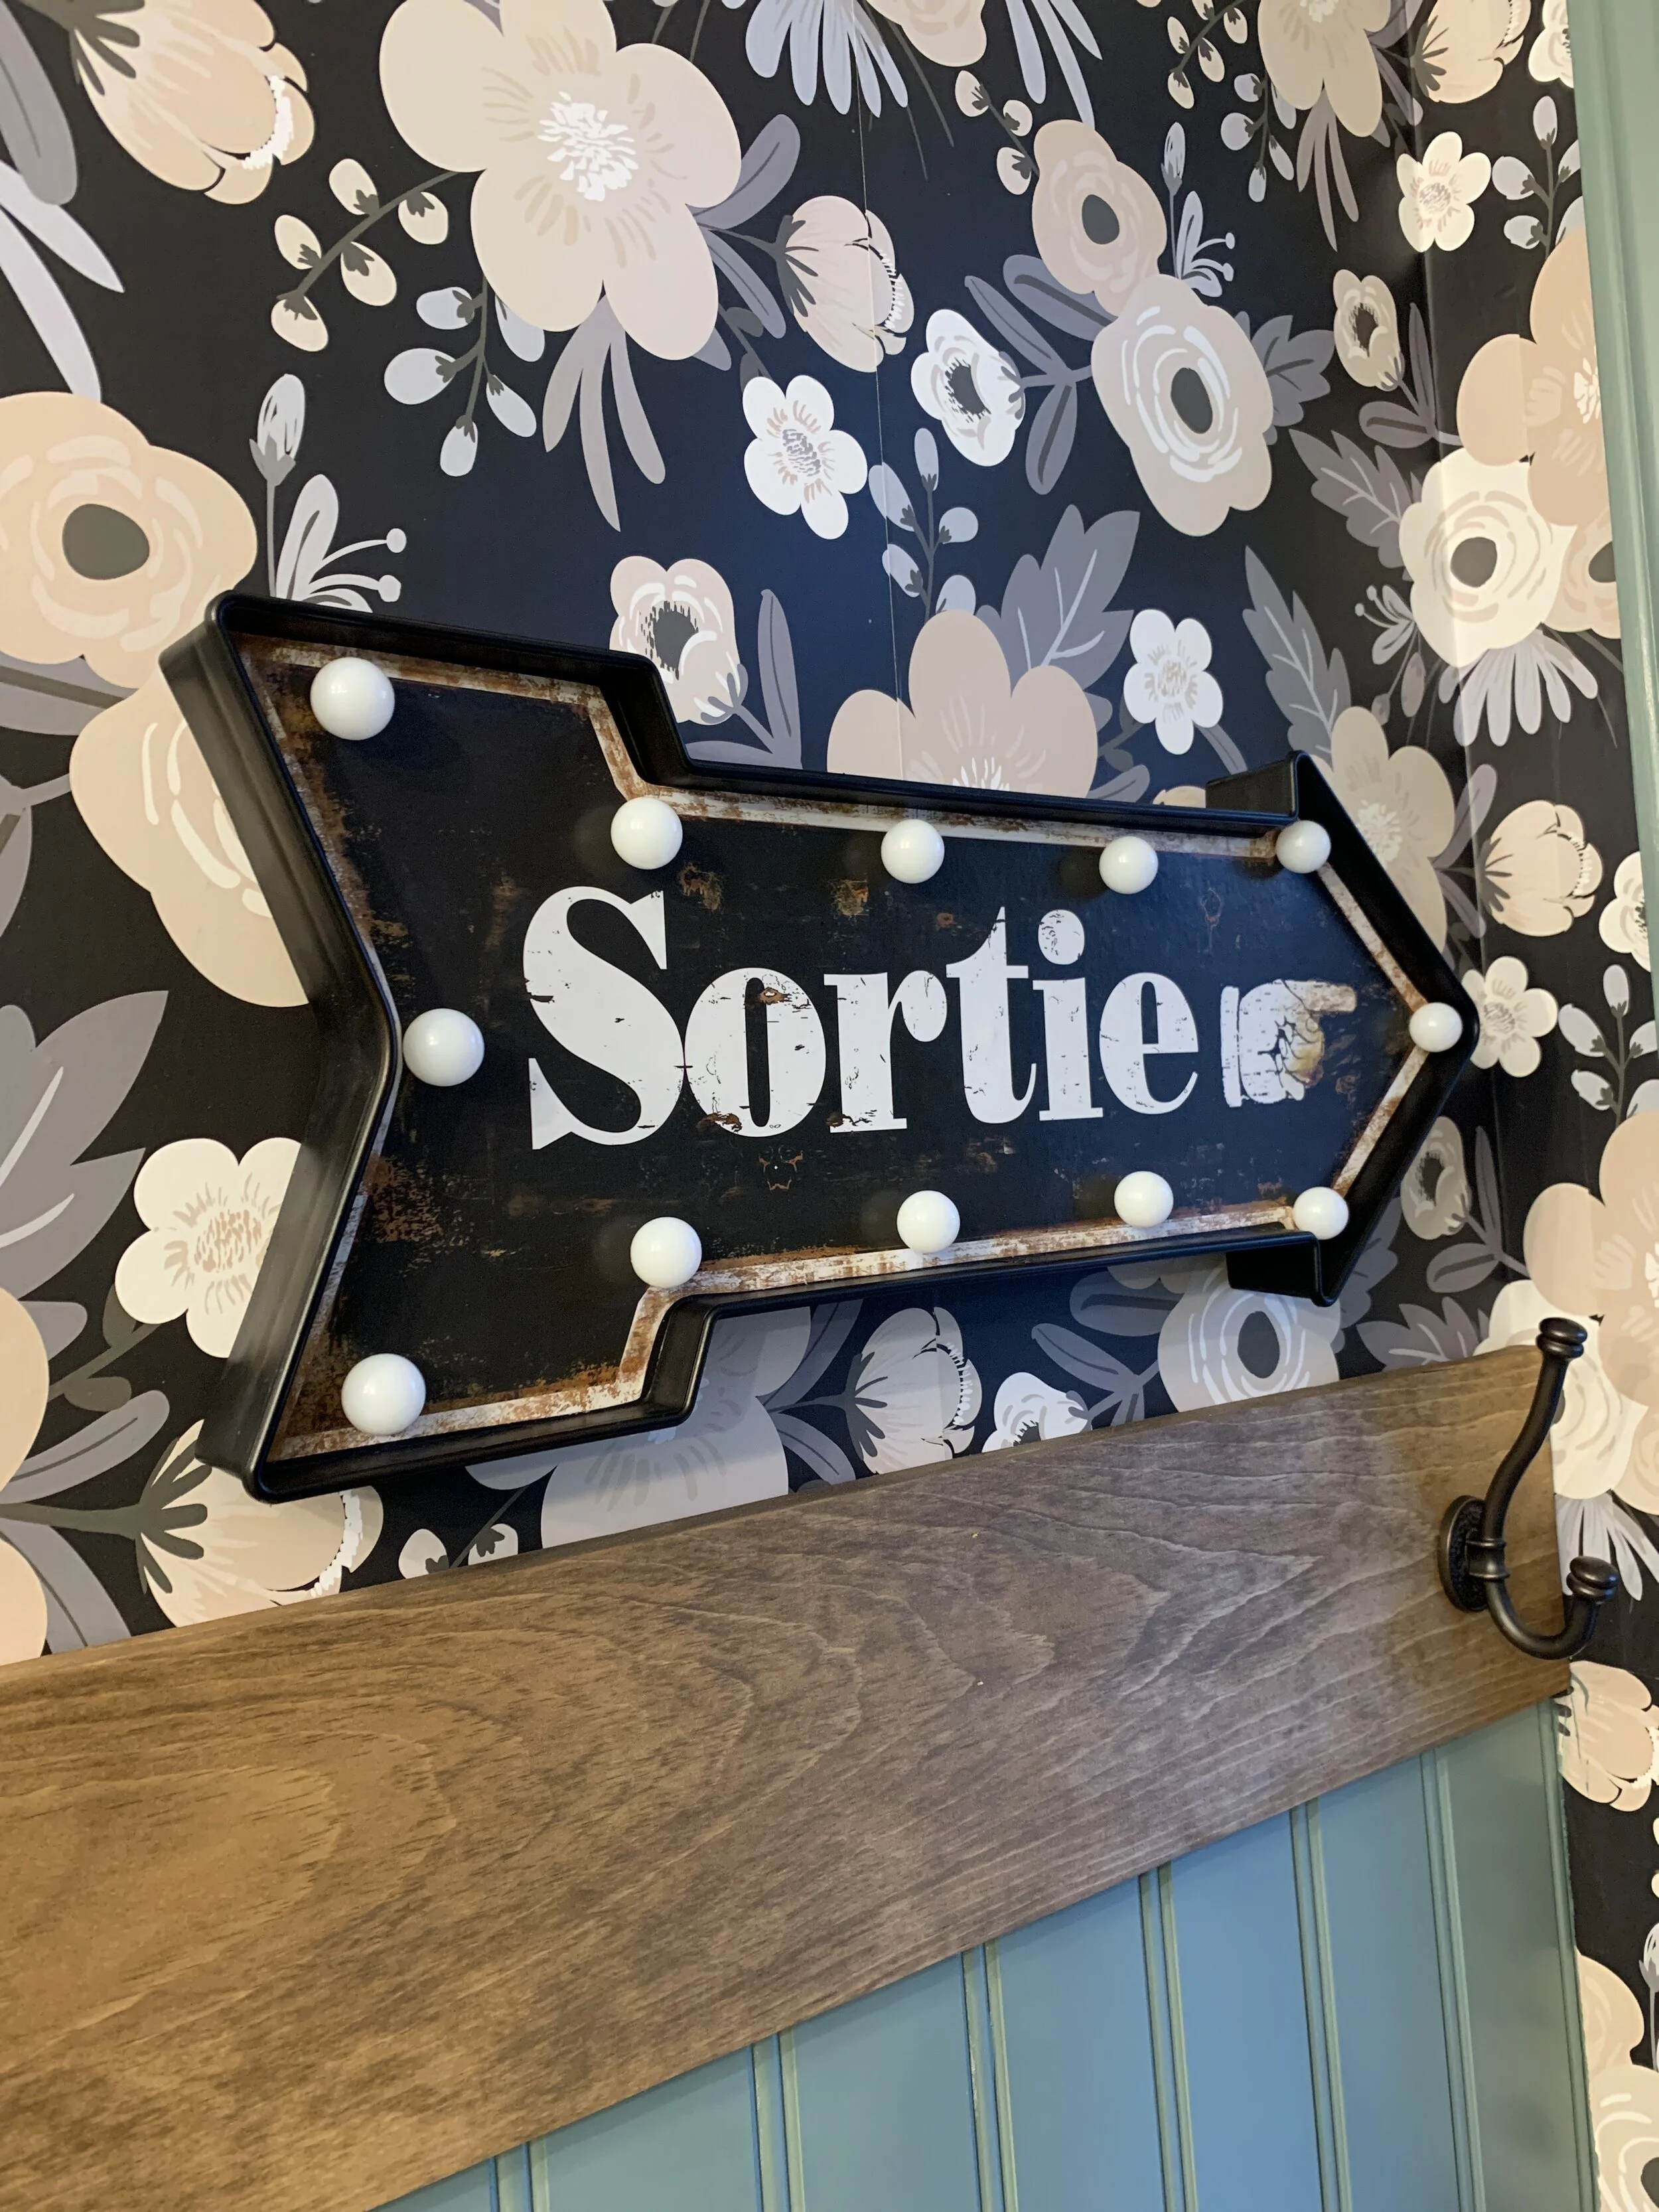
And now for the few finishing touches, my fun “Sortie” (which of course means Exit in English) was a Winners find. It is battery operated and lights up, so fun to turn on at night. My beads made by my friend Danica from Thoughtfully Beaded have found a permanent home in the space I think, they could’t be more perfect. And the mirror? This mirror belonged to my mother-in-law who has recently moved in with her sister due to health issues. This was the one thing of hers I am so happy to have because she loved it so much. The frame had an antique silver frame and I decided to add a little more depth to it and used some Rub N’ Buff in Ebony and I think it is perfect for the space.
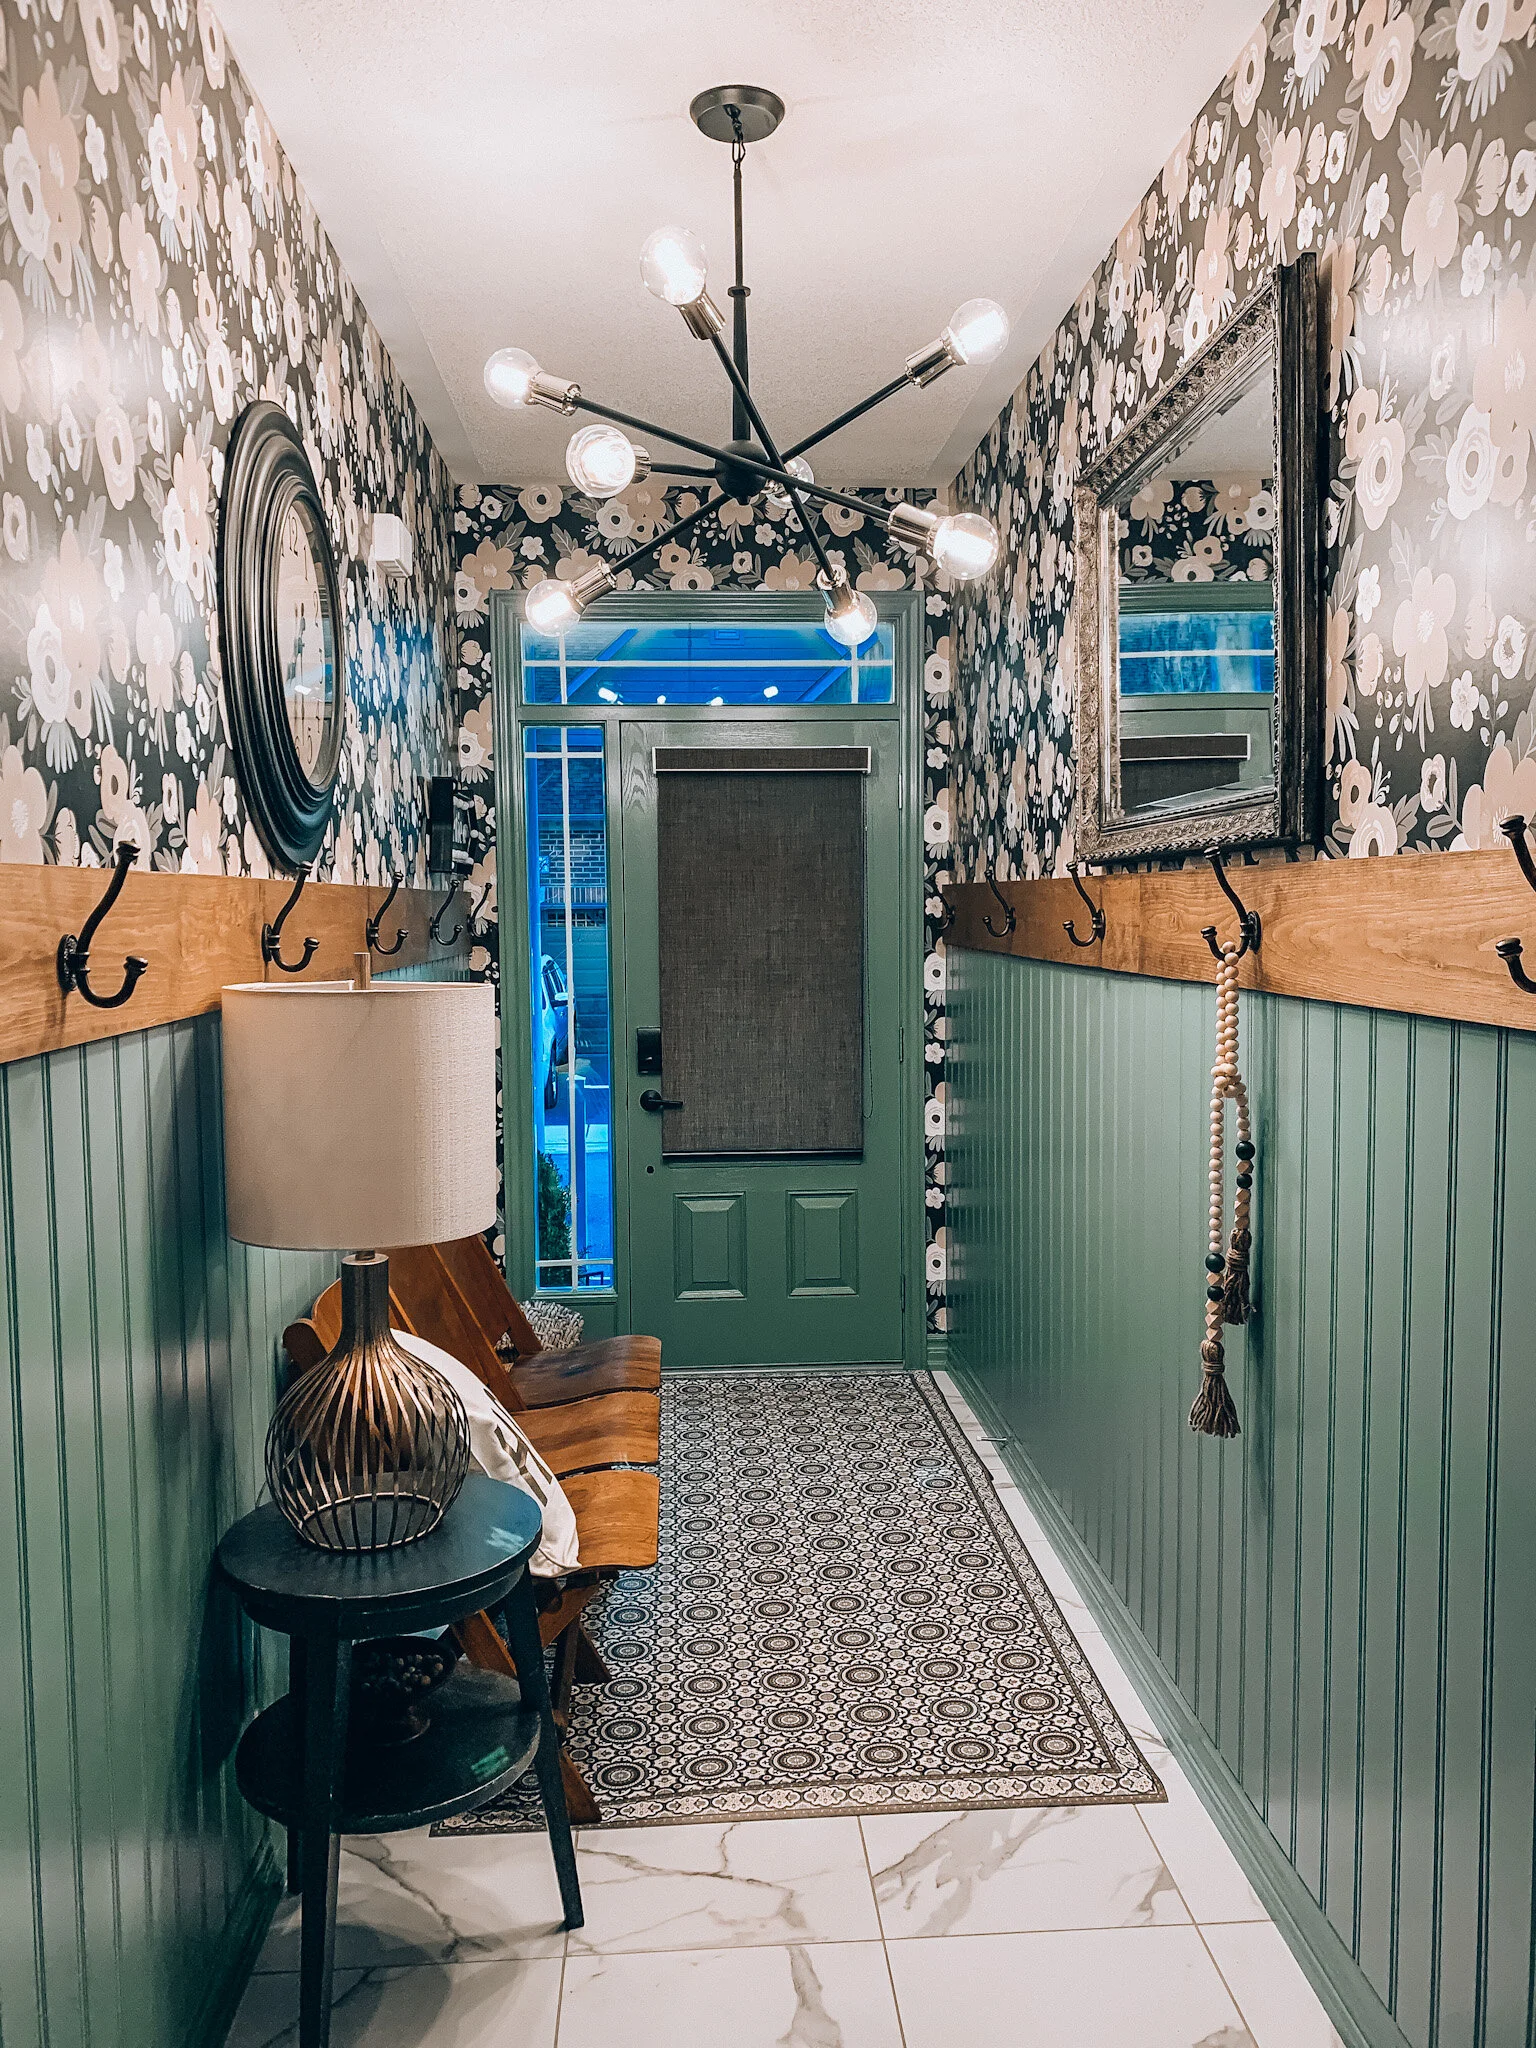
And there you have it, a step by step story of how we created, what is now, one of our favourite makeovers! I always get asked what my design style is and I can never accurately answer that question because I honestly just do what I love. Most of these projects are thought up in my head, sometimes I have a mood board, most times I don’t. I just follow my heart, not the trends. We moved twice in 2019 which was no easy feat. At the end of the day it doesn’t matter what kind of house you live in, big or small, you can always make a house a home. Warm, cozy and inviting are always the vibes I go for and that is the feeling I get when I walk through our front door into our newly makeover entryway.
As always I welcome your questions and your comments.
Have a lovely day!
Michele xo