REMOVING CERAMIC TILE FOR BEGINNERS! WEEK 2 OF THE RENO CHALLENGE
Whoever said removing ceramic tiles was “easy” has either
A) never actually removed ceramic tiles; or
B) is a liar liar pants on fire
I’m gonna be 100% honest with you guys and tell you that not only do we fall under A) above, we’ve also never installed ceramic or porcelain floor tiles, like NEVER EV-ER. We are tile virgins.
The good news is we (mostly hubby) are pros at installing laminate and vinyl plank flooring so we know a little something about flooring in general AND we have done two kitchen backsplashes, one marble and most recently Stone Speed Tiles. We know our way around a wet saw, we know what grout is, that counts for something right? Plus Pinterest, Google and obviously You Tube are three of our besties.
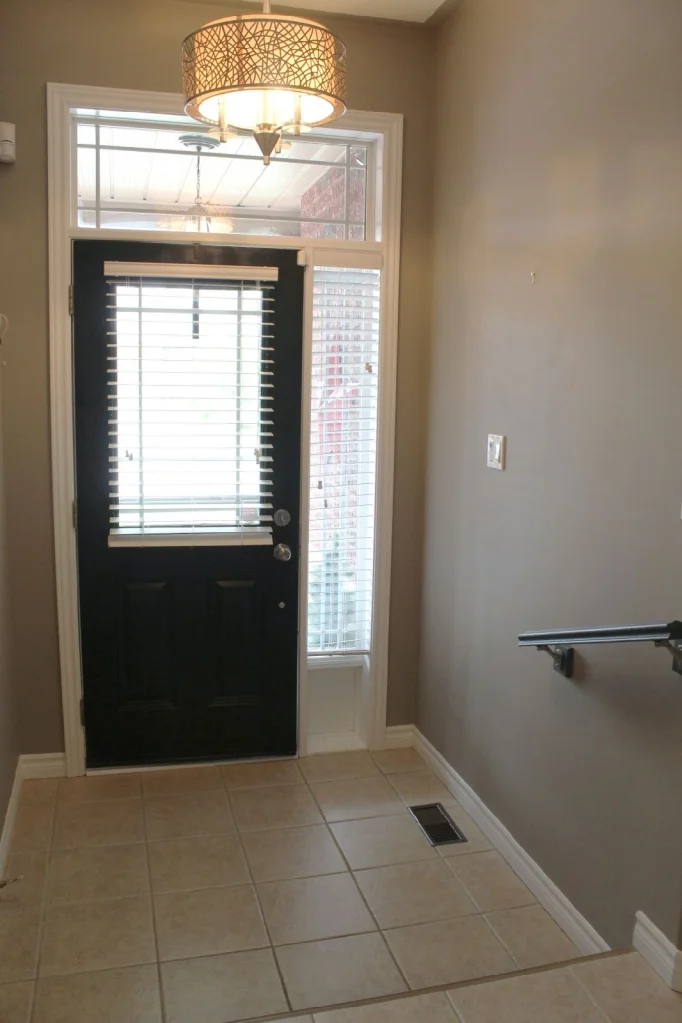
The boring before
I mean all of the guys on You Tube made removing ceramic tiles look so easy we were pumped! Just grab a couple of tools and we’ll be off to the races, a couple of hours max and we’ll be done. Guess what? These You Tube guys mostly fall under B) above. Yep, PANTS ON FIRE.
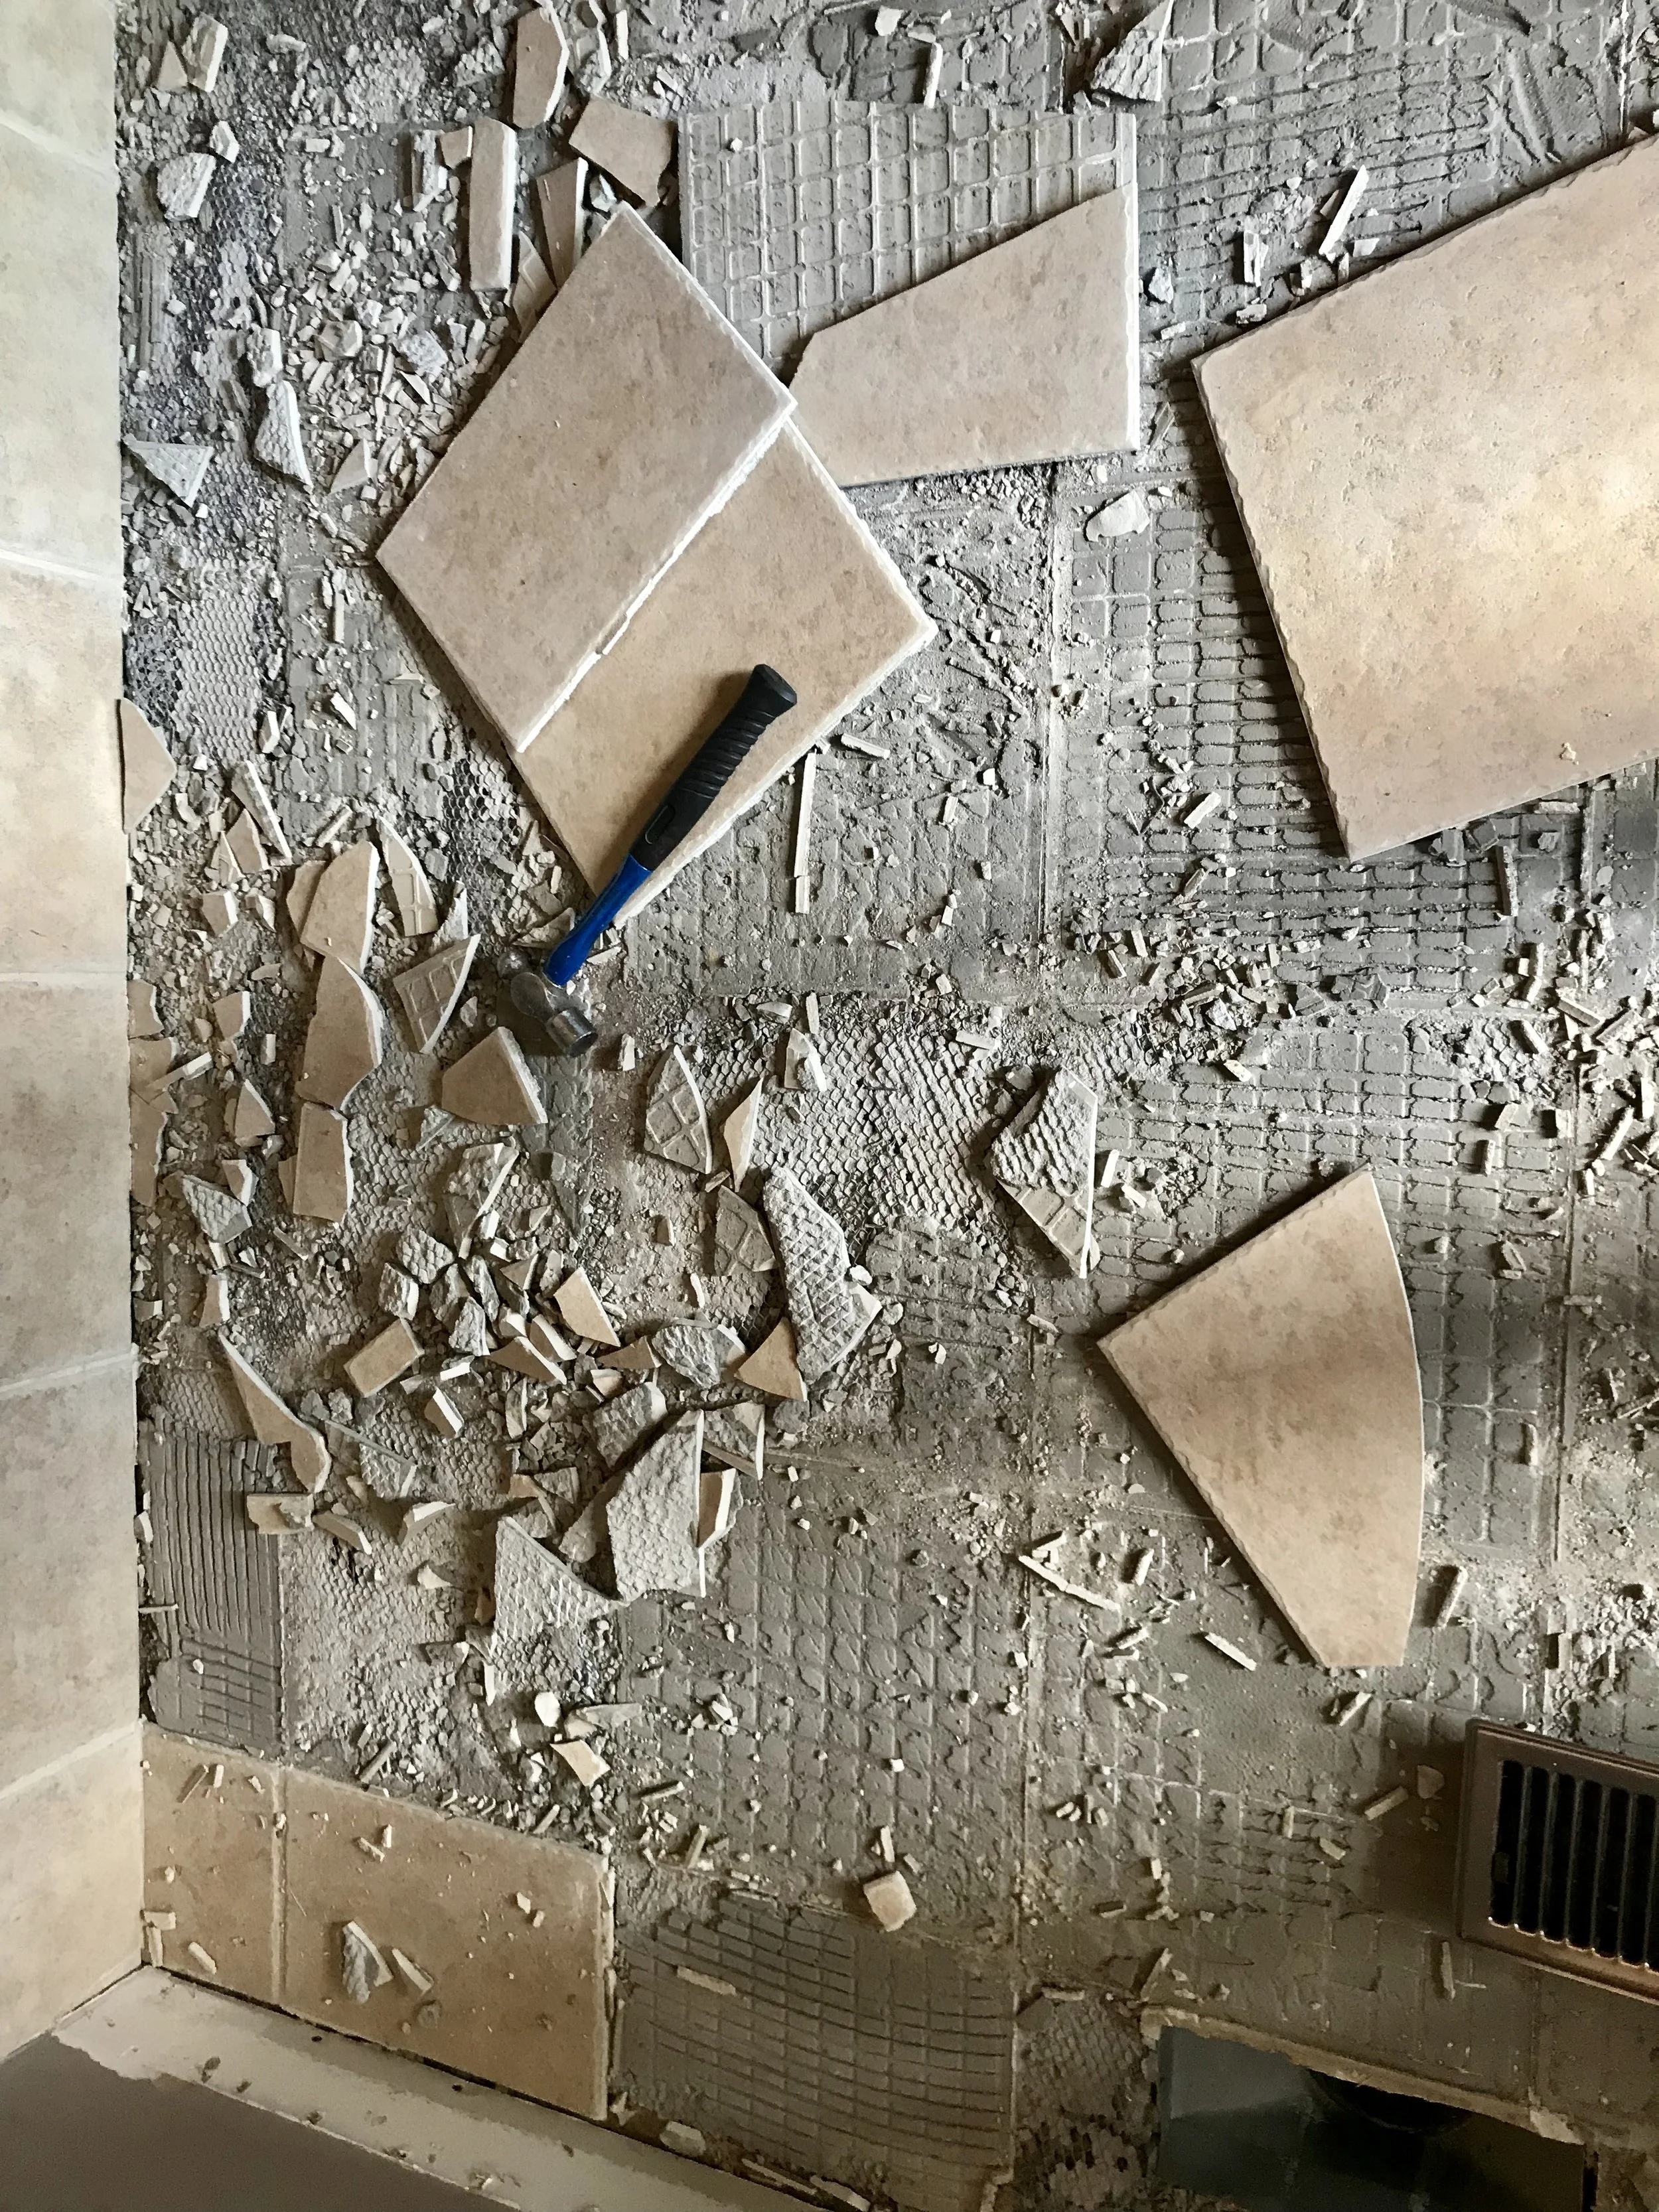
We are working in a small-ish space, about 6x6 and removing 12x12 ceramic tiles that were installed by a builder about 13 years ago. Seriously, how hard could it be? Here’s what we needed to get started:
ball pean hammer
Cold chisel
Safety glasses
Gloves (don’t forget the gloves whatever you do, I’m still wearing bandaids)

Rocking the safety glasses
The hardest part is getting started in a space like this. This 6x6 square is “sunken” and it was hard to find a spot to start the lifting process. It took A LOT of hits with the old ball pean to loosen some tile so we could start making head away. But once we got started I was swinging the hammer like a one armed bandit! OMG it was so cathartic!! And, it actually came up quite quickly, some tiles didn’t even break. I was told by my friends at Home Depot that the easier they come up generally means the worse they were installed. No surprise there in this cookie cutter, builder grade home. We’ve discovered this in most of the DIY’s we’ve tackled in this little house.


Moving right along…..once the tiles themselves were ripped up we were like “hmmm what is this mess of chicken wire doing under here and why does it look like it’s sitting in a literal huge pile of rocks?”.
Back to You Tube we went to do more research. We discovered this “wire mesh” is generally used in the install process of ceramic tiles in older homes and can be very difficult to remove....great! Some people were recommending you rent a JACK HAMMER!! At this point I’ll admit, I had a few regrets and was a little worried that we had bitten off WAY more than we could possibly chew. I mean we’ve used a lot of tools but a jack hammer is not on the list!
But I remained calmer then I normally would, I didn’t even swear...out loud. I rallied the troops, found a new You Tube video and hubby got to work. All we had to do was find a loose corner of this wire mesh and get a good grip and it “should” lift up....and luckily for us it did! It wasn’t easy and my poor hubby was sweating and swearing like a sailor but it all came up eventually! Not a single jack hammer needed. We bagged everything in contractor bags and took it to the dump. Phew! Close call but now we are ready to get started installing our beautiful new tile.


We have BIG plans for this small space and I mean BIG! We are working with some INCREDIBLE sponsors and the transformation is going to be out of this freaking world, or at least out of ours!
If you aren’t following us on Facebook you best get yourself on over there because all the excitement of this challenge is going down live later this month, not only will we need your votes, you won’t want to miss out on all the DIY excitement! Oh, and this HAS to be a good sign…voting starts on my birthday!! I’ll also be sharing some of the design details this week on Facebook and Instagram so be sure to follow along.
And last but not least, make sure to bookmark the official Reno Challenge website (click here). This is where you can stay up to date on all things challenge related, follow along with the other talented designers as well as find out how and when the voting is going to unfold. I mean c’mon, there’s a $5000 dream vacation up for grabs, no big deal right?
Michele xo